How to Reduce Moisture in Home and Prevent Damp Issues
You can cut household damp fast by fixing leaks, venting steam, and controlling humidity. Seal roof and foundation breaches, keep gutters clear, and slope soil away from your walls. Use extractor fans, trickle vents, and vented dryers, and run dehumidifiers in basements and laundry areas. Insulate cold surfaces and caulk gaps to stop condensation, and monitor humidity to stay around 40–50%. Follow these steps now, and keep going for deeper prevention and long-term fixes.
Quick Checklist: Short-Term Damp vs Serious Damp
If you spot a little damp patch after heavy rain, don’t panic — act quickly to stop it getting worse.
Check for short term signs: a new stain, musty smell, or condensation that dries with ventilation.
Watch for serious symptoms: spreading mould, peeling paint, persistent wetness or rising damp.
If serious symptoms appear, call a professional to assess and remediate promptly.
How Moisture Gets Into Homes: Common Sources
Because moisture can come from many places, it’s important to know the common sources so you can target fixes effectively.
You’ll face moisture intrusion from plumbing leaks, damp building materials, and landscaping issues that drive water toward foundations.
Condensation sources and humidity sources include appliance usage, poor ventilation; ventilation failures trap moisture, fueling damp, mold, and structural decay if you don’t address them promptly.
Top Quick Wins to Lower Indoor Moisture Today
Start by venting steam from kitchens and bathrooms with exhaust fans or open windows whenever you cook or shower.
Put dehumidifiers where dampness gathers, like basements and laundry rooms, and run them to keep relative humidity between 40–50%.
Also cut indoor moisture at the source by covering pots, fixing leaks, and drying clothes outside or in vented dryers.
Ventilate High-Moisture Areas
When you boost airflow in bathrooms, kitchens, and laundry rooms, you cut moisture at its source and prevent mold before it starts.
Use bathroom fans, kitchen ventilation, exhaust systems, and natural ventilation. Improve attic airflow and install moisture barriers. Add humidity sensors and air purifiers where needed.
Action steps:
- Run fans during and after use.
- Open windows briefly.
- Check vents for blockages.
Use Dehumidifiers Strategically
After improving airflow in wet rooms, you can further cut indoor humidity by placing dehumidifiers where they’ll work fastest.
For dehumidifier placement, target basements, bathrooms, and laundry areas.
Use ideal settings for 45–55% humidity control, balance energy efficiency and noise levels, and adapt seasonal usage.
Follow room-specific solutions and simple maintenance tips to keep performance high and costs low.
Control Indoor Humidity Sources
Because everyday activities are the biggest indoor moisture sources, you can cut humidity fast by changing a few habits and fixing small problems.
Use these quick humidity control methods:
- Run exhaust fans when cooking or showering and dry clothes outside.
- Fix leaks and vent appliances.
- Limit indoor plants impact by grouping, reducing numbers, or placing them on trays; monitor soil moisture.
Stop Window Condensation and Cold-Surface Damp
To stop window condensation, open vents or crack a window briefly to let moist air escape and bring in drier air.
You can also boost airflow with trickle vents or by moving furniture away from cold windows.
Insulating cold surfaces — adding weatherstrips, thermal curtains, or foam insulation — cuts chill and prevents damp forming.
Improve Window Ventilation
When warm, moist indoor air meets a cold window, you’ll get condensation and damp patches — so improving window ventilation is one of the quickest ways to stop it.
Use window treatments that don’t block airflow direction.
Try these steps:
- Crack trickle vents or tilt windows for continuous exchange.
- Use fans to direct moist air outside.
- Keep curtains off glass to let air circulate.
Insulate Cold Surfaces
If cold surfaces stay exposed, you’ll keep getting condensation and damp patches; insulating them raises surface temperature and cuts moisture buildup. Choose insulation types suited to surface materials, add moisture barriers, and mind temperature differences. Improve thermal performance and energy efficiency with proper installation techniques. Maintain air circulation to prevent trapped damp.
| Material | Recommended method |
|---|---|
| Glass | Low-E film, secondary glazing |
| Wall | PIR boards, breathable membrane |
Ventilation Basics: Where to Add Airflow and Why
Where should you add airflow in your home, and why does it matter?
You’ll manage airflow patterns and airflow balance by choosing ventilation types that suit rooms, using natural ventilation and mechanical systems for proper air exchange and humidity control, and adapting seasonal ventilation to reduce damp.
- Wet rooms
- Sleeping areas
- Living spaces
Use Extractor Fans Correctly
Because extractor fans remove humid air at the source, you should run them during and after showers, cooking, or any moisture-producing task to stop condensation and mold before it starts.
Choose extractor fan types for room size and humidity load, set timers or humidity sensors, and guarantee ideal fan placement near the moisture source with clear ducting to outside.
Clean and maintain regularly.
Passive Venting: Trickle Vents and Air Bricks Explained
Passive venting—like trickle vents in windows and air bricks in walls—lets fresh air flow steadily into your home without you doing anything, cutting humidity buildup and lowering condensation risk.
Passive venting—trickle vents and air bricks—provides steady, low-maintenance airflow to reduce humidity and condensation.
You’ll get passive airflow that’s low-maintenance and energy-friendly.
Consider:
- Fit trickle vents in habitable rooms.
- Ascertain air bricks aren’t blocked.
- Combine with good room sealing for balanced ventilation.
When to Choose Mechanical Ventilation (MVHR/ERV)
A compact MVHR or ERV unit makes sense when your home’s fabric is tight, ventilation needs are constant, or you want to recover heat (and energy) from the air you exhaust—especially in well-insulated or newly refurbished properties where trickle vents and air bricks won’t provide enough fresh air without heat loss.
You’ll appreciate mechanical ventilation benefits: steady humidity control, filtered air, and energy efficiency considerations that lower heating costs.
Fix Leaks Fast: Roofs, Pipes and Walls
Even with good mechanical ventilation, uncontrolled leaks will keep humidity high and invite mould, so you should fix roof, pipe and wall breaches as soon as you spot them.
Use prompt leak detection and patch with waterproof materials.
Steps:
- Inspect roof seams and flashings.
- Check visible pipes and joints.
- Seal wall cracks and replaster damp areas.
Rising Damp vs Penetrating Damp: How to Spot Each
How can you tell whether damp rising from the ground or water penetrating from outside is causing those wet patches?
You inspect baseboards, skirting and floor-level stains for rising damp; check higher walls, window sills and external cracks for penetrating damp.
Use damp identification techniques like salt staining checks and moisture detection methods such as a moisture meter to pinpoint source and guide repairs.
Improve Home Drainage to Stop Water Entry
To keep water from seeping into your home, start by grading the ground so it slopes away from the foundation.
Keep gutters clear and well maintained so rainwater is directed off the roof and away from walls.
Where needed, install or repair drainage systems like downspout extensions or French drains to move water away from the house.
Grade Ground Away From Foundation
If water pools near your foundation after a rain, regrading the soil so it slopes away will keep moisture from seeping into your basement or crawl space.
Use soil grading and landscape slope to guide water runoff, add landscaping barriers and moisture barriers for foundation protection, and apply erosion control to preserve grades.
- Create 5–6% slope.
- Compact soil layers.
- Add mulch & plants.
Clear And Maintain Gutters
Redirecting runoff away from your foundation only helps if gutters carry roof water far enough from the house, so keeping them clear is key.
You should schedule regular gutter cleaning, remove debris, and check downspouts for clogs.
Inspect hangers and seals, repair leaks, and guarantee water discharges well away from walls.
Combine this with a basic drainage assessment to spot issues early.
Install Or Repair Drainage
Assess your property’s drainage and act before water finds its way into your basement or crawlspace.
You’ll need drainage solutions like foundation grading and water diversion to manage surface runoff and soil moisture.
Consider:
- Install French drains and sump pumps.
- Use permeable surfaces to reduce runoff.
- Perform regular drainage maintenance and landscaping adjustments to keep water moving away from your home.
Gutter and Downpipe Maintenance Checklist
Because clogged or damaged gutters can send water straight toward your foundation, keeping them clear and functioning is essential to reducing moisture in your home.
Inspect gutter materials for rust, cracks, and secure fixings. Clear debris, check slope, and test flow.
Examine downpipe types and joints for leaks, verify proper anchors, and direct runoff away from foundations with extensions or splash blocks.
Basement and Cellar Waterproofing Options
When basement moisture keeps coming back, you’ll want to compare interior drainage systems and exterior foundation sealing to find what works for your space.
Interior drains and sump pumps manage water that’s already inside, while exterior sealing stops it at the source.
I’ll explain the pros, cons, and typical costs so you can pick the best option.
Interior Drainage Systems
If your basement or cellar keeps getting damp or you spot water pooling after heavy rains, interior drainage systems offer a practical way to channel that water away before it damages walls or finishes.
- Install interior French drains and drainage basins to control soil moisture.
- Fit sump pumps and waterproof membranes to remove and isolate water.
- Combine with smart foundation grading and landscaping techniques.
Exterior Foundation Sealing
Interior drainage helps keep water from pooling under your slab, but sealing the exterior of your foundation stops moisture before it reaches the footing.
You should inspect foundation materials, repair cracks, and apply membrane or cementitious coatings.
Combine proper backfill, drainage boards, and flashing.
Choose sealing methods suited to soil, climate, and your budget, and hire pros for deep excavations or complex waterproofing tasks.
Choose Insulation That Reduces Cold Surfaces
Because cold surfaces attract condensation, pick insulation that keeps wall and ceiling temperatures closer to indoor air temperature.
Because cold surfaces draw condensation, choose insulation that keeps walls and ceilings closer to indoor temperatures.
You’ll reduce moisture risk by choosing effective thermal insulation and addressing cold bridging.
Consider these steps:
- Install continuous insulation to raise surface temperatures.
- Use higher R-value materials where walls meet windows and roofs.
- Seal gaps and air leaks to keep warm air consistent.
Prevent Thermal Bridging and Cold Spots
Don’t let metal studs, concrete joists, or window frames create cold spots that attract condensation—insulate those junctions to keep surfaces warm.
Seal gaps and cracks where cold air sneaks in, because air leakage turns warm, moist indoor air into condensation at cold surfaces.
Together, targeted insulation and airtightness stop thermal bridges and reduce moisture risk.
Insulate Cold Junctions
When cold building elements meet warm ones, they create thermal bridges that draw heat out of your living spaces and condense moisture at the junctions; insulating those spots stops heat loss and prevents the damp patches that lead to mold.
Use targeted fixes and proper insulation materials to boost thermal efficiency:
- Add rigid boards at wall-floor junctions.
- Install cavity foam around pipes.
- Fit insulated gaskets at frames.
Seal Air Leakage
Insulating cold junctions cuts heat loss at specific spots, but air leaks can still carry warm, moist air to those same cold surfaces and cause condensation.
Seal gaps with weather stripping, caulking techniques, and door seals. Use window insulation, draft stoppers, thermal curtains, and continuous air barriers.
Prioritize basement sealing, repair foundation cracks, and balance attic ventilation to prevent thermal bridging and damp spots.
Heating Strategies That Cut Condensation Risk
Because warm air holds more moisture than cold air, keeping your home evenly heated cuts the chance that surfaces will dip below the dew point and collect condensation.
Use heating methods that balance energy efficiency and condensation control.
Tips:
- Set heating schedules for steady temperature regulation.
- Combine insulation types with radiant heating.
- Promote air circulation to spread warmth and reduce cold spots.
Dry Clothes Without Raising Indoor Humidity
To keep laundry from adding moisture, use a well-ventilated drying space or an outdoor line when possible.
Pick low-humidity methods like a condenser dryer with a drain or quick tumble cycles and avoid air-drying in living areas.
Manage heat and ventilation by running an exhaust fan or opening a window briefly while drying to carry steam outside.
Use Ventilated Drying Spaces
If you hang wet laundry indoors without airflow, you’ll quickly raise indoor humidity and invite mold; using a dedicated, well-ventilated drying space lets you dry clothes without dumping moisture into living areas.
Use moisture control and effective drying techniques:
- Install exhaust fan or vented window.
- Use a dehumidifier nearby.
- Space items for airflow to speed drying and reduce damp.
Choose Low-Humidity Methods
When you want dry clothes without adding humidity to your home, pick methods that send moisture outdoors or capture it before it mixes with indoor air.
Use a vented dryer or tumble outside when possible, position drying racks near exhausts, run a dehumidifier or condensing dryer, avoid drying on indoor humidity plants, and employ moisture barriers like waterproof mats to protect surfaces and contain dampness.
Manage Heat And Ventilation
You’ve picked low-humidity drying methods; now focus on controlling heat and ventilation so drying won’t raise indoor moisture.
Use heat sources sparingly and run ventilation systems to exhaust damp air.
Tips:
- Dry near a kitchen or bathroom fan turned on.
- Use a condenser dryer vented outside when possible.
- Add a portable extractor or dehumidifier to speed drying and protect rooms.
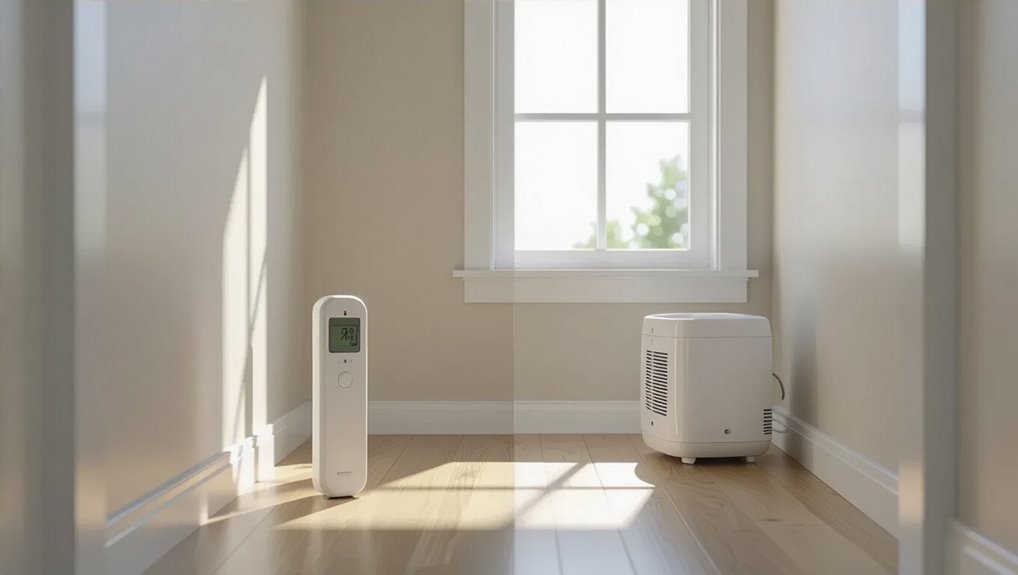
How to Choose and Use a Dehumidifier
Choosing and using a dehumidifier can quickly improve comfort and stop mold before it starts; pick one sized for your room, aim it where air circulates, and run it until humidity stays between 30–50%.
Learn dehumidifier types—compressor, desiccant, whole-house—and match capacity to space.
Use ideal settings, empty or plumb the drain, clean filters, and monitor humidity to prevent recurrence.
When to Use Moisture-Resistant Paint and Plaster
If damp spots, frequent condensation, or past mold problems keep cropping up, opt for moisture-resistant paint and plaster to protect surfaces and simplify cleanup.
You should pick moisture resistant materials, prepare surfaces, and follow correct paint application for durability.
- Use mold-inhibiting plaster in basements.
- Seal porous surfaces before paint application.
- Choose high-quality moisture resistant materials for kitchens and bathrooms.
Protect Furniture and Belongings From Damp
When dampness threatens your home, act quickly to protect furniture and belongings by moving items off the floor, improving air circulation, and using breathable covers or moisture absorbers where needed. You’ll prioritize furniture protection and belongings preservation: wipe surfaces, elevate pieces, rotate stored items, and check absorbers regularly.
| Item | Action |
|---|---|
| Sofa | Elevate |
| Mattress | Cover |
| Boxes | Ventilate |
| Wood | Wipe |
| Fabrics | Rotate |
Mould Prevention: Early Signs and Safe Removal
Because mould spreads fast in damp, poorly ventilated areas, you should watch for early signs like musty odors, discolored patches on walls or ceilings, peeling paint, and recurring allergy-like symptoms.
Because mould spreads quickly in damp, poorly ventilated areas, watch for musty smells, stains, peeling paint, and allergy symptoms.
Use these steps:
- Identify mould types, assess health risks, improve air quality.
- Apply cleaning solutions, surface treatments, moisture barriers.
- Try safe DIY techniques, removal methods, prevention tips; add indoor plants.
When to Call a Damp Surveyor or Contractor
If you keep spotting musty smells, recurring mould, or damp patches despite DIY fixes, it’s time to call in a damp surveyor.
You’ll want professional help sooner rather than later to assess structural risks and stop moisture from coming back.
Ask about their certifications, experience with your type of property, and whether they offer a written report and remedial plan.
Signs Of Persistent Damp
A stained skirting board or a musty smell that won’t go away are clear signs you should call a damp surveyor or contractor.
You’ll want a home inspection to identify damp causes and propose moisture solutions and prevention methods.
Check air quality and health effects, assess building materials and insulation types, and note weather influences or seasonal changes.
- Visible mold
- Peeling paint
- Persistent condensation
Timing For Professional Help
When damp problems persist despite basic fixes, call a damp surveyor or contractor so they can diagnose the cause and recommend targeted repairs.
Act quickly if worsening damp symptoms, spreading mold, or recurring musty smells appear.
A professional will perform moisture analysis, identify sources like rising damp or leaks, and advise urgent interventions.
Don’t wait—early assessment limits damage and repair costs.
Choosing The Right Specialist
Which specialist should you call depends on the problem’s source and severity. You’ll want a damp assessment and clear expert recommendations before hiring.
Check specialist qualifications, contractor experience, service reviews, pricing transparency, local regulations, and insurance coverage.
- Surveyor: diagnosis, reports, damp assessment.
- Contractor: repairs, contractor experience, pricing transparency.
- Ask for references, service reviews, and proof of insurance coverage.
Typical Costs for Damp Repairs and Budgeting Tips
Repairing damp can cost anywhere from a few hundred to several thousand dollars, depending on the cause and scope, so you’ll want a clear budget before work starts.
Estimate damp repair costs by getting multiple quotes, prioritise urgent fixes, and include contingency (10–20%).
Use budgeting strategies like phased work, DIY where safe, and checking warranties to avoid surprise expenses and stay on track.
Seasonal Checklist: Damp Prevention Through the Year
Having a budget and plan for repairs gives you more control over long-term damp prevention.
Plan and budget for repairs to take control of long-term damp prevention and keep moisture away.
So pair that financial readiness with a seasonal checklist to keep moisture at bay year-round.
Use Seasonal tips and Climate considerations to guide Humidity monitoring, Weatherproofing strategies, Insulation types, Ventilation systems, Moisture barriers, Home maintenance, and Energy efficiency.
- Spring: Seasonal maintenance, vents, check barriers.
- Autumn: Seal, insulate, drain.
- Winter: Reduce indoor humidity, protect pipes.
Smart Sensors and Tools to Monitor Humidity
Want to know exactly when your home’s humidity is rising so you can act before mold or condensation appears? Use smart humidity monitors with automated alerts to track rooms, trends, and trigger dehumidifiers or ventilation. They’ll log data, help set targets, and notify you remotely so you can respond fast.
| Device | Feature |
|---|---|
| Monitor A | Alerts |
| Monitor B | History |
Common DIY Mistakes That Make Damp Worse
If you try short-term fixes or ignore root causes, you can actually make damp worse—blocking a leaky cavity, for example, can trap moisture and encourage mold growth.
You’ll worsen issues by using wrong materials or ignoring poor insulation, unsealed gaps, outdated ventilation, careless landscaping, excessive watering, improper drying, or neglected maintenance.
- Patch without diagnosing.
- Paint over mold.
- Layer insulation wrongly.
Long-Term Strategies to Keep Your Home Dry and Valuable
Because long-term dryness protects both your health and your home’s value, plan durable solutions that address root causes rather than quick fixes.
You’ll install moisture barriers, improve crawlspace management, choose resilient building materials, and use landscaping strategies that divert water.
Consider climate considerations, upgrade ventilation systems, boost energy efficiency, and schedule regular home inspections so you catch issues early and preserve comfort and resale value.
Frequently Asked Questions
Can Houseplants Significantly Increase Indoor Humidity Levels?
Yes — you can notice added humidity from plants, but they’re usually minor humidity sources unless you have many or specific plant types like large tropicals; monitor levels and adjust watering or ventilation to avoid excess moisture.
Are Certain Cooking Methods Worse for Moisture Than Others?
Studies show cooking can raise indoor humidity by up to 30%. You’ll find steam cooking and boiling impact humidity most, frying methods add less, and baking moisture varies—use lids, hoods, and ventilation to control steam.
Can Waterproofing Paint Hide Structural Damp Problems?
No, waterproofing paint can’t hide structural damp problems long-term; you’ll only delay symptoms. You should get a proper damp diagnosis, because waterproofing benefits are mainly cosmetic and temporary unless underlying leaks and rising damp are repaired.
Do Dehumidifiers Increase Electricity Bills Substantially?
They won’t hugely spike bills if you choose an energy-efficient model and use it for targeted moisture control; you can run it on low settings, use timers, and combine with ventilation to minimize electricity use while keeping humidity down.
Will Insurance Cover Damp-Related Repairs?
Damp damage’s dreary details differ, so you’ll check policy specifics: damp insurance sometimes covers repair coverage for sudden, accidental causes, but insurers often exclude gradual damp, wear, or poor maintenance, so you’ll document and dispute denials.
Conclusion
So you’re now armed with vents, dehumidifiers, and a sensible rota—lucky you. Ignore it all and enjoy that decorative mildew instead; after all, who needs fresh air, dry walls, or a mortgage that holds value? Jokes aside, act early: fix leaks, boost ventilation, monitor humidity, and stop masking symptoms with heaters. Do that and damp becomes the thing you remember only as an amusing cautionary tale—one less thing to worry about.