
How to Remove Glitter Paint From Walls Without Damaging the Surface
You can remove glitter paint without harming the wall by working carefully: start by identifying the surface (drywall, plaster, wood, or wallpaper), then dry-brush and vacuum loose glitter, test a small patch with isopropyl alcohol or an eco-friendly remover, and gently lift residue with a plastic putty knife and soft sponge. Protect trim, ventilate, and wear PPE. Repair any small damage, prime, and repaint for a seamless finish—keep going and you’ll find step-by-step techniques and troubleshooting tips.
What Success Looks Like: Remove Glitter Paint Without Damage
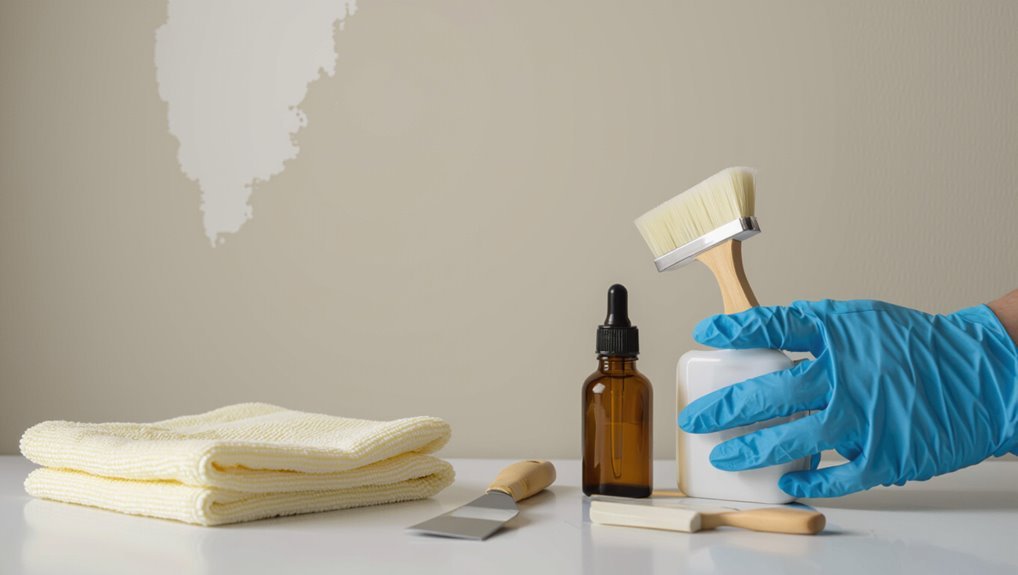
Picture a wall that looks as if the glitter was never there: paint finish intact, no streaks, scratches, or cloudy residue, and edges blending seamlessly with adjacent surfaces.
You’ll gauge success by uniform sheen, no texture changes, and preserved trim.
Choose glitter removal techniques that respect paint surface compatibility, test a small area first, and proceed gently to avoid abrasion or chemical damage.
Identify Your Wall Surface: Drywall, Plaster, Wood, Wallpaper
Start by identifying the wall material—drywall, plaster, wood, or wallpaper—because each reacts differently to solvents, scrubbing, and scraping. You’ll assess wall types and surface durability to choose safe methods. Use the table below to compare characteristics quickly.
| Material | Porosity | Fragility |
|---|---|---|
| Drywall | Medium | Moderate |
| Plaster | Low | High |
| Wood | Low | Variable |
| Wallpaper | High | Very High |
Quick Single-Wall Removal Plan (Step-by-Step)
Gather the right tools and materials—drop cloths, gentle solvent or remover, scrapers, sponges, and protective gear—so you’re ready to work efficiently.
Start with a small test area, then follow a clear step-by-step removal: soften the glitter paint, gently scrape or wipe it away, rinse, and repeat as needed.
Finish by evaluating the surface for repairs or touch-up before moving on to the rest of the room.
Tools And Materials
You’ll need just a handful of tools and materials to remove glitter paint from a single wall: a plastic putty knife, soft scrub sponge, microfiber cloths, bucket, mild detergent, rubbing alcohol or adhesive remover, painter’s tape, drop cloths, and a small fan for ventilation.
Review your tools list and material options, choose gentle cleaners, test a small area, and keep protective coverings ready.
Step-By-Step Removal
Work methodically and work from top to bottom so you don’t spread glitter or cleaning residue to areas you’ve already cleaned.
First, dry-brush loose glitter paint flakes into a tray. Vacuum with a brush attachment.
Apply mild detergent solution, blotting gently. Rinse, dry, then assess for remaining glitter paint; repeat targeted removal techniques or use a gentle solvent test on a hidden spot before proceeding.
Quick Whole-Room Removal Plan (Step-by-Step)
Start by clearing the room so you can move freely and protect floors and furniture; this lets you tackle the glitter paint systematically without spreading it further.
Start by clearing the room to move freely and protect floors and furniture before tackling glitter paint.
Then follow a quick whole-room removal plan using proven removal techniques:
- Vacuum edges and drop cloths.
- Test a small patch with gentle cleaner.
- Work top-down in sections.
- Rinse, dry, inspect, and repeat as needed.
When to DIY and When to Hire a Pro
If the glitter covers a small area and you’ve got time and steady hands, you can probably tackle it yourself.
For large-scale damage, complex finishes, or when you don’t have the skill set, hiring a pro can save time and reduce the risk of costly mistakes.
Weigh the cost of a contractor against the risk of repair or repainting to decide which route makes sense.
Scope Of Damage
When evaluating whether you can tackle glitter paint removal yourself or need a pro, focus on the extent of coverage, the type of underlying finish, and any damage already present.
Do a damage assessment, consider prevention methods to avoid spreading glitter, then decide.
- Small, localized spots
- Intact, washable finish
- Large, textured coverage
- Peeling, stained, or fragile surfaces
Skill And Time Required
Deciding whether you can remove glitter paint yourself comes down to your comfort with hands-on repairs, the tools you’ll need, and the time you can commit; simple spot cleanup with gentle solvents or sanding suits most DIYers, while extensive coverage, textured surfaces, or delicate finishes usually demand a pro. Assess surface, set Time estimates, follow Preparation tips, practice Technique practice, and plan Cleanup strategies.
| Skill levels | Tool familiarity |
|---|---|
| Project planning | Surface assessment |
| Time estimates | Cleanup strategies |
Cost Versus Risk
Balancing cost and risk helps you choose whether to tackle glitter paint removal yourself or hire a pro: small, localized spots and sturdy, flat surfaces usually make DIY sensible and cheap, while extensive coverage, textured walls, or valuable finishes raise the stakes and can justify paying for experienced labor.
- Do a cost analysis: estimate tools, materials, time.
- Perform a risk assessment: surface damage likelihood.
- DIY if low cost and low risk.
- Hire a pro for high risk or complex finishes.
Safety Essentials: PPE and Ventilation Checklist
Because glitter paint can release fine particles and strong fumes, you should treat removal like a small-scale hazardous task and gear up accordingly.
Treat glitter paint removal like a small hazardous task—gear up with respirator, goggles, gloves, and proper ventilation.
Follow PPE guidelines: N95 or respirator, safety goggles, nitrile gloves, and disposable coveralls.
Use ventilation methods: open windows, cross-breeze, box fan exhausting air outside, and avoid recirculating HVAC.
Keep a fire extinguisher nearby if using solvents.
Test a Small Patch Safely (Quick Checklist)
Before you go full‑scale, always test a small, inconspicuous patch to confirm the removal method won’t damage the wall — you’ll check paint adhesion, finish change, and how glitter reacts.
Use patch testing to verify surface compatibility and results.
Try this quick checklist:
- Clean area gently.
- Apply chosen remover briefly.
- Wipe and inspect for finish loss.
- Wait 24 hours, recheck.
Tools and Supplies You’ll Actually Need
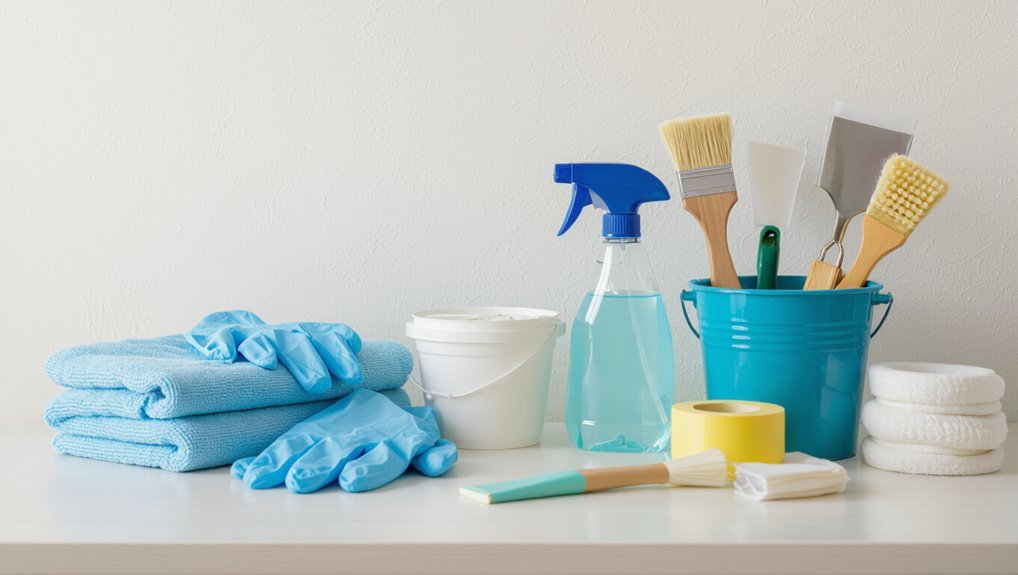
Now that you’ve confirmed a safe patch, gather the right tools so the full removal goes smoothly and doesn’t create more mess.
Now that the patch is safe, gather the right tools to remove the rest cleanly and without extra mess.
For a concise tools overview, grab a soft sponge, microfiber cloths, plastic scraper, bucket, and gentle detergent.
Supply essentials include gloves, drop cloths, painter’s tape, and a spray bottle with water.
Keep a flashlight to spot stubborn glitter.
Products to Avoid That Cause Permanent Damage
Don’t reach for harsh chemical solvents—they can strip paint, damage drywall, or leave stains you can’t fix.
Avoid abrasive scrubbing tools like steel wool or heavy-duty pads, which will gouge or dull the wall surface.
Instead, use gentle, tested methods first to protect your finish.
Harsh Chemical Solvents
While it might be tempting to grab strong solvents to blast away glitter paint, many common products can permanently damage wall finishes, strip color, or dissolve drywall paper. You should avoid acetone, paint thinners, undiluted bleach, and engine degreasers unless a professional recommends them.
- Acetone — strips finish, raises glitter toxicity concerns.
- Paint thinners — remove paint layers.
- Undiluted bleach — discolors, weakens drywall.
- Degreasers — leave residues; prefer alternative methods.
Abrasive Scrubbing Tools
1. You should avoid abrasive materials and harsh brushes that gouge paint or drywall; they cause irreversible damage.
Instead of aggressive scrubbing techniques, use gentle options—soft cloths, nonabrasive sponges, and light circular motions. Test a small area first.
If glitter won’t lift, switch to safe alternatives like mild soap, warm water, or targeted adhesive removers designed for painted surfaces.
How to Protect Floors, Fixtures, and Moldings

Start by clearing the area and laying down durable drop cloths or plastic sheeting to catch every flake of glitter paint; tape the edges tightly so debris can’t slip underneath.
- Use weighted floor protection and non-slip mats for secure coverage.
- Wrap fixtures with plastic and painter’s tape for fixture safeguarding.
- Protect moldings with foam guards to guarantee molding care.
- Keep tools organized to aid debris containment and workspace organization.
Contain Dust and Glitter: Cleanup and Barriers
Once you finish shielding floors and fixtures, set up containment barriers and a tidy cleanup plan so glitter and dust don’t migrate through the space.
You’ll use plastic sheeting and tape for glitter barriers, plan dust control zones, establish cleanup strategies with dedicated tools, maintain surface protection around work areas, and assign residue management procedures to prevent spread and simplify final removal.
Remove Loose Glitter: Brushing and Vacuuming
Start by using a soft, dry brush to sweep loose glitter gently from the wall, working top to bottom so particles fall to the floor.
Then run a vacuum with the brush attachment over the wall surface and baseboards to pick up remaining specks.
Use a narrow nozzle or a small brush to reach corners and crevices where glitter hides.
Dry Brushing Technique
Grab a soft-bristle brush and gently sweep the loose glitter into small piles—this dry brushing method keeps particles from smearing and makes vacuuming easier.
Use controlled strokes to protect finish; don’t press hard. The dry brushing technique aids careful paint removal without solvents.
- Work top to bottom
- Use short strokes
- Change brush often
- Dispose piles promptly
Vacuum With Brush Attachment
Move the brush piles straight into the vacuum using a soft brush attachment to lift loose glitter without grinding it into the paint.
Work slowly, overlapping strokes to capture flakes. Adjust suction and test on a hidden spot to prevent finish damage.
Empty the canister often and clean bristles—good brush maintenance preserves effectiveness.
These vacuum techniques remove residue without scrubbing or risking paint damage.
Tackle Corners And Crevices
Corners and crevices trap glitter, so focus a soft-bristled brush and your vacuum’s crevice tool on those tight spots to lift flakes before they spread.
- Brush gently along edges using corner cleaning methods.
- Vacuum immediately to capture loosened glitter.
- Repeat until no sparkle shifts.
- Finish with a microfiber wipe to catch residual particles and cement your glitter removal techniques.
Soft Scraping Technique for Flaking Glitter Paint
Start by inspecting the flaking areas to determine how firmly the glitter paint is adhering.
Use a soft scraping, flaking technique with a plastic putty knife or credit card to lift loose pieces. Work slowly, keep a gentle approach to avoid gouging, and frequently clear debris.
Protect adjacent areas with drop cloths and painter’s tape for surface protection while you progress.
Using Heat to Loosen Glitter Paint: Safety Tips
When you apply controlled heat—using a heat gun or hair dryer on a low setting—you can soften glitter paint so it lifts more easily, but you must prioritize safety:
- Keep heat application moving to avoid scorching.
- Wear gloves, eye protection, and a mask for fumes.
- Test a hidden spot first to check surface tolerance.
- Ventilate the area and keep a fire extinguisher nearby.
Solvent Options: Which Removers Work on Glitter Paint?
Choosing the right solvent matters because glitter paint blends binders, pigments, and reflective flakes that respond differently to cleaners.
You’ll usually pick between water-based removers, solvent-based strippers, and specialty adhesive or paint removers depending on the paint’s type and the wall finish.
You should test small areas, compare solvent effectiveness, prefer eco-friendly options when possible, and follow manufacturer instructions to avoid surface damage.
Using Rubbing Alcohol and Mineral Spirits Correctly
Before you start, test rubbing alcohol and mineral spirits on a hidden patch of wall to check for paint damage or finish changes.
Use isopropyl alcohol for small, water-based glitter paint spots and choose mineral spirits for oil-based paints, following product instructions and ventilating the area.
Wear gloves and work gently to avoid stripping the underlying paint.
Test Surface First
Although it’s tempting to reach for strong solvents right away, you’ll want to test rubbing alcohol and mineral spirits on a hidden patch first.
You’ll verify test methods and surface compatibility before treating visible areas. Follow a simple checklist:
- Clean small area.
- Apply tiny solvent amount.
- Wait 10 minutes.
- Inspect for discoloration or texture change.
Use Proper Solvents
Reach for rubbing alcohol or mineral spirits when water and soap won’t budge glitter paint, but use each solvent with care—rubbing alcohol (isopropyl, 70–90%) dissolves many water-based paints and adhesive binders, while mineral spirits work better on oil-based paints and older finishes.
You’ll choose solvent types by paint chemistry, test a hidden spot, wear gloves, and follow safe application techniques with gentle blotting.
Eco-Friendly Removers That Cut Glitter Paint
If you want to remove glitter paint without harsh chemicals, several eco-friendly options cut through the finish while being safer for your home and the planet.
You can try vinegar solutions, citrus-based removers, baking soda pastes, or soy-based strippers. Test a small area first, work gently, and rinse thoroughly.
- Vinegar solution
- Citrus-based remover
- Baking soda paste
- Soy-based stripper
Wet Sanding: When and How to Sand Gently
Wet sanding offers a controlled way to smooth remaining glitter paint and feather edges without kicking up dust, and you should use it only after chemical or manual removal has removed most of the finish.
You’ll employ wet sanding techniques with a sanding block, keep the surface wet, and start with fine sandpaper grit (400–600), moving to 800–1000 for polishing.
Rinse and inspect often.
When to Avoid Power Sanders and Grinders
Because power sanders and grinders remove material so aggressively, you’ll want to skip them in several common situations: on thin drywall, over delicate textures, near trim or electrical outlets, and when glitter paint sits atop multiple fragile layers.
- Thin drywall heightens glitter paint risks and tear-through.
- Close trim needs careful surface protection strategies.
- Near wiring increases hazard and damage.
- Layered finishes may delaminate.
Dealing With Textured Drywall and Glitter Paint
Start by evaluating the texture and finish of your drywall so you know how delicate the surface is and whether the glitter is embedded in grooves.
For lightly textured walls you can try gentle removal techniques like soft-bristle brushing, mild solvent swabs, or a damp microfiber to lift flakes without damaging the profile.
If the texture is pronounced or the glitter’s stubborn, you’ll need to proceed more cautiously to avoid flattening or tearing the surface.
Assess Texture And Finish
Someone’s glittered up textured drywall can be trickier to clean than a smooth surface, so you should first identify the wall’s texture and finish—knock lightly to sense depth, run your hand for roughness, and check the sheen (flat, eggshell, satin) to know how firmly paint adhered.
Use texture analysis and verify finish compatibility before proceeding.
- Note texture pattern.
- Test sheen level.
- Map glitter density.
- Record fragile areas.
Gentle Removal Techniques
1. You’ll use gentle solvents sparingly on textured drywall, testing an inconspicuous spot first.
Work in small areas, applying with soft cloths and gentle dabbing rather than scrubbing. These effective techniques lift glitter paint without tearing texture.
Move slowly, rinse residue with damp cloths, and let dry between passes. Favor careful approaches to preserve the finish and avoid overworking the wall.
Removing Glitter Paint From Painted Plaster Walls
If glitter paint has gotten onto your painted plaster walls, you can remove it without wrecking the underlying finish by working carefully and using gentle methods first; test a small, hidden spot to confirm the paint and plaster tolerate the cleaner before proceeding.
Use mild detergent, soft cloths, and minimal abrasion to protect wall surfaces and paint.
- Blot gently
- Try soap solution
- Use rubbing alcohol sparingly
- Rinse and dry
Removing Glitter Paint From Primed or Raw Wood Trim
Start by evaluating the trim’s surface and finish, since primed or raw wood soaks up paint differently than finished pieces; you’ll need gentler, more controlled methods to lift glitter paint without damaging the wood or primer.
Work slowly with a soft brush, mild detergent, and distilled water; test a hidden spot.
If needed, use fine-grit sanding or a solvent-safe swab sparingly on wood trim.
Handling Glitter Paint on Wallpaper and Vinyl
Before you start, check how well the wallpaper is stuck to the wall so you don’t lift paper when removing glitter paint.
For vinyl, test a small hidden spot with your cleaning method and solvent to make sure it won’t warp or discolor.
If either surface seems fragile, proceed with gentler techniques or consult a pro.
Assess Wallpaper Adhesion
When tackling glitter paint on wallpaper or vinyl, first check how well the material’s edges and seams are adhered so you know what you can safely scrub or peel without causing more damage.
- Identify wallpaper types to anticipate fragility.
- Gently lift a corner for adhesion testing.
- Note loose seams or bubbled areas.
- Mark sections needing conservative cleaning or professional repair.
Test Vinyl Integrity
1 simple test will tell you how much force you can use without damaging vinyl: press a fingernail or a blunt plastic scraper into an inconspicuous spot and try to lift or flex the surface gently.
For vinyl testing, note any peeling, stretching, or color change.
Use this integrity assessment to choose removal tools—soft cloths, mild solvent, or mechanical methods—avoiding excessive force.
Working Around Outlets, Trim, and Tight Corners
Although the bulk of the paint comes off with broad strokes, you’ll need a different approach for outlets, trim, and tight corners to avoid damage and missed spots.
- Use outlet protection and outlet covers before working.
- Apply trim masking tape to protect woodwork.
- Employ corner techniques: small brushes, cotton swabs for tight space access.
- Work with careful maneuvering, slow strokes, and check edges for remaining glitter.
Preventing Spread: Steps to Control Glitter While Working
Containment is key: set up drop cloths, tape plastic sheeting at doorways, and lay down sticky mats or towels to catch loose glitter before you start working. You’ll wear gloves, use low-tack tape to lift specks, and keep a sealed bin for debris. Prioritize glitter control during paint preparation to limit spread and simplify cleanup.
| Action | Benefit |
|---|---|
| Drop cloths | Catch fallout |
| Tape barriers | Seal zones |
| Sticky mats | Trap specks |
| Sealed bin | Confines waste |
Fixing Dents, Gouges, and Damage After Removal
Once the glitter’s gone, take a close look and note any dents, gouges, or uneven spots so you know what needs fixing.
You’ll fill small holes with spackling and sand smooth, while bigger damage may need patching or joint compound.
Finish by priming and feathering paint to blend repairs into the surrounding wall.
Assess Surface Damage
After you scrape and clean off the glitter paint, take a careful look for dents, gouges, or areas where the substrate was damaged during removal; these flaws will show through new paint if you don’t repair them first.
Conduct a quick surface assessment and damage evaluation, noting size, depth, surrounding adhesion, and moisture.
- Mark locations
- Measure depth
- Test adhesion
- Check for moisture
Repair And Blend
If you found dents, gouges, or loose substrate during your assessment, tackle repairs now so your new finish looks seamless; you’ll fill, sand, and feather each damaged spot to match the surrounding wall. Use proper repair techniques and blending methods to avoid texture or sheen mismatches.
| Step | Task |
|---|---|
| 1 | Fill gouges |
| 2 | Sand smooth |
| 3 | Feather & prime |
How to Fill and Smooth Repaired Areas Before Repainting
Prep the surface carefully before you paint: clean the area, scrape away loose glitter and flaking paint, then sand the edges smooth so fillers will bond evenly.
- Choose repair materials suited to your wall (spackle or joint compound).
- Apply thin layers, letting each dry.
- Use smoothing techniques with a damp sponge or fine sandpaper.
- Wipe dust away before repainting.
Re-Priming Tips After Removing Glitter Paint
Seal the repaired surface with a quality primer that matches both your wall type and the finish you plan to use, since a good primer hides residual sparkle, evens porosity, and improves paint adhesion.
For re priming techniques, sand lightly, clean dust, and apply thin, even coats.
Focus on surface preparation so your topcoat adheres uniformly and reduces any remaining shimmer.
Best Paint Types and Primers to Hide Residual Shimmer
Once you’ve stripped the glitter, you’ll want a high-hide primer to block any leftover shimmer and even out the surface.
Choose a flat or matte finish paint rather than satin if you need to mask sparkle, since lower-sheen finishes scatter less light.
If one coat isn’t enough, pick a heavily pigmented paint to improve coverage and reduce the chance of shimmer showing through.
High-Hide Primer
A high-hide primer is your best bet for masking stubborn glitter sheen because it’s formulated with opaque pigments and thicker binders that block shimmer rather than just cover it.
You’ll use high hide techniques to seal sparkle; primer benefits include better coverage and fewer coats.
Choose quality, sand between coats, and spot-test first.
- Block shimmer
- Seal surface
- Reduce coats
- Test patch
Matte vs. Satin
Pick matte when you want to hide any leftover shimmer—its flat finish scatters light and makes sparkles far less noticeable—while satin will still show a faint sheen that can draw attention to residual glitter.
You’ll prefer a matte finish for problem areas and touch-ups; reserve a satin finish only where slight sheen and easy cleaning outweigh hiding tiny sparkles.
Pigmented Paint Options
Choose paints and primers with strong pigmentation and stain-blocking formulas to mask leftover glitter—you’ll get better coverage with high-hide latex or acrylic latex paints paired with a full-coverage primer designed for sealing sparkly residues.
- Use pigmented paint with high-hide acrylic latex.
- Apply shellac or oil-based primer for sealing.
- Pick darker color alternatives to conceal shimmer.
- Test samples on a small area before full application.
Matching Texture and Sheen When Repainting
When you repaint over glitter paint, matching the wall’s texture and sheen is key to hiding any telltale shadows or glossy specks.
Start by comparing the current finish to your repair sample under the same lighting.
You’ll focus on texture matching with appropriate skim coats or spray textures, then select paint for sheen consistency—flat hides flaws, satin or eggshell may reveal sparkle unless matched precisely.
Fast Rental Fixes Before Inspection
A few targeted fixes can make your unit inspection-ready without a full renovation: focus on quick, high-impact tasks like touching up paint to hide glitter remnants, smoothing small texture inconsistencies, replacing damaged outlet covers and switch plates, and cleaning or re-caulking high-visibility seams.
- Use paint alternatives for small spots.
- Match wall textures when patching.
- Prioritize surface preparation.
- Apply cleaning techniques before rental inspections.
Time-Saving Strategies for Large Rooms or Multiple Walls
Small repairs you handled on single walls won’t scale when you’ve got large rooms or several units to prep, so plan to work faster and smarter. Use large space strategies: divide areas, assign stages, and pick efficient removal techniques like stripping tools plus HEPA vacuums. Schedule teams and batch tasks to cut downtime.
| Task | Benefit |
|---|---|
| Zone | Focus |
| Tools | Speed |
| Teams | Parallel |
| Batch | Consistent |
Cost Comparison: DIY vs. Professional Removal
Although you can save money by doing glitter paint removal yourself, you should weigh tool rental, materials, and your time against a pro’s labor and disposal fees.
- Estimate DIY supplies and rental vs. professional estimates.
- Include disposal and cleanup in your cost analysis.
- Factor time value and possible repairs.
- Get multiple quotes to compare warranties and timelines.
Troubleshooting Stubborn Glitter That Won’t Come Off
If your cost comparison showed DIY still makes sense, you’ll want a clear plan for stubborn glitter that resists scraping and washing. Test solvents for glitter adhesion and confirm paint compatibility first. Use gentle abrasion, heat, or a citrus remover as needed.
| Step | Tool | Tip |
|---|---|---|
| 1 | Soft scraper | Work slowly |
| 2 | Solvent | Spot test |
| 3 | Heat gun | Low setting |
| 4 | Sanding | Light touch |
Final Quality Check: Confirm Surface Is Paint-Ready
Before you repaint, do a focused final quality check to confirm the wall’s surface is smooth, clean, and dry; this prevents adhesion problems and visible flaws in the new finish.
Before repainting, do a final check: wall must be smooth, clean, and fully dry to ensure proper adhesion.
- Check for remaining glitter or residue during your surface assessment.
- Feel for rough spots; sand and re-clean as needed to confirm paint readiness.
- Verify patch compound is dry and feathered.
- Wipe with tack cloth and inspect under good light.
Frequently Asked Questions
Can Glitter Particles Permanently Embed in Drywall Paper Facing?
Of course glitter adhesion loves commitment — it can embed into drywall paper facing if particles get trapped in texture or damaged paper. You’ll need careful drywall repair and gentle cleaning to avoid tearing the paper and spreading sparkle.
Will Glitter Paint Damage HVAC or Central Air if Removed Indoors?
It won’t usually damage HVAC if you’re careful, but glitter paint hazards include clogging filters and spreading particles; use controlled indoor removal techniques like HEPA vacuums, sealed containment, and changing filters to protect your system.
Can Removing Glitter Paint Release Microplastics Into Wastewater?
Yes — when you scrub glitter paint, it can shed tiny particles like confetti at a parade, and you’ll release microplastics; that contributes to microplastics impact and environmental consequences, so you should capture and dispose responsibly.
How Do I Dispose of Glitter Paint Waste Legally and Safely?
You should treat glitter paint waste as hazardous: check local paint disposal rules, avoid pouring down drains, use designated paint disposal or household hazardous waste facilities, and choose eco friendly options like recycling programs or solidifying for proper disposal.
Will Glare From Residual Glitter Affect Photography or Video Production?
“Light travels where it pleases”: yes, residual glitter can cause glitter photography and video glare, so you’ll see specular highlights and flares; you’ll need controlled lighting, diffusers, and careful camera angles to minimize distracting reflections.
