
How to Remove Hot Glue From Painted Walls Without Taking the Paint With It
Act fast: if the glue’s still warm peel it gently with a fingernail or plastic scraper, then blot residue with warm soapy water. For dried glue, soften it with a heat gun on low while keeping the gun moving, or freeze small spots with an ice pack and chip them off with a plastic scraper. Finish with a little mineral or cooking oil to lift residue, rinse and touch up paint as needed — keep going and you’ll find step‑by‑step tips and precautions.
Quick Fix: Remove Fresh Hot Glue Now
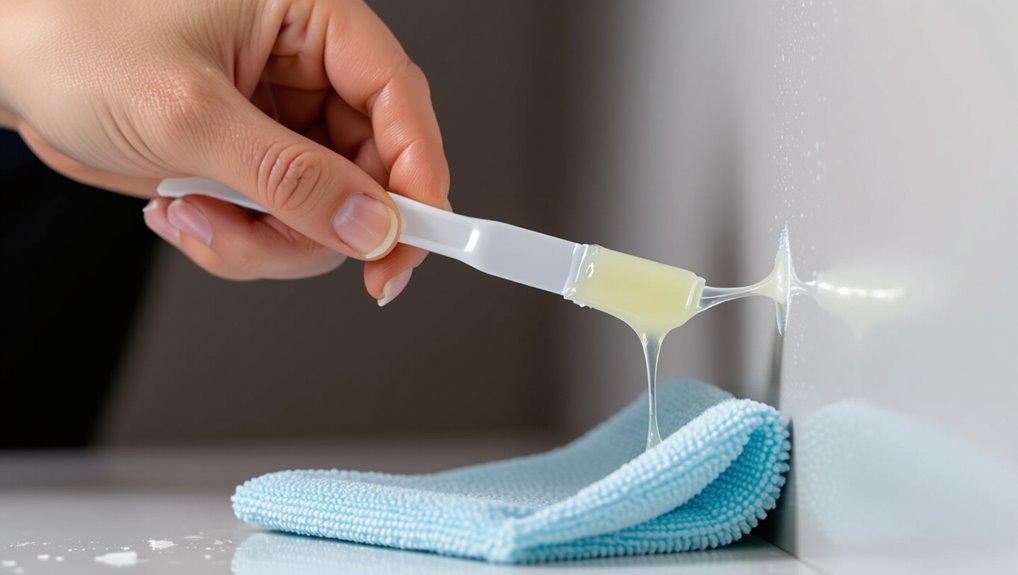
If the hot glue is still warm and tacky, act fast: peel up as much as you can with your fingernail or a plastic scraper, then blot any residue with a soft cloth dampened in warm soapy water.
You’ll protect paint by working gently, testing pressure, and rinsing. For fresh glue removal, respect adhesive properties—don’t scrub hard; lift, absorb, and repeat until the wall’s clean.
Identify: Hot Glue vs Dried Craft Adhesive
When you’re deciding how to remove a sticky spot, start by identifying whether it’s hot glue or a dried craft adhesive, because the two look similar but respond to different treatments.
Check texture, sheen, and flexibility: hot glue is rubbery and peels; dried craft adhesives often harden, crack, or yellow.
Note adhesive types and glue properties to choose the right removal method.
Prevent Damage Before You Start
Before you start removing hot glue, test the paint finish in an inconspicuous spot to make sure your method won’t strip or discolor it.
Lay down drop cloths or masking tape to protect surrounding areas and furniture.
Gather gentle tools—plastic scrapers, soft cloths, and mild solvents—so you can work carefully and avoid damage.
Test Paint Finish First
Since paint formulations vary, test a small hidden spot first so you won’t damage the finish while removing hot glue.
You should try your chosen removal method on that area, noting the paint types and any reaction.
Proper surface preparation matters: clean gently, dry fully, then apply heat or adhesive remover briefly.
If the finish changes, stop and choose a gentler approach.
Protect Surrounding Area
Cover nearby surfaces with drop cloths or old towels and tape down edges so glue, heat tools, or cleaning solvents don’t damage paint, trim, or flooring.
Use a tarp placement that extends beyond the work zone and secure it.
Identify adhesive types to choose safe removers and avoid spreading residues.
Keep ventilation open and clear a workspace perimeter to prevent accidental contact or drips.
Gather Gentle Tools
Gather a few gentle, precise tools so you can remove hot glue without harming paint or wallpaper: a plastic putty knife or credit card for prying, a soft microfiber cloth, cotton swabs for detail work, a plastic razor blade for stubborn edges, and a hair dryer or heat gun on low to soften the glue.
Use gentle scrapers, test adhesive removers on an inconspicuous spot, and work slowly.
Use Controlled Heat to Soften Glue
Apply gentle, focused heat to soften the hot glue so you can remove it without damaging the paint.
Use a hair dryer on low, keeping it several inches away and moving constantly. Monitor heat application and test glue consistency with a plastic scraper tip; once tacky, lift slowly.
Don’t overheat—stop if the paint warms or looks altered. Work patiently and in short bursts.
Cool-and-Peel Method for Stubborn Spots
When heat doesn’t work, cool the glue with an ice pack or bag of frozen peas to harden it.
Once it’s brittle, you can lift an edge and peel slowly with your fingers or a plastic scraper.
Go gently to avoid gouging the wall.
Cool The Glue
If the glue’s bothering you because it’s hardened into a stubborn patch, cool it down so it becomes brittle and easier to peel off; you can use an ice pack or a bag of frozen vegetables held against the spot for several minutes until the glue loses its tack.
Use precise cooling techniques to exploit glue properties — work slowly, reposition the cold source, and avoid chilling surrounding paint.
Peel Gently
Loosen the cooled glue by gently prying at an edge with your fingernail or a thin plastic spatula.
Then peel it back slowly at a low angle so the adhesive comes away in larger pieces instead of tearing.
Use a steady peel technique, keeping the tool flat to protect paint.
If adhesive residue remains, lift it with a soft cloth dampened with mild solvent, testing first on an inconspicuous spot.
Safe Household Solvents for Painted Walls
For painted walls, pick mild household solvents that dissolve hot glue without stripping paint or dulling the finish.
You’ll use gentle options and avoid harsh chemicals.
- Rubbing alcohol — dab sparingly to soften glue edges.
- Household vinegar mixed with water — mild, non-abrasive lift.
- Baking soda paste — apply gently to break adhesion, then wipe away.
Test a Solvent Safely on Your Paint
When you’re ready, pick an inconspicuous spot—behind a piece of furniture or inside a closet—and apply a tiny dab of the chosen solvent with a cotton swab; wait a few minutes, then blot and check for color change, softening, or finish dulling.
Note paint compatibility and document results. If safe, proceed; if not, reassess solvent selection and try a gentler option elsewhere.
How to Remove Hot Glue With Isopropyl Alcohol
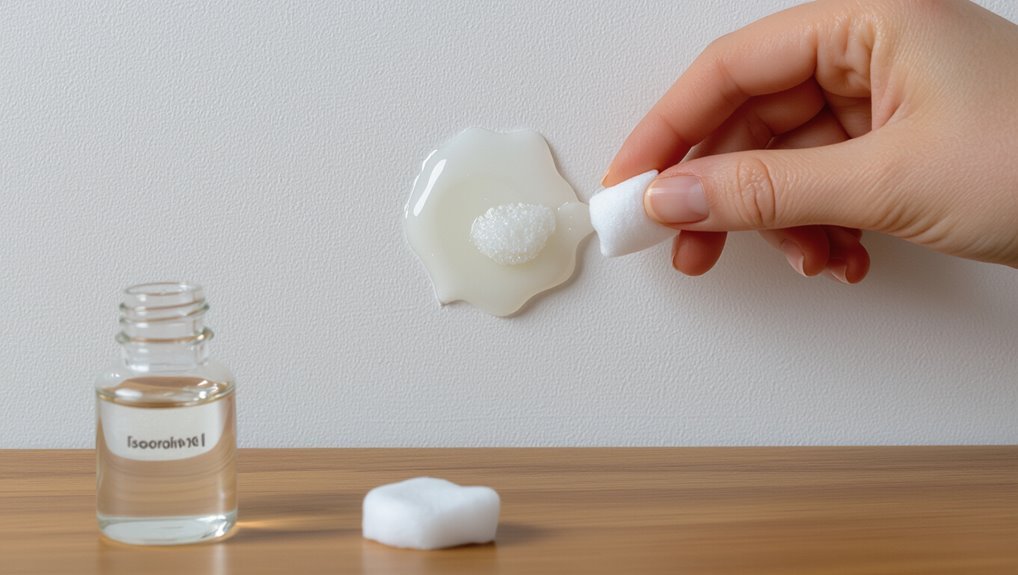
Grab a cotton ball or soft cloth and dampen it with 70% (or higher) isopropyl alcohol to tackle hot glue on painted walls.
Dampen a cotton ball with 70%+ isopropyl alcohol, blot the hot glue, then gently lift with a plastic scraper.
Gently blot, don’t rub, then lift softened glue with a plastic scraper.
Isopropyl alcohol benefits include quick evaporation and safe adhesive removal techniques when tested first.
- Blot
- Scrape gently
- Rinse and dry
How to Remove Hot Glue With Mineral or Cooking Oil
If hot glue’s left a residue on a painted wall, you can loosen it with a few drops of mineral or cooking oil applied to a soft cloth.
Let the oil sit for a minute to penetrate the glue, then gently work the spot with the cloth and lift softened bits with a plastic scraper.
Wipe residue with a clean cloth, then wash the area with mild soap and water.
When to Use Paint‑Safe Commercial Adhesive Removers
Because oil and gentle scraping don’t always do the job, reach for a paint‑safe commercial adhesive remover when the glue is stubborn, covers a large area, or sits on delicate or high‑value finishes you don’t want to risk damaging.
If oil and scraping fail, use a paint‑safe adhesive remover for stubborn glue or delicate, high‑value finishes—test first.
Choose products labeled paint safe options and match remover to adhesive types. Test first in an inconspicuous spot.
- Follow label directions.
- Use minimal product.
- Rinse and dry promptly.
Touch-Up Paint: Fix Small Chips and Discoloration
Once the glue’s gone, you’ll want to match the paint so the touch-up blends with the rest of the wall.
Prep the area by cleaning, sanding any rough spots, and filling tiny chips before you paint.
Use thin coats and feather the edges outward to hide brush marks and avoid a noticeable patch.
Matching Paint Color
Matching the paint color is the trickiest part of touching up small chips and discoloration, but you can do it without repainting the whole wall.
Use careful color matching techniques and smart paint sample selection so your patch blends.
Try these steps:
- Compare samples in room light on matte cards.
- Test tiny swatches on hidden area.
- Adjust tint gradually until matched.
Preparing The Surface
Before you paint, make sure the area is clean, dry, and smooth so the touch-up will adhere and blend.
Gently remove residual glue, dust, and loose paint with a soft scraper and fine sandpaper.
Wipe with a damp cloth and let dry.
Assess surface preparation and any altered adhesive properties from residue; use primer on compromised spots before applying touch-up paint.
Feathering Paint Edges
Start by thinning the paint slightly and loading only the tip of a small brush or a foam applicator so you can gently feather each repair into the surrounding finish.
Use a precise feathering technique and subtle color blending to hide chips.
- Light strokes outward.
- Dab excess, then sweep.
- Let layers dry between coats.
Troubleshooting: If Paint Peels, Blisters, or Discolors
If paint peels, blisters, or discolors after you remove hot glue, it usually means the finish or underlying paint was damaged during removal or reacted to heat/solvents.
Assess the affected area immediately so you can choose the right repair method. Test paint adhesion with a gentle scrape, note surface texture, sand or spot-prime as needed, then repaint using compatible primer and finish to restore appearance.
Frequently Asked Questions
Can Hot Glue Damage Textured Walls Differently Than Smooth Walls?
Yes — you’ll find hot glue affects textured walls more due to adhesive properties gripping uneven wall textures, making removal trickier; smooth surfaces let glue peel more cleanly, so you’ll need gentler techniques on textured finishes.
Will High Humidity Affect Glue Removal Success?
Yes — high humidity weakens glue adhesion, so you’ll often find removal easier when humidity levels are high; however, excess moisture can soften paint, so you’ll test a small spot and dry the area gently after removing glue.
Can I Use a Hairdryer Instead of a Heat Gun?
Yes — you can, though it’s a gentler option: you’ll want to mind hairdryer safety and control heat application so you don’t soften paint; keep distance, use low settings, and test a hidden spot before proceeding.
Are There Eco-Friendly Solvent Alternatives?
Yes — you can try eco friendly options like natural solvents such as citrus-based cleaners or white vinegar diluted with water; you’ll test a hidden spot first, apply gently, and scrape softened glue with a plastic tool.
How Long Should I Wait Before Repainting Treated Areas?
About 24–48 hours: studies show 85% of paint failures stem from poor surface preparation. You’ll want full cure for paint adhesion, so wait at least a day, ideally two, after treatment before repainting.
