
How to Remove Paint Stains From Floor Tiles After a Messy Project
First identify your tile type (glazed ceramic, porcelain, vinyl, or stone) and whether the paint’s wet or dry. For fresh spills blot then lift with a damp cloth and plastic scraper; for partially dried latex soften with warm soapy water or rubbing alcohol and scrape gently. For cured spots use a tested solvent or commercial remover, apply heat cautiously, then rinse and dry. Protect grout, test cleaners first, and keep tools handy—keep going to find step‑by‑step tips and safety notes.
Identify Your Tile Type
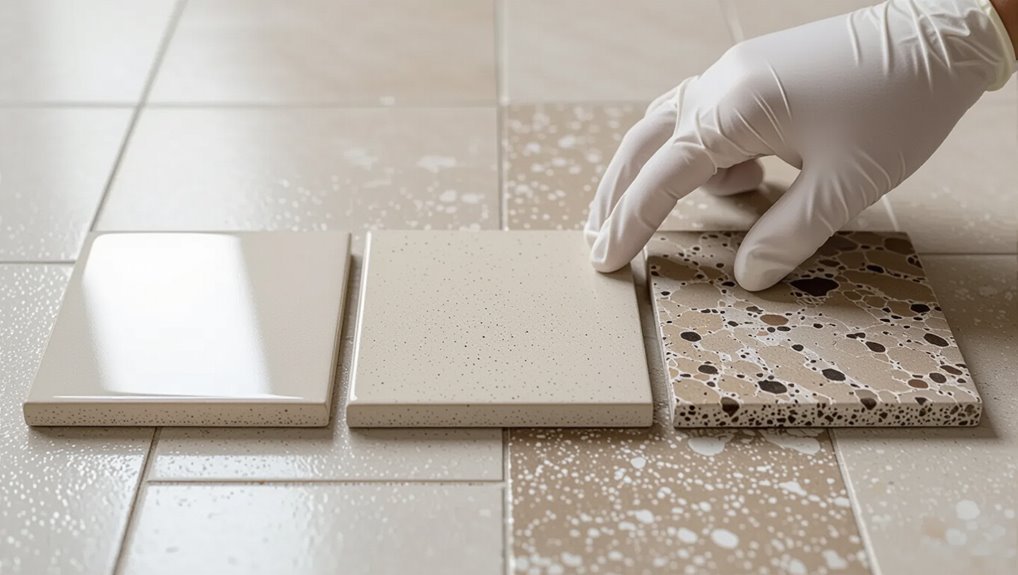
Before you start removing paint, determine what kind of tile you’re working with so you can choose a safe, effective method.
Check ceramic tiles and porcelain tiles for glazing, inspect vinyl tiles’ surface, and identify natural stone porosity.
Note textured surfaces, grout types, and tile finishes—matte or glossy—and tailor tile maintenance accordingly so you won’t damage the surface or grout when treating stains.
Immediate Steps to Remove Fresh Paint (Do This First)
Act quickly: wet paint is far easier to remove than dried, so grab a damp cloth or paper towel and blot—don’t rub—to lift as much pigment as you can without spreading it.
For immediate action, scrape excess with a plastic scraper, then use mild soap and water. These paint removal techniques prevent staining; rinse and dry the area, repeating blotting until paint lifts.
Test Whether Paint Is Fresh, Dried, or Cured
Sometimes you’ll need to know whether paint on your tile is still wet, just dried, or fully cured before choosing a removal method.
Lightly touch a hidden spot: tacky means fresh; dry but soft suggests curing; hard, non-marking surface indicates cured.
Use paint freshness indicators like sheen and stickiness and consult the paint curing timeline on the can to pick a safe removal approach.
Quick Supplies Checklist
Grab a small kit of essentials so you can tackle paint stains on tile without hunting for tools mid-job: rubber gloves, safety goggles, a utility knife or razor scraper, plastic putty knife, microfiber cloths, paper towels, bucket, mild detergent, rubbing alcohol or acetone (for oil-based paints), a commercial paint remover safe for your tile type, a stiff nylon brush, and a few test tiles or cardboard to try cleaners first.
Keep a compact kit—gloves, scraper, cloths, mild cleaner, solvent and a test tile—so paint stains on tile are handled fast and safely.
- Prioritize safety and tile care tips.
- Keep cleaners labeled and separate.
- Test paint removal techniques on scrap.
- Replace worn cloths and brushes promptly.
Tools for Scratch-Free Scraping
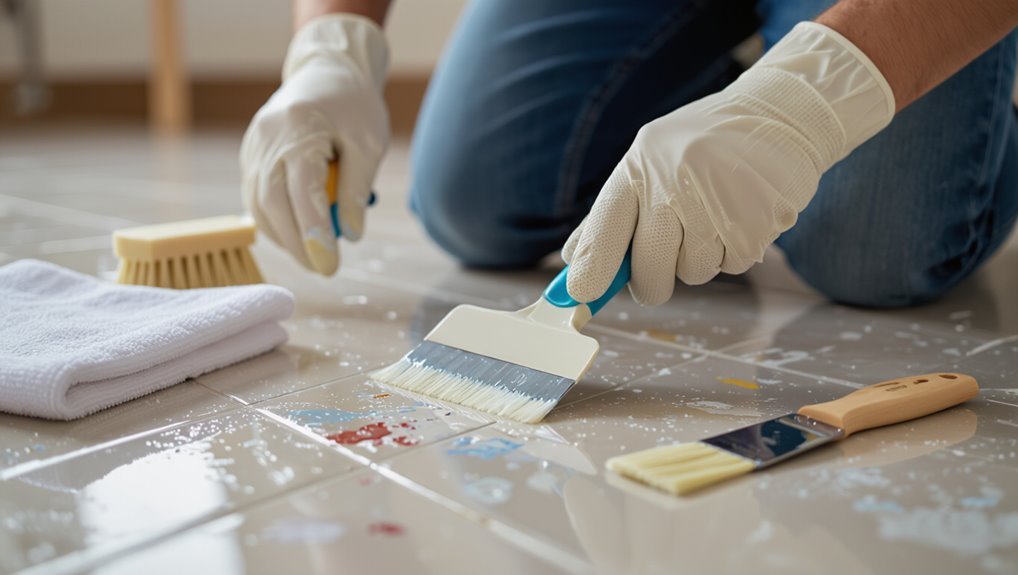
When you’re removing paint from tiles, pick tools that won’t scratch the surface.
Use soft plastic scrapers for lifting stubborn spots, nylon scrub brushes for gentle abrasion, and felt-tipped putty knives for precision along grout lines.
These choices help you remove paint effectively while protecting your floors.
Soft Plastic Scrapers
If you want to lift dried paint without scratching tile, a soft plastic scraper is your go-to tool; it lets you apply firm leverage while protecting grout and glaze.
You’ll appreciate soft plastic benefits: flexible edges, non-marring contact, and easy cleaning.
Choose best scraper types for corners and curved grout.
- Flat blade
- Angled tip
- Mini scraper
- Scraper with handle
Nylon Scrub Brushes
Nylon scrub brushes give you a scratch-free way to loosen paint from tile and grout; their stiff but nonabrasive bristles cut through dried splatters without dulling glaze.
You’ll find nylon brush benefits include durability, chemical resistance, and gentle scrubbing power.
Choose among nylon brush types—handheld, angled, or long-handle—so you can access grout lines and corners while protecting finishes and working comfortably.
Felt-Tipped Putty Knives
Reach for a felt-tipped putty knife when you need to lift dried paint without scratching tile or grout—the soft, cushioned edge peels away flakes while the rigid core gives you control for precise scraping.
You’ll appreciate the felt tipped benefits for delicate surfaces and improved scraping techniques.
- Test on an inconspicuous spot.
- Use light, consistent pressure.
- Angle blade under edges.
- Wipe residue promptly.
Solvents and Cleaners: What to Use When
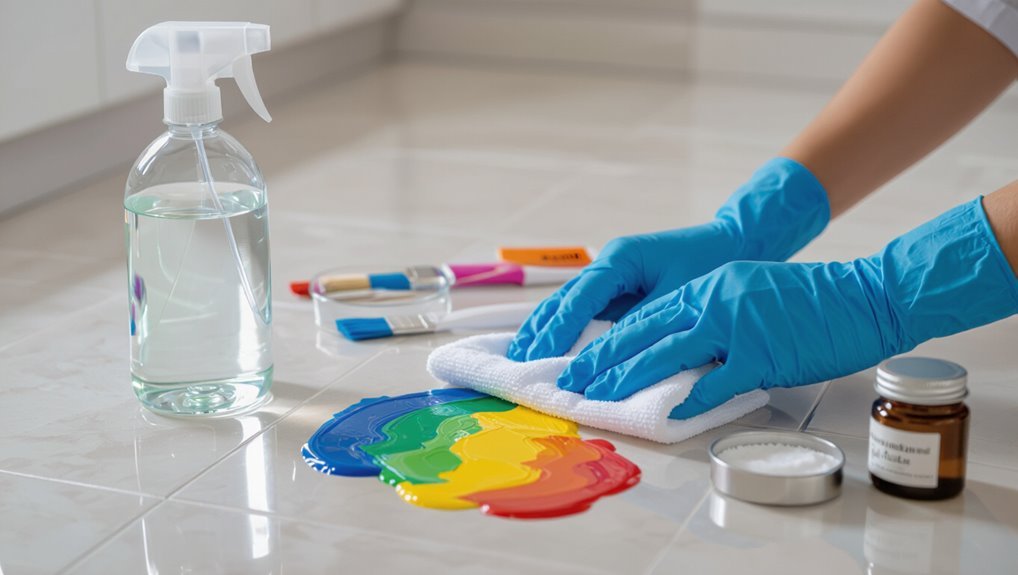
First, figure out what kind of paint you’re dealing with—latex, oil-based, or enamel—because that determines which solvent will work.
Then pick a compatible cleaner (water and mild detergent for latex; mineral spirits or paint thinner for oil-based) and use the weakest effective option.
Always test the solvent on an inconspicuous spot and rinse the area thoroughly after treatment.
Identify Paint Type
Wondering which solvent will actually work on that spill? You’ll first identify paint type by checking labels, texture, and drying: oil, latex, enamel, or acrylic.
Knowing paint characteristics guides safe paint removal steps without guessing. Quick tests (inconspicuous spot) confirm solubility. Follow with proper cleaner choices in the next section.
- Examine can labels
- Test texture
- Observe drying behavior
- Try small spot test
Choose Appropriate Solvent
Now that you’ve identified the paint type, pick a solvent that matches its chemistry and your tile’s finish.
Choose water-based removers for latex, mineral spirits for oil-based, and acetone for tougher enamel, considering sealed or porous tile.
For safe solvent selection, read labels, wear gloves and ventilate.
Apply small amounts with a cloth, using proper application techniques to avoid surface damage.
Test And Rinse
Before you apply a solvent across a whole tile, test it on an inconspicuous spot to confirm it won’t dull, strip, or stain the finish; if the small area reacts poorly, switch to a gentler product.
- Try quick test methods: dab solvent, wait, inspect.
- Note any discoloration or softening.
- Use proper rinse techniques: clear water, microfiber.
- Repeat tests before treating larger areas.
Cleaners to Avoid on Tile and Grout
While it may seem like any household cleaner will work in a pinch, some products can permanently damage tile and grout. You should avoid abrasive powders, acidic cleaners (like vinegar or grout cleaners with high acid content), bleach-based formulas, and oil-based solvents, since they can dull finish, etch stone, or break down grout sealants.
Don’t use harsh cleaning agents or abrasive materials; opt for pH-neutral solutions instead.
Prep: Sweep, Mop, and Protect Surroundings
Since loose dirt and grime can turn a paint-removal job into a bigger mess, sweep the area thoroughly and give the tiles a quick mop with a mild, pH-neutral cleaner so you’re working on a clean surface.
Then focus on tile protection and surface preparation:
- Move furniture away.
- Tape baseboards.
- Lay drop cloths.
- Keep ventilation open.
Remove Wet Latex Paint (Step-by-Step)
If you spill latex paint, act fast and blot the wet spot with a clean cloth—don’t rub or you’ll spread it.
Use a mild detergent mixed with warm water to lift what’s left, working from the edges toward the center.
Repeat blotting and rinsing until the stain’s gone.
Act Fast Immediately
When you catch wet latex paint on your tiles, act immediately to prevent it from drying and bonding to the grout—quick removal saves effort and preserves the finish.
You’ll want instant cleanup and swift actions:
- Gather a damp cloth, mild detergent, and a plastic scraper.
- Loosen edges gently with the scraper.
- Wipe with the cloth, rinsing often.
- Repeat until residue’s gone.
Blot, Don’t Rub
After loosening and lifting as much paint as you can, resist the urge to scrub—blotting is your next move.
Use a clean, absorbent cloth and press firmly to transfer paint, repeating with fresh cloths to prevent re-smearing. This blot technique minimizes spreading and maximizes paint absorption.
Keep blotting until no more transfer occurs, then let the tile air-dry before inspecting.
Use Mild Detergent
1 Start by mixing a few drops of mild dish soap with warm water in a bucket or bowl to create a gentle cleaning solution. You’ll use mild detergent benefits to lift wet latex without harming grout.
Apply, wait, then blot with a microfiber cloth. Follow these tile cleaning techniques:
- Dampen cloth
- Blot paint
- Rinse area
- Dry thoroughly
Remove Partially Dried Latex Paint
Start gently scraping the softened edges with a plastic putty knife or credit card to lift as much partially dried latex paint as you can without scratching the tile.
Dampen a microfiber cloth with warm soapy water or rubbing alcohol, wipe gently, and repeat.
For stubborn spots, apply a little commercial latex paint removal product, then rinse and dry, preserving tile surface protection throughout.
Remove Dried Latex Paint From Glazed Tile
If the latex is fully dry, start by evaluating how thick the paint layer is so you can choose the right approach.
For thin flakes you can often scrape gently, but thicker buildup may need a mild solvent like isopropyl alcohol or a commercial latex remover tested in an inconspicuous spot.
Always work cautiously to protect the glaze and rinse the area thoroughly after treatment.
Assess Paint Thickness
Wondering whether the stain is a thin smudge or a thick, crusted layer? You’ll do a paint thickness evaluation and paint stain assessment by inspecting edges, tapping to test adhesion, scraping gently with a plastic blade, and noting color opacity.
Use this numeric checklist to guide your approach:
- Visual edge inspection
- Tap adhesion test
- Gentle plastic scrape
- Note opacity and coverage
Use Gentle Solvents
When the paint’s dried but not fully cured into the grout or glaze, you can soften it with a gentle solvent to lift it without damaging the tile; choose products labeled safe for glazed ceramic or porcelain and test a small, inconspicuous area first.
Apply solvent sparingly, wait, then gently scrape with a plastic tool. Rinse thoroughly, repeat if needed, and follow manufacturers’ instructions for safe application.
Remove Oil‑Based Paint From Tile
Tackle oil‑based paint on tile by acting promptly and choosing the right solvent for the job.
You’ll use paint removal techniques that respect tile finish and follow stain prevention strategies to avoid spreading.
Test solvent in an inconspicuous spot, work gently with a plastic scraper, and rinse thoroughly.
- Choose solvent
- Test first
- Scrape gently
- Rinse well
Remove Cured Epoxy or Enamel Spots
If epoxy or enamel has fully cured on your tile, you’ll need stronger methods than ordinary cleaners—start by softening the spot, then remove it carefully to avoid damaging the finish. Use acetone or a commercial stripper, test first, scrape gently, and finish with mild cleaner. Focus on epoxy removal techniques and enamel spot solutions.
| Tool | Action |
|---|---|
| Acetone | Soften |
| Scraper | Lift |
| Cleaner | Restore |
Use Heat Safely to Loosen Paint
You can soften stubborn paint by warming it first.
Use a hair dryer on high for small spots, keeping it a few inches away and moving constantly so you don’t overheat the tile.
For tougher patches, carefully apply a heat gun on a low setting and never leave it in one place to avoid cracking or discoloration.
Use A Hair Dryer
Warm the paint with a hair dryer set on low to medium heat, holding it a few inches away and moving it steadily so the paint softens without overheating the tile.
- Choose appropriate heat settings to avoid damage.
- Maintain proper drying distance—about 3–6 inches.
- Work small areas, softening paint before wiping.
- Use a plastic scraper and a cloth to lift softened paint gently.
Apply A Heat Gun
Apply a heat gun carefully to soften stubborn paint so it lifts more easily from tile grout and edges.
You’ll keep the gun moving, hold it several inches away, and test a small spot first.
Use heat application only as needed, wear gloves and eye protection, ventilate the area, and follow safety precautions to avoid scorching tiles or igniting fumes while prying softened paint gently.
Scraping Without Scratching: Technique
Start by loosening the paint edges with a gentle push from a plastic or rubber scraper held at a shallow angle, and work slowly to lift flakes without gouging the tile.
Use careful scraping techniques and focus on scratch prevention.
- Hold scraper flat, low angle
- Apply light, steady pressure
- Remove softened paint in small sections
- Wipe residue with a damp cloth
Use Rubbing Alcohol and Acetone on Tile
If scraping left thin smears or stubborn spots, you can move on to solvents like rubbing alcohol and acetone to dissolve what’s left.
Test a hidden tile area first, wear gloves, and work in a ventilated space.
Always patch-test, wear gloves, and ensure good ventilation before using solvents on tile surfaces.
Dampen a cloth with rubbing alcohol for water-based paint; use acetone usage sparingly for tougher spots.
Rinse and dry thoroughly after removal.
Mineral Spirits and Paint Thinner: Safe Use
When tougher oil-based paints or stubborn smears resist rubbing alcohol and acetone, reach for mineral spirits or paint thinner but handle them carefully: wear gloves, work in a well-ventilated area, and test a hidden tile first to make sure the solvent won’t dull the finish.
- Use small amounts.
- Maintain proper ventilation.
- Wipe with a soft cloth.
- Dispose rags safely per safety precautions.
Natural Remedies That Actually Work
You can tackle paint spots with simple kitchen supplies that won’t harm your tiles.
Try a vinegar-and-baking-soda paste for lifting dried paint, lemon juice for brightening and breaking down water-based stains, and a bit of olive oil to soften stubborn flakes before scraping.
I’ll show how to use each one safely and effectively.
Vinegar And Baking Soda
1 simple, inexpensive mixture of vinegar and baking soda can loosen and lift many paint stains from floor tiles without harsh chemicals.
You’ll sprinkle baking soda, spray diluted vinegar, let fizz, then gently scrub with a soft brush. Rinse and repeat for stubborn spots.
Tips:
- Test small area
- Use 1:1 vinegar benefits ratio
- Don’t scrub grout hard
- Dry thoroughly
Lemon Juice Power
Although it’s gentle, lemon juice packs natural acidity that can dissolve water-based paint and brighten tile without harsh chemicals. You’ll squeeze fresh lemon, apply, let sit, then scrub gently to lift stains. Enjoy lemon juice benefits for safe, effective natural cleaning.
| Step | Action |
|---|---|
| 1 | Squeeze lemon |
| 2 | Apply juice |
| 3 | Wait 5–10 min |
| 4 | Scrub gently |
| 5 | Rinse dry |
Olive Oil Softening
Olive oil works surprisingly well to soften dried paint spots on floor tiles by loosening the film so you can wipe it away; you’ll use its olive oil benefits for gentle paint removal without harsh chemicals.
Apply, wait, and scrape gently, then clean with soap.
- Apply oil
- Wait 10–15 min
- Scrape gently
- Wash and dry
Choose a Commercial Paint Remover for Tile
When you’re dealing with paint on tile, a commercial paint remover can save time and effort — but you need one that’s formulated for tile surfaces and safe for your grout.
Pick a product with clear instructions, check compatibility with your tile finish, and look for eco friendly options if ventilation is limited.
Test a small spot to confirm product effectiveness before treating the whole area.
Working With Textured or Porous Tile
Textured or porous tile soaks up paint and hides splatters in crevices, so you’ll need a different approach than for smooth surfaces.
You’ll work patiently, testing small areas and using gentle agitation to lift paint without damaging the tile.
- Use soft brushes to tease paint from textured tile.
- Apply solvent sparingly on porous tile.
- Blot, don’t rub, to avoid spreading.
- Rinse and repeat as needed.
Remove Paint From Grout Without Weakening It
Because grout is softer than tile, you’ll need a gentler touch to lift paint without eroding the joint lines; work slowly, choose mild cleaners, and test a hidden spot first to confirm the method won’t weaken the grout.
Use a soft nylon brush, diluted dish soap or pH-neutral cleaner, and a plastic scraper. Rinse thoroughly, dry, and apply grout protection to prevent future paint adhesion.
Cleanup for Unglazed and Quarry Tile
Unglazed and quarry tiles soak up liquids differently, so first check the porosity by placing a few drops of water on an inconspicuous spot to see how quickly it absorbs.
Once you know how porous the tile is, pick a remover that’s formulated for porous masonry—harsh solvents can penetrate and damage the tile.
Test the chosen product on a hidden area before treating the stain to confirm it works without harm.
Assess Tile Porosity
Start by identifying whether your tiles absorb water—this determines how aggressive your cleanup must be.
Test tile absorption with a few drops; faster soaking means higher risk of paint penetration. For unglazed or quarry tile, note surface texture and stains.
- Drop test
- Observe soak time
- Check grout porosity
- Photograph stains for reference
Choose Correct Remover
When dealing with unglazed or quarry tile, pick a remover that matches the tile’s porosity and the paint type so you won’t drive pigment deeper into the surface.
Test small areas first.
Choose from paint remover options like citrus or low-VOC gel for latex, stronger solvent for oil-based spots.
Prefer eco friendly solutions when possible, and rinse thoroughly to avoid residue.
When to Use an Orbital Sander or Buffer
Although both tools remove stubborn paint, you’ll choose an orbital sander when you need controlled, even abrasion across a flat tile surface and a buffer when you’re polishing or working large areas quickly. Each has distinct grit, pad, and speed considerations that affect results and risk of damage.
Use orbital sander tips and learn buffer benefits:
- Start with low grit.
- Test an inconspicuous spot.
- Keep the tool moving.
- Wear eye and respiratory protection.
Prevent Color Bleed and Grout Staining
Before you start painting, seal tile edges and grout lines to stop pigment from soaking in.
Use painter’s tape along seams and baseboards for crisp edges and extra protection.
If a drip happens, wipe it up immediately with a damp cloth to prevent staining.
Seal Tile Edges First
Since paint can seep into grout and stain irreversibly, seal the tile edges first to block any bleed and protect the grout lines.
You’ll choose appropriate sealant types for edge protection and work methodically so spills won’t penetrate.
Follow these steps:
- Clean and dry edges thoroughly.
- Apply chosen sealant evenly.
- Smooth seams for a tight barrier.
- Let cure fully before working.
Use Painter’s Tape
When you’re ready to paint, press painter’s tape firmly along tile edges and grout lines to create a clean barrier that prevents color bleed and keeps grout stain-free.
You’ll enjoy painter’s tape benefits like crisp lines and easier cleanup when you follow proper application: smooth edges, overlap corners, and remove tape while paint is tacky.
This simple step saves time and protects grout.
Wipe Spills Immediately
Spills happen, so wipe them up the moment paint lands on your tiles to stop color from seeping into grout and leaving a stubborn stain.
You should act fast, knowing different paint types need specific cleaning techniques.
- Blot excess with a paper towel.
- Use mild soap and water for water-based paint.
- Apply solvent for oil-based paint cautiously.
- Rinse and dry thoroughly.
Rinse and Neutralize Solvents Properly
Before the solvent has time to spread or leave residues, rinse the area thoroughly with clean water and blot with a microfiber cloth to lift remaining solvent and loosen paint particles.
You should follow solvent safety guidance, wear gloves, and ventilate the room.
Use gentle rinse techniques, change water as it soils, then neutralize with a mild detergent solution before drying completely.
Repair Scratches and Dull Spots After Cleaning
Inspect the tile surface closely for fine scratches, scuffs, or areas that look dull after cleaning, because addressing these now will restore shine and prevent dirt from settling into damaged spots.
Inspect tiles carefully for fine scratches, scuffs, or dull spots—fixing them now restores shine and keeps dirt out.
- Buff minor scratches gently with a soft pad for basic scratch repair.
- Use a fine abrasive for light scuffs, then polish.
- Apply a recommended tile restoration product sparingly.
- Reinspect and repeat as needed for even finish.
Seal and Protect Tile and Grout Afterward
Once you’ve repaired scratches and restored the shine, seal the tile and grout to lock in your work and keep dirt and moisture out.
Choose a penetrating sealer for tile sealing and a separate product for grout protection. Apply evenly, follow cure times, and avoid traffic until set.
For maintenance tips, clean gently and reseal per manufacturer instructions to guarantee long term care and durability.
Small-Spot vs Full-Floor Strategies and Timing
Decide whether to tackle just the affected spots or the whole floor based on the paint amount, tile condition, and how long the stains have set; small-spot cleaning works well for isolated drips or fresh splatters, while full-floor treatment is wiser for widespread staining, aged discoloration, or when restoration will change texture or finish across the room.
- Inspect extent for spot cleaning.
- Test a small area.
- Schedule floor restoration if widespread.
- Time work to avoid heavy traffic.
Cost Estimate: DIY Supplies vs Pro Cleanup
After you’ve chosen spot treatment or full-floor restoration, weigh the costs of doing it yourself against hiring a pro.
Estimate DIY cost for cleaners, scrapers, pads and protective gear; factor material quality and your cleanup time.
Compare professional pricing including labor expenses and equipment.
Match choices to project scale: small spots often favor DIY, larger or delicate tile may justify paying for a pro.
When to Call a Professional Restorer
If the stain covers a large area, involves multiple layers of paint, or sits on porous or delicate tile like unglazed ceramic or natural stone, call a professional restorer—these situations need specialized tools, stronger chemical treatments, and expertise to avoid permanent damage.
- You spot deep paint damage across grout.
- DIY attempts worsen finish.
- Time or tools are lacking.
- You want professional restoration and warranty.
Common Mistakes That Make Paint Damage Worse
Because haste and the wrong tools can turn a fix into a disaster, you should avoid common mistakes that make paint damage worse: scrubbing with wire brushes or abrasive pads, using high‑strength solvents on untested surfaces, sanding glazed or porous tiles without knowing the finish, and ignoring paint in grout lines where it hides and spreads.
| Fear | Regret | Relief |
|---|---|---|
| scratched tile | ruined finish | saved tile |
| chemical burn | stubborn stain | proper cleaning |
Check paint type identification to prevent common cleaning mistakes.
Quick Before-You-Start Checklist
Start with a quick walkthrough of the area so you know what you’re dealing. Confirm tile type and dry vs. fresh paint, and note any nearby rugs or vents.
Check supplies and safety gear, and plan paint protection placement.
- Identify tile material.
- Assess paint age and thickness.
- Gather cleaners, scrapers, cloths.
- Clear and tape off surrounding areas for proper surface preparation.
Habits to Prevent Future Paint Splatters
When you establish simple, consistent habits—like laying down drop cloths, keeping a damp rag nearby, and using painter’s tape along edges—you’ll cut splatters dramatically and make cleanup quick.
Plan each job, gather tools, and set up containment. Keep brushes and rollers on trays, wipe drips immediately, and schedule short breaks to tidy.
These paint prevention tips and clear project planning save time and mess.
Frequently Asked Questions
Can Paint Fumes Trapped in Grout Pose Health Risks Long-Term?
Yes — chronic fume exposure trapped in grout can harm you long-term; you’ll experience respiratory, neurological, or dermatitis issues, so prioritize grout maintenance, ventilate, clean residues, and use proper PPE to reduce lasting health risks.
Will Removing Paint Affect Underfloor Heating Systems?
Yes — you can remove paint without harming underfloor heating if you use gentle methods; harsh scraping or heat guns can reduce paint adhesion and temporarily lower heating efficiency, so test small areas and avoid excessive force or temperature.
How to Document Damage for Insurance Claims After Paint Removal?
Document damage ASAP with photos, timestamps, and notes; complete a damage assessment checklist, keep repair estimates and receipts, and file everything promptly to support the claim process — you’ll speed approval and avoid disputes.
Can Pets Spread Solvent Residues After Cleanup?
Like a wind spreading seeds, yes — you can carry solvent residues on paws, fur, or paws’ prints, so you’ll clean thoroughly, isolate pets, and monitor for pet safety to prevent solvent exposure and accidental ingestion or skin contact.
Is Replacing a Single Damaged Tile Better Than Refinishing the Whole Floor?
You’ll usually choose tile replacement benefits when damage’s localized; it’s faster, cheaper, and preserves aesthetics. But cost comparisons matter—extensive wear or mismatched tiles often make refinishing or full replacement the more economical, cohesive option.
