
How to Separate Paint Colors on the Same Wall With Clean Transitions
You can get crisp or soft color separations by planning your line, prepping the surface, and using the right tools. Clean, patch, sand, and prime so both paints adhere evenly. Measure and snap a level chalk line, apply low‑tack painter’s tape, then seal the tape edge with base paint to stop bleed. Paint the bold color first, use thin coats, and remove tape at a 45° angle while tacky. Keep going for tips on sealing, feathering, and fixes.
Quick Answer: How to Get a Crisp Two‑Color Wall
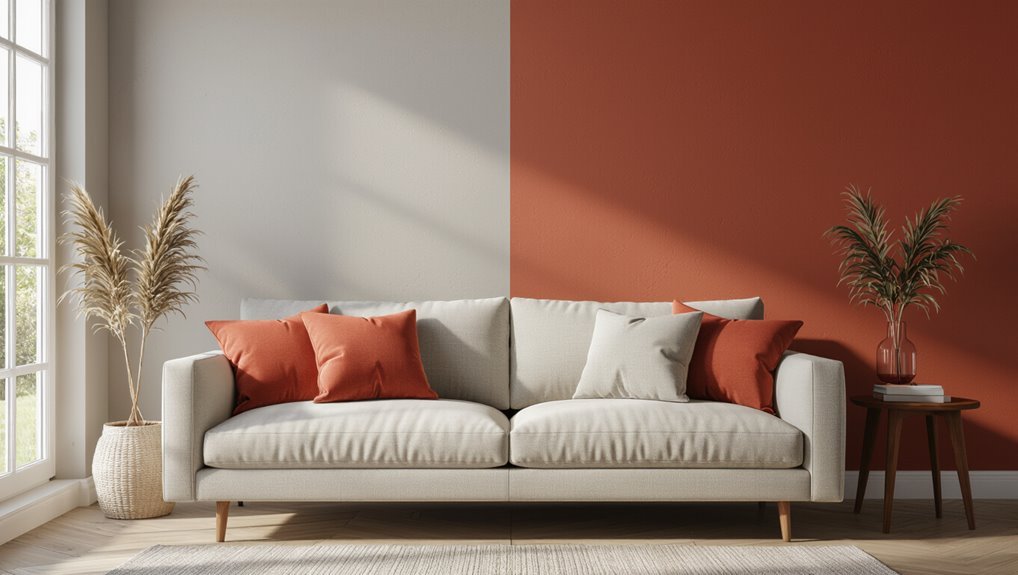
Start by planning your line and prepping surfaces: clean the wall, fill any holes, sand rough spots, and apply primer where needed so paint adheres evenly.
Choose tape and level for a sharp edge, paint the base, remove tape partially while wet, then finish the second color.
Consider color theory for balance and contrast to enhance wall aesthetics and create a deliberate split.
When to Split a Wall: Use Cases & Design Goals
Think about whether you’re separating a ceiling from a wall, carving out functional zones, or highlighting an accent versus a background.
You’ll choose different techniques and heights depending on if the split’s structural (ceiling line), practical (seating area, workspace), or purely decorative.
Knowing the goal up front makes it easier to pick colors and a crisp method that suits the space.
Ceilings Versus Walls
Splitting a wall and ceiling color can instantly change how a room reads—use a matching or slightly lighter ceiling to lift the space, or a contrasting ceiling to create drama and define zones.
You’ll consider ceiling designs and wall finishes together: coordinate sheen, trim, and texture so shifts look intentional.
Paint darker ceilings to cozy, lighter ones to expand, keeping proportions and light in mind.
Functional Zone Division
After you’ve considered how ceiling color affects a room, use wall splits to define how the space functions.
You’ll create functional zones via color blocking to improve room functionality and space perception.
Apply color theory and paint psychology for mood influence and visual impact, ensuring design harmony and aesthetic balance.
Use contrasts deliberately so each zone supports purpose without jarring the overall scheme.
Accent Versus Background
When you want a wall to sing or simply recede, decide whether an accent or background treatment will serve your goal: accents draw the eye and define focal points—great for highlighting architectural features or a reading nook—while background colors support the room’s overall mood and let furnishings stand out.
- Use accent walls for visual hierarchy and mood enhancement.
- Apply color theory for space perception.
- Balance contrast techniques with design balance.
- Leverage color psychology to guide emotion.
Picking Complementary Colors and Contrast Levels
Although you can pair almost any hues, choosing complementary colors and the right contrast level determines whether the division on your wall feels intentional or accidental.
Use color psychology to decide mood—calming blues or energetic oranges—and apply color harmony principles to balance warmth and coolness.
Test swatches at different lighting, vary contrast for subtle or bold separation, and trust your eye for cohesion.
Prepare the Wall: Clean, Patch, Prime
Before you tape off and roll, clean the wall thoroughly so dust and grease won’t interfere with adhesion.
Patch holes and sand them smooth so the color change looks crisp.
Then apply a suitable primer to guarantee the new paint sticks and the colors read true.
Clean Surface Thoroughly
Start by removing dust, grease, and loose paint so your new colors stick and lines stay crisp.
You’ll focus on surface preparation and proven cleaning techniques to guarantee adhesion and a flawless edge.
Use these steps to feel confident and proud:
- Wipe with mild detergent.
- Rinse and dry thoroughly.
- Degrease stubborn spots.
- Sand lightly for grip.
Patch Holes Smoothly
With the surface clean, you can move on to smoothing out holes and dents so paint lays flat and colors meet sharply.
Choose patch techniques based on size: spackle for hairline cracks, joint compound for larger gouges, and fiberglass tape for holes.
Sand flush after drying, remove dust, and inspect for imperfections.
Proper wall smoothing guarantees crisp shifts between adjacent paint colors.
Prime For Adhesion
Seal the surface with a quality primer to guarantee the new paint sticks evenly and the colors stay true where they meet.
You’ll boost adhesion techniques and choose primer types that match surface and paint.
Follow this emotional checklist to feel confident:
- Inspect for dust and oils.
- Sand glossy spots.
- Apply uniform primer coat.
- Let cure fully before taping and painting.
Measure and Mark Your Transition Lines Accurately
Before you tape or cut in, measure and mark your boundary lines precisely so your colors meet cleanly and look intentional.
Use a level and straightedge, measure from fixed reference points, and mark faint pencil guides.
Think through changeover techniques—hard edge, taped line, or feathered blend—and prioritize marking accuracy to guarantee repeatable, crisp results when you apply paint.
Essential Tools and Materials Checklist
Before you tape and paint, make sure you’ve picked the right painter’s tape for your surface and edge sharpness.
Gather cutting-in tools like angled brushes and a good edger, plus sandpaper, spackle, and a tack cloth for surface prep. Having these materials on hand will keep your color separation crisp and save time.
Painter’s Tape Types
Painter’s tape is the unsung hero of clean lines when you’re separating paint colors on the same wall—pick the right type and you’ll avoid bleeding, adhesive residue, and uneven edges.
Choose tape based on tape durability and tape adhesion for your surface and paint.
- Delicate-surface
- Multi-surface
- High-adhesion
- Exterior-grade
Cutting-In Tools
1 essential set of cutting-in tools will make the difference between crisp, professional-looking edges and a messy border where colors meet.
You’ll need angled cutting in brushes, a small trim brush, a steady edger, and a quality paint cup.
Practice cutting in techniques with these tools, keep brushes clean, and replace worn brushes to maintain sharp lines between adjacent paint colors.
Surface Preparation Supplies
Once your cutting-in tools are ready, you’ll want the right surface preparation supplies to guarantee paint adheres cleanly and colors meet without flaws.
Gather items tailored to surface types and paint finishes so shifts feel intentional, not messy.
- Sandpaper (various grits)
- Degreaser/cleaner
- Patch compound & putty knife
- High‑quality primer
Choose the Right Painter’s Tape for Sharp Edges
Not all tape gives you a crisp line—so pick a low-tack, paint-specific tape sized for your surface and paint type to prevent bleed and damage.
Test tape adhesion on a hidden spot, press edges firmly, and choose the correct width for corners.
Remove tape slowly at a 45° angle within the paint’s recoat window to guarantee clean tape removal without peeling fresh paint.
Tape Placement for Straight Horizontal Lines
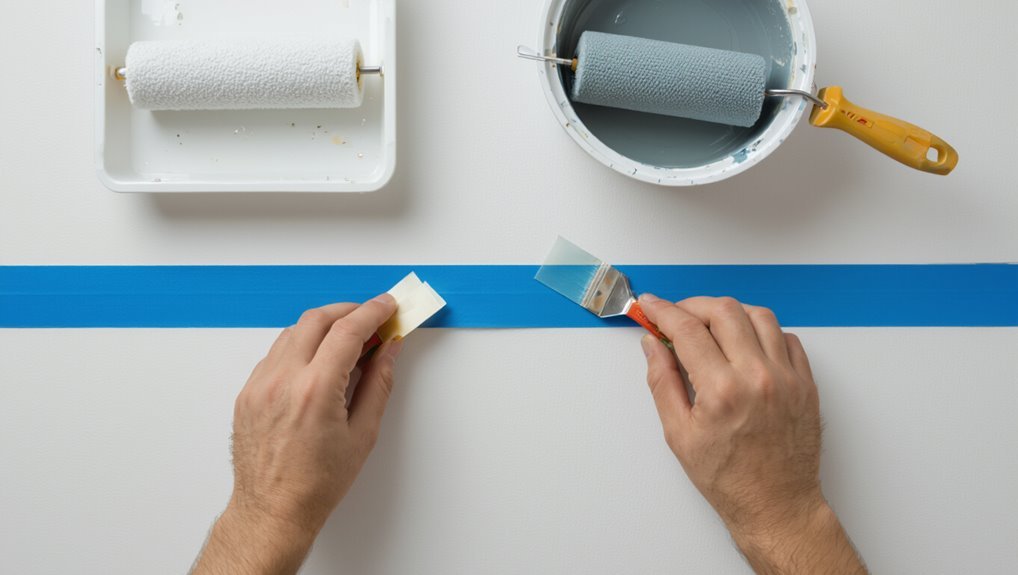
Measure and mark your guideline across the wall at eye level using a laser level or a chalk line so your horizontal paint edge stays perfectly straight.
Use precise tape techniques and alignment tips to press tape down firmly, sealing edges.
You’ll feel confident as you:
- Smooth the tape
- Burnish the edge
- Paint the top coat
- Remove tape at angle
How to Get Crisp Vertical Lines
Start by marking a straight plumb line from ceiling to baseboard—use a laser level or a weight-and-string—to give yourself an exact vertical guide. Mask along the line, press tape edge firmly, and seal with a thin clear coat for paint layering control. Remove tape while tacky. Confirm vertical alignment by checking top, middle, bottom.
| Step | Action | Tip |
|---|---|---|
| 1 | Mark | Laser |
| 2 | Tape | Seal |
| 3 | Remove | Tacky |
Use a Level, Laser, or Chalk Line for Perfect Alignment
Choose the right alignment tool—level, laser, or chalk line—based on the wall size and the precision you need, and set it up so the reference line runs exactly where the two colors will meet.
You’ll love the control:
- level alignment — steady confidence
- laser precision — futuristic certainty
- chalk guidance — tactile reassurance
- changeover accuracy — satisfying finish
Seal Tape Edges With Base Paint to Stop Bleed
Once your guide line’s set, press painter’s tape down firmly and seal its edge with the base color before you roll on the new shade.
You’ll guarantee tape application is tight and any gaps are filled by matching paint consistency to the base.
Let that seal dry fully; it creates a polymer barrier so the contrasting color won’t bleed under the tape edge.
Brush and Roller Techniques for Painting to the Tape
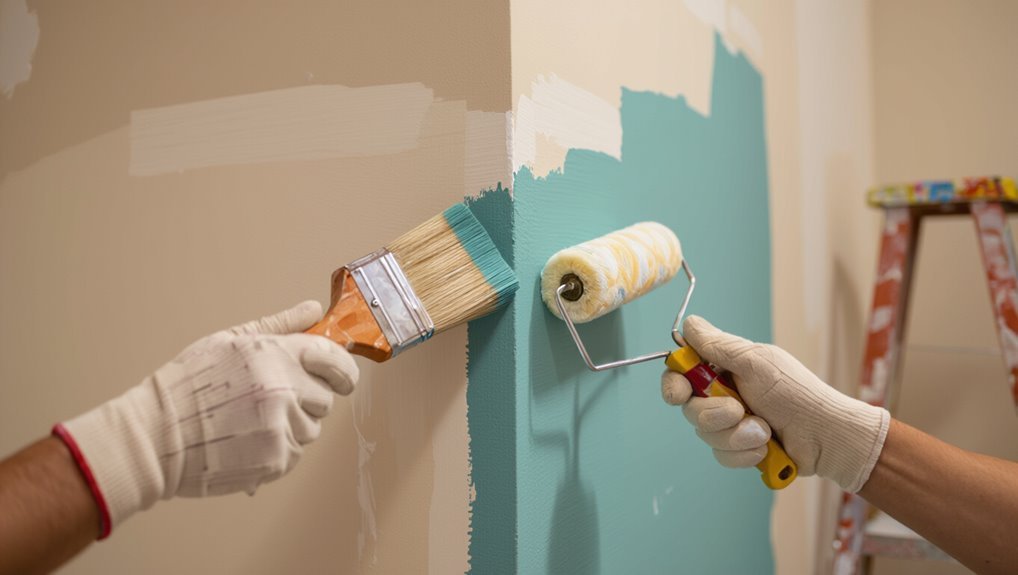
Work the brush and roller toward the tape, not away from it, so you press paint into the sealed edge and avoid lifting or flicking color under the tape.
Use precise brush techniques and roller methods to control pressure and overlap.
Follow this emotional, focused checklist:
- Calm
- Confident
- Deliberate
- Satisfied
Which Color to Paint First : And Why?
Because darker or stronger hues are likelier to show through lighter paints, start with the bolder color first so you can seal its edge and prevent bleed-through when you tape and paint the lighter shade.
For smart color selection and an efficient painting sequence, apply the dominant shade, let it cure, then tape and roll the lighter tone. That order minimizes touch-ups.
Feathering vs Blocking: Soft Blends vs Hard Edges
If you want a seamless shift between two hues, feathering softens the join with gradual strokes and blended edges, while blocking gives you crisp, defined lines that make each color read independently.
Use feathering techniques for subtle paint alterations; blocking methods suit bold edge definitions and strong design aesthetics.
Choose based on mood, room light, and desired blending colors.
- Calm
- Bold
- Cozy
- Dramatic
Paint Geometric Shapes and Stripes Without Stencils
Start by sketching your shapes and marking exact lines on the wall so you know where each color stops and starts.
You can get crisp, tape-free edges by using a putty knife or a straightedge as a barrier while you roll or brush.
Work from the largest shapes to the smallest, letting paint cure enough to avoid smudging adjacent areas.
Plan Shapes And Lines
When you plan shapes and lines, sketching them first on paper or with a light pencil on the wall keeps proportions and angles consistent; this lets you adjust sizes and placement before committing paint.
You’ll choose plan types and line styles to match mood and scale. Consider feelings each choice evokes:
- Bold—confident
- Soft—calm
- Angular—energetic
- Curved—gentle
Tape-Free Sharp Edges
Although it seems counterintuitive, you can get crisp, geometric edges without tape or stencils by relying on careful brush technique, precise masking with removable materials, and controlled paint consistency. You’ll learn tape alternatives and edge techniques: practice steady strokes, use low-nap rollers, peel masking at tack stage, and clean up with a fine brush for flawless, tape-free sharp edges.
| Tool | Purpose | Tip |
|---|---|---|
| Brush | Detail | Angle bristles |
| Roller | Fill | Low nap |
| Masking | Edge | Peel early |
| Cleanup | Refine | Fine brush |
Manage Drying and Wet Edges to Avoid Smudges
Because paint stays tacky longer than you expect, you’ve got to plan your timing and technique to keep wet edges from smudging adjacent colors.
Focus on wet edge management and monitor drying times. Do this:
- Work in small sections to reduce stress.
- Use thinner coats for faster curing.
- Keep airflow steady, not blasting.
- Pause between colors to confirm tack-free edges.
Remove Tape at the Right Time and Angle
If you wait until the paint’s just set, you’ll get the cleanest lines: pull tape while the paint is firm but not fully cured so it lifts cleanly instead of tearing or pulling dried paint.
Use steady tape removal techniques, peeling back slowly at a 45-degree angle.
Watch angle considerations: too steep rips paint, too flat peels tape residue.
Work section by section.
Fixing Bleeds, Jagged Lines, and Quick Touch‑Ups
If you notice paint bleeds after removing the tape, catch them quickly before the paint fully cures so you can blot or scrape them away.
For jagged edges, use a small angled brush or a razor blade to feather and straighten the line, then recoat with a steady hand.
Quick touch‑ups are easiest when you wipe the area clean, let it dry, and apply thin layers until the edge looks sharp.
Prevent Paint Bleed
Preventing paint bleed is mostly about preparation and quick correction—get the edges clean, seal the tape, and have touch‑up tools ready.
You’ll consider paint types and wall textures, press tape firmly, and use a fingertip caulking trick for tiny gaps.
Keep a small brush for fixes so you don’t panic.
- Prep
- Seal
- Check
- Touch‑up
Smooth Jagged Lines
1 quick pass with the right tools can turn a jagged, bleed‑marked edge into a clean line—don’t wait for paint to fully dry before you act.
Use a sharp utility knife to slice away dried ridges, then feather with a damp brush or small roller.
Employ jagged line techniques and smooth shift methods: load minimally, stroke lightly, and touch up with a fine brush for crisp, even seams.
Working Around Corners, Trim, Outlets, and Windows
When you’re painting different colors that meet at corners, trim, outlets, or windows, take your time and use steady, deliberate strokes so the lines stay crisp; a quality angled brush and painter’s tape will be your best tools for tight spots.
Use precise corner techniques and outlet strategies, plan window junctions, and respect trim considerations.
- Slow
- Steady
- Patient
- Proud
Seal Gaps at Trim for Seamless Paint Transitions
If you want crisp paint lines where wall meets trim, seal any gaps first so color doesn’t bleed or show uneven edges; a thin bead of paintable caulk and a steady fingertip swipe will create a smooth joint ready for paint.
Use proper caulking techniques, tool the bead, and match caulk sheen to trim finishes. Let cure fully, then sand lightly for flawless connections.
Time‑Saving Techniques That Keep Lines Sharp
Save time and keep lines sharp by working smart with the right tools and a simple sequence: tape only what truly needs protection, cut in with a quality angled brush before rolling, and use a steady, slightly loaded brush to feather edges for fewer touch-ups.
Use color psychology and visual balance to guide choices.
- Prep quickly
- Brush confidently
- Roll evenly
- Inspect edges
When to Hire a Pro for Complex Patterns?
Wondering whether a pro is worth it for complex wall patterns?
If your design has intricate geometry, curves, or multiple colors that demand flawless edges, hire professional services. You’ll save time, avoid costly mistakes, and get crisp results that DIY masking often can’t match.
Bring detailed plans and expect precise execution — it’s worth the investment for high‑visibility spaces.
Care and Maintenance to Keep the Split Looking Crisp
Once the paint’s dry, you’ll want to protect the crisp line with simple, regular care:
- Gently clean smudges with mild soap to preserve color longevity.
- Touch up chips promptly using original paint for seamless paint maintenance.
- Avoid abrasive cleaners and heavy scrubbing along the split.
- Inspect seasonally and re-seal edges if moisture or wear appears, keeping shifts sharp and intentional.
Frequently Asked Questions
Can Textured Walls Be Split Cleanly Without Skim Coating?
Yes — you can split textured finishes cleanly without skim coating; treat the wall like a map, using sharp blue painter’s tape, flexible edging, and a steady brush or roller to achieve clean edges and controlled shifts.
How Do Humidity and Temperature Affect Tape Adhesion?
Humidity and temperature directly affect tape adhesion: you’ll choose tape types and adjust surface preparation accordingly—high humidity weakens adhesive, extreme temperatures reduce tack, so work in stable, moderate conditions and prep surfaces clean and dry.
Can Murals or Decals Be Integrated Across the Two Colors?
Absolutely — you can! It’ll look insanely seamless if you use color blending techniques and mural application tips: plan your design across the seam, match edge tones, feather paint, and apply decals after sealing for perfect, durable integration.
Will VOC Levels Differ With Two-Tone Paint and Need Ventilation Changes?
Yes — VOC levels can vary between paints, so you’ll need to check VOC regulations, choose low-VOC paint selection, monitor air quality, ventilate accordingly, and account for differing drying times to protect occupants and finish.
How to Match Sheen When Repainting Only One Side Later?
Think of subtle wardrobe choices: you’ll match sheen types by testing small swatches, comparing paint finishes under room lighting, using the same brand and batch when possible, and blending edges or lightly scuffing before repainting to harmonize.
