
How to Thin Exterior Paint for a Sprayer Without Ruining Coverage
You can thin exterior paint for a sprayer without ruining coverage by making small, measured adjustments and testing as you go. Start with 5–10% solvent for oil/alkyds or 10–15% water for latex, use the reducer recommended for acrylics, and check viscosity with a flow cup or dipstick. Match tip size and pressure to the sprayer, spray on scrap, and tweak in tiny increments until atomization and hiding are right—keep going and you’ll pick up pro tips and troubleshooting.
Why Thinning Exterior Paint Matters
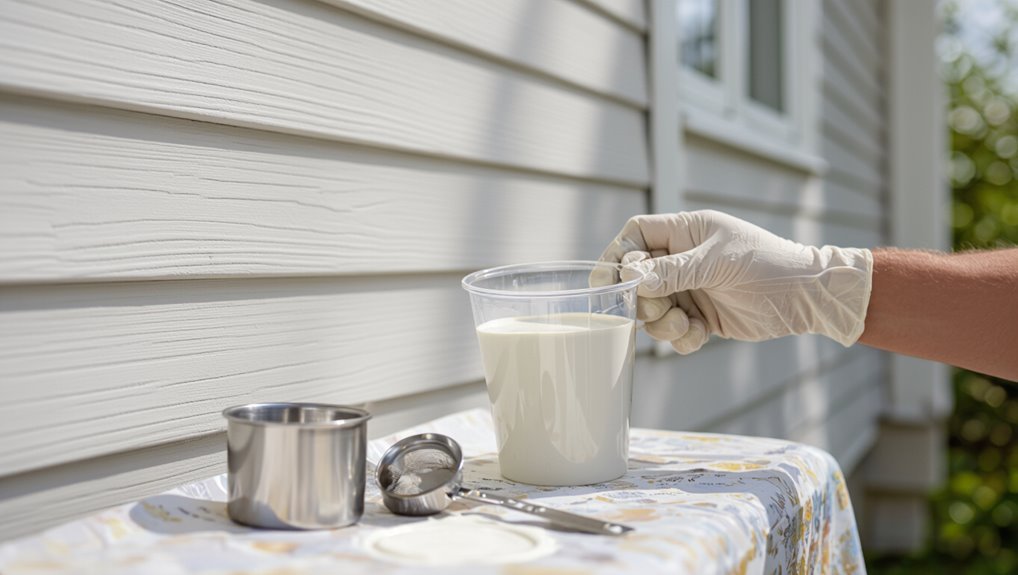
When you’re prepping to spray exterior paint, thinning matters because it guarantees smooth atomization, consistent flow, and proper adhesion; without the right viscosity you’ll get spitting, uneven coverage, or runs that ruin the finish.
You’ll learn to control paint consistency, refine application techniques, adopt maintenance tips for your sprayer, and apply troubleshooting methods so you fix clogging, overspray, or poor coverage fast.
Quick Starter Ratios for Exterior Paint and Sprayers
Because every sprayer and paint base behaves a bit differently, start with conservative, easy-to-remember ratios and adjust from there:
Start with conservative, easy-to-remember mixing ratios and adjust based on your sprayer and paint behavior.
- Water-based latex: 10–15% water.
- Acrylic enamel: 5–10% reducer.
- Oil-based: 5% mineral spirits.
Test spray, note settings, and keep records for sprayer maintenance.
Store leftovers properly to preserve finish and follow paint storage guidance to avoid drying or contamination.
When to Thin Paint: Common Signs and Scenarios
If your sprayer spits, dribbles, or leaves heavy ridges instead of a smooth mist, you’re seeing clear signs the paint needs thinning.
You’ll also notice uneven coverage, clogging, or poor atomization. Check paint consistency against manufacturer specs before adjusting.
Thin only to improve flow for your chosen application techniques, testing small amounts until spray pattern is smooth and coverage remains even.
Which Sprayer Types Change Thinning Needs

Although different sprayer styles share the same goal—smooth, even coverage—they demand different paint viscosities, so you’ll need to adjust thinning accordingly.
Consider common sprayer types and matching thinning techniques:
- HVLP: thinner for fine atomization, prevents orange peel.
- Airless: minimal thinning, keeps pressure and coverage.
- Turbine/Detail: moderate thinning for consistent spray and reduced clogging.
Read Your Sprayer’s Thinning Guidelines Correctly
When you pick up your sprayer’s manual, scan the thinning section first so you’ll match the manufacturer’s recommended solvent, ratios, and testing steps rather than guessing from generic advice.
Follow sprayer manuals’ limits on solvent types and max thinning percent, and consider paint characteristics like base (water/oil) and solids.
Stick to recommended procedures to preserve atomization, coverage, and warranty.
Test Paint Flow for Sprayer: Dipstick & Viscosity Cup
Before you spray, check flow with a dipstick by drawing paint down it and watching how evenly it streams.
Use a viscosity cup to time how long paint takes to drain and compare that to your sprayer’s recommended range.
If the dipstick shows uneven flow or the cup time’s off, thin in small increments until the consistency matches the specs.
Dipstick Flow Check
To check whether your thinned paint will spray properly, you’ll perform a dipstick flow check—an easy, quick test that simulates how the paint behaves under shear.
You’ll verify paint viscosity and aid sprayer maintenance by observing flow time and breakup.
Steps:
- Dip a clean stick into paint.
- Lift and time runoff.
- Adjust thinning until smooth, consistent stream.
Viscosity Cup Method
A simple viscosity cup gives you a repeatable way to measure paint flow for a sprayer: you fill the cup, lift it, and time how long it takes the paint to drain through the calibrated hole.
Use the elapsed seconds for viscosity measurement, compare to your sprayer’s recommended range, and repeat after mixing.
Record results so you can match paint flow between batches.
Adjusting For Consistency
Start by testing paint flow with both a dipstick and a viscosity cup so you’ll know exactly how the material behaves through your gun.
Then adjust while watching results:
- Measure current viscosity, note paint consistency.
- Add small solvent increments for adjusting thickness.
- Retest with dipstick; spray sample.
Repeat until flow and coverage match specs, avoiding over-thinning.
Target Viscosity Ranges for Common Exterior Sprayers
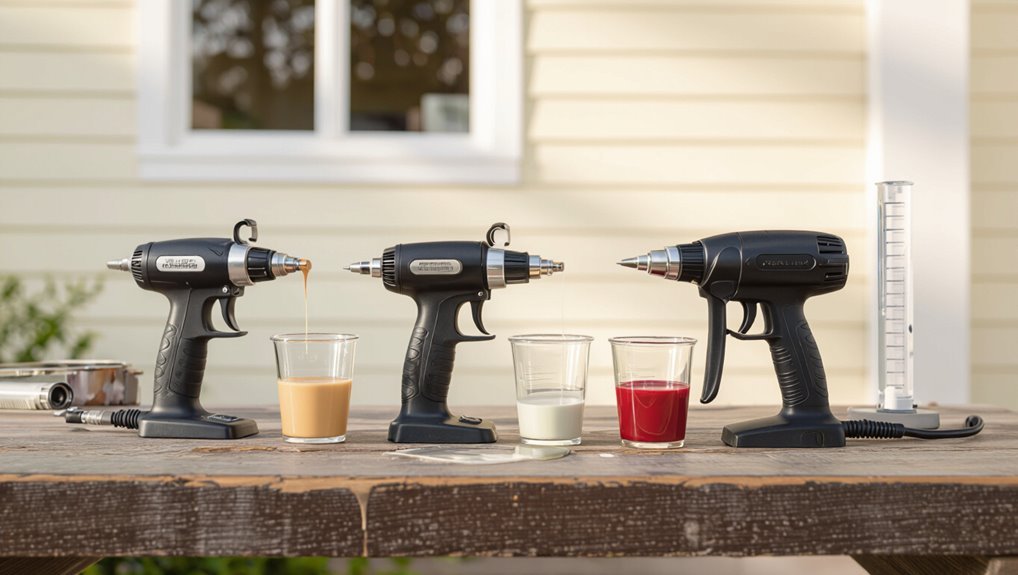
When you’re preparing exterior paint, aim for the right viscosity for your gear: HVLP and turbo tips usually want thinner, low-viscosity mixes for fine atomization.
Airless sprayers tolerate thicker ranges and often need less thinning, so check the pump and tip recommendations.
Also keep in mind what you’re matching—thinner sprays compare to brush/roller milks, while thicker mixes mimic roller consistency for better coverage.
HVLP And Turbo Tips
Most HVLP and turbo (turbo air) guns perform best within a relatively narrow viscosity window, so you’ll want to measure and adjust your exterior paint before you spray.
You’ll use HVLP advantages and Turbo efficiency with proper Spray techniques, Equipment maintenance, Air pressure, Paint compatibility, Nozzle selection, and Cleanup tips.
- Test viscosity.
- Adjust thinner.
- Recheck flow.
Airless Spray Ranges
Although airless sprayers handle thicker exterior paints than HVLP guns, you’ll still want to match viscosity to the machine and tip size for smooth, even coverage.
Aim for 20–30 seconds Zahn #2 for heavy latex, 12–18 for enamels, and thinner for stains.
Test, adjust with water or reducer, and keep records for sprayer maintenance and paint storage to repeat results.
Brush/ Roller Equivalents
Matching your sprayer’s target viscosity to common brush or roller results helps you predict finish and coverage.
You’ll match feel and coat thickness by aiming for equivalents to hand tools. Consider these targets:
- Light (brush-like): 80–100 KU — mimics fine Brush Techniques.
- Medium (roller-like): 100–120 KU — matches Roller Applications.
- Heavy: 120–140 KU — thicker, less leveling but fuller coverage.
Thinning Latex (Water‑Based) Paint Safely
When you’re thinning latex paint for a sprayer, keep the changes small and controlled so you don’t ruin the finish or clog the equipment. Add water in 5% increments, stir, and test. Respect latex paint characteristics and follow sprayer maintenance routines to prevent buildup.
| Step | Action |
|---|---|
| 1 | Add 5% water |
| 2 | Stir & test |
| 3 | Clean filter |
Water vs. Acrylic Thinners for Latex: Pros & Cons
If you’re deciding between water and acrylic thinners for latex paint, focus on how each affects flow, drying, and durability:
- Water advantages — cheap, easy cleanup methods, minimal environmental impact; it alters paint consistency but may slow drying times.
- Acrylic drawbacks — boosts flow and durability but raises cost considerations and requires precise application techniques.
- Balance coverage, environmental impact, and final finish when choosing.
Thinning Oil‑Based and Alkyd Exterior Paints
For oil‑based and alkyd exterior paints, you’ll want to pick the right thinner—mineral spirits or paint thinner depending on the manufacturer’s recommendation.
Thin a small batch and test the spray pattern on scrap to see if it atomizes cleanly. If the spray’s too heavy or splatters, adjust the viscosity with small increments until you get a smooth, even mist.
Pick The Right Thinner
1 key choice you’ll make before thinning oil-based or alkyd exterior paint is the solvent type, because the wrong one can wreck gloss, drying time, or film integrity.
You should check paint compatibility and pick among common thinner types. Consider:
- Mineral spirits — balanced, slow drying.
- Turpentine — stronger solvency, more odor.
- Odorless mineral spirits — gentler, pricier.
Test Spray Pattern
Now that you’ve chosen a compatible thinner, you’ll want to confirm the paint sprays correctly before you start on the job.
Test on scrap wood, checking spray pattern, atomization, and overlap. Verify paint compatibility with your sprayer, inspect nozzle selection for even coverage, and watch for separation after adding paint additives.
Note sprayer maintenance needs and minimize environmental impact by containing overspray and cleaning responsibly.
Adjust For Viscosity
When you thin oil‑based or alkyd exterior paints, aim for a consistency that flows easily through your sprayer without running—start by adding small amounts of mineral spirits or an approved reducer (usually 5–10% by volume), stir thoroughly, and test; you can always add more, but you can’t take it out.
Adjust for viscosity adjustment and paint consistency:
- Add 5% reducer, stir.
- Test spray; check pattern.
- Repeat in 2–3% increments until ideal.
Solvents for Alkyds: Mineral Spirits and Alternatives
If you’re working with alkyd paints, you’ll usually reach for mineral spirits to thin them because it dissolves the binder effectively and keeps drying time predictable; but there are other solvents—odor-reduced mineral spirits, citrus-based solvents, and naphtha among them—that can change viscosity, drying speed, and safety considerations.
So you’ll want to choose based on the paint label, the sprayer manufacturer’s recommendations, and ventilation constraints.
Choose solvent types for paint compatibility, test small batches, adjust application techniques to maintain atomization, and expect varied drying times and odor and flammability trade-offs.
Exact Starter Ratios: Water & Acrylic Thinners for Latex
Because spray equipment and paint formulations vary, you’ll want a precise starting point for thinning latex: generally begin with 5–10% water by volume (about 1–2 ounces per pint) for most interior acrylic latex, and 10–20% for thicker exterior or high-solids formulations—then test and adjust.
- Measure thinning methods precisely.
- Check paint viscosity, coverage consistency, and spray techniques.
- Follow application tips, safety precautions, and environmental impact guidance.
Exact Starter Ratios: Mineral Spirits & Solvents for Alkyds
Switching from water-thinned latex to solvent-based alkyds means you’ll use mineral spirits or specific solvents instead of water, and the starting mix rates are different: begin with about 5–10% solvent by volume for brushable alkyds (roughly 1–2 oz per pint) and 10–15% for heavier, spray-grade or high-solids alkyds.
Then test spray and adjust in small increments until you get a smooth, steady atomization. Use mineral spirits and compatible solvent types; follow thinning techniques to tune paint consistency for spray efficiency and coverage optimization.
Mind environmental considerations and safety measures: ventilate, wear respirator, and store solvents properly.
Thinning Heavy Primers and Exterior Enamels
When you’re thinning heavy primers or exterior enamels for a sprayer, aim for minimal, controlled dilution so the product retains hiding power and film build while flowing through the gun.
You should test spray, mind material compatibility and surface preparation, and monitor drying times, paint adhesion, paint consistency, spray techniques, environmental factors, and equipment maintenance.
- Mix small increments
- Test pattern
- Adjust slowly
Thinning Elastomeric Coatings, Stains, and Clear Coats
Thinning elastomeric coatings, stains, and clear coats calls for a different approach than heavy primers or enamels because these materials have unique binders and performance needs—elasticity, penetration, or clarity—that you can’t compromise.
You should prioritize surface preparation, check product compatibility, thin minimally for stain application or clear coat clarity, and consider drying times and environmental factors to protect finish durability and adhesion.
How Temperature and Humidity Change Thinning Needs
When you spray exterior paint, temperature changes its viscosity—cold makes paint thicker and hot thins it out.
Humidity also affects how fast the paint dries, so you may need to adjust thinning to avoid runs or poor atomization.
In cold weather you’ll often thin a bit more to keep flow, while in hot, humid conditions you might thin less or use faster-evaporating solvents cautiously.
Temperature Affects Viscosity
Because temperature and humidity change how paint flows, you’ll need to adjust thinning for the conditions you’re working in.
Temperature affects viscosity changes directly: warmer temps thin paint, colder temps thicken it. Watch consistency and spray pattern, and thin accordingly.
Examples to guide you:
- Cool day: add small increments of thinner.
- Warm day: thin less to avoid overspray.
- Moderate: follow label.
Humidity Alters Drying
If humidity climbs, paint takes longer to cure and can sag or pick up debris more easily. You’ll need to adjust thinning and spray technique to compensate.
You’ll thin slightly less and slow your pass rate to prevent runs. Monitor humidity effects and test a small panel: longer drying times demand thinner coats, increased overlap, and patience to maintain coverage without orange peel or sagging.
Cold Vs. Hot Thinning
Although temperature and humidity often act together, you’ll need to treat them as separate variables when deciding how much to thin exterior paint for a sprayer.
In cold weather you’ll thin less; in hot climates thin slightly more to prevent tip clogging and overspray.
Consider:
- Cold: slower drying, thicker coat
- Mild: standard thinning
- Hot: faster drying, leaner mix
Adjusting Thinning for High‑Altitude or Cold Jobs
At high elevations or on chilly days, paint behaves differently, so you’ll need to tweak your thinning to keep spray patterns consistent and drying times predictable.
For high altitude adjustments, reduce thinning slightly to compensate for faster evaporation; for cold weather considerations, thin a bit more to maintain flow and atomization.
Test spray on scrap, adjust incrementally, and monitor drying before full application.
Mix Thinner and Paint Without Introducing Bubbles
When you mix thinner into exterior paint, stir gently and steadily with a flat paddle or wide stir stick to combine without whipping air into the blend; avoid shaking the can, using high-speed mixers, or pouring from great heights.
Keep your strokes low and slow until the thinner is fully incorporated.
- Use slow mixing techniques.
- Check paint consistency.
- Inspect for air incorporation—sprayer maintenance aids bubbles prevention, blending methods matter.
Strain Thinned Paint to Remove Skins and Lumps
After you’ve mixed the thinner in carefully, strain the paint before pouring it into your sprayer to catch skins, clumps, and debris that can clog tips and ruin a finish.
Use paint strainers and choose filter types for viscosity, employ straining methods for lump removal, and follow application techniques that preserve paint quality.
Regular equipment maintenance prevents contamination and supports skin prevention.
Calibrate Your Sprayer After Thinning Paint
Once you’ve thinned and strained the paint, calibrate your sprayer so the flow, pattern, and atomization match the job and material—test on cardboard or scrap, adjust pressure and tip size, and note the wet film thickness to guarantee even coverage without runs.
You’ll verify sprayer calibration and paint compatibility by:
- Setting pressure and tip.
- Measuring wet film.
- Recording settings for repeatability.
Test Spray Pattern and Coverage on Scrap Material
Pick a few pieces of scrap material that match the surface you’ll be painting—wood, metal, or siding—and spray a series of test passes to check pattern, atomization, and coverage.
Adjust nozzle, pressure, and distance while noting spray technique to avoid runs. Verify material compatibility and how the paint lays, then tweak thinning in small increments until you get even coverage without overspray or sagging.
How to Tell When Paint Is Thinned Too Much
Testing on scrap helps you pinpoint the right thinning, but you’ll know you’ve gone too thin when the paint sprays like watery mist—producing runny, translucent coats, excessive overspray, poor hide, or a tendency to sag.
Check signs as you use proper application techniques and judge paint consistency:
- Translucent coverage
- Heavy overspray
- Runs or sagging
Fix Over‑Thinned Paint and Restore Coverage
If your paint looks thin on the surface, check its viscosity with a cup or viscosity cup first to confirm it’s over‑thinned.
Add concentrated pigment or a tinting base a little at a time to rebalance coverage, stirring thoroughly between additions.
Test spray on a scrap board and tweak thickness until the spray pattern and opacity are correct.
Check Viscosity First
Wondering whether your paint’s too thin? Check viscosity measurement before adding anything. Test paint consistency with a viscosity cup or flow test, then decide.
- Use a viscosity cup to time flow.
- Compare to manufacturer’s spec for consistency.
- Record results and adjust thinning slowly.
You’ll avoid guessing, prevent over‑thinning, and restore proper spray performance without unnecessary fixes.
Rebalance With Pigment
Once you’ve confirmed paint is over‑thinned, restore hiding power by adding pigment rather than more binder or solvents.
Measure pigment concentration carefully and add small increments, mixing thoroughly after each.
Keep notes so you maintain color consistency across batches. Aim for minimal pigment additions to regain opacity without altering flow.
Recheck viscosity after each addition to avoid re‑thinning mistakes.
Test Spray And Adjust
Grab a scrap of the same substrate and do a short test spray to see how the repair mix performs at actual spray conditions.
Watch atomization, droplet size, and coverage; then make focused consistency adjustments.
Follow this quick checklist:
- Note spray technique issues (distance, speed).
- Add small solvent increments if too thick.
- Add pigment or reducer sparingly to restore coverage.
Preserve Color, Sheen, and Film Thickness
If you thin paint too much, you’ll lose the color depth, sheen, and the protective film that make the finish last and look right.
You should thin minimally to maintain color retention and sheen preservation while testing for film uniformity.
Keep spray passes consistent so application consistency preserves hiding power and durability.
Adjust only until you achieve even coverage without over‑reducing the mix.
How Thinning Affects Dry Time and Cure
When you thin exterior paint, solvents evaporate faster so the film can set quicker but may also dry too fast on the surface.
That rapid evaporation can leave a tacky layer or extend cure time beneath the skin, especially if you over-thin.
Also remember temperature, humidity, and wind all change evaporation and cure, so adjust thinning accordingly.
Increased Evaporation Rate
Because thinning reduces a paint’s solvent content and lowers its viscosity, it speeds up evaporation and can shorten both tack-free and full cure times; you’ll notice evaporation effects tied to paint consistency and application thickness.
Consider how faster drying changes handling:
- Thinner coats dry quicker.
- Overlap marks can set fast.
- Recoat window narrows, so plan timing accordingly.
Extended Tack And Cure
Although thinning can speed surface drying in some conditions, it can also leave the paint feeling tacky longer and delay full cure, especially when you over-thin or spray thick wet coats.
Solvents may flash off unevenly, trapping binders and slowing crosslinking. You’ll notice extended drying and weaker film formation if you push solvent too far.
Thin carefully to preserve ideal adhesion and final hardness.
Environmental Factors Impact
You’ve seen how over-thinning can slow tack and cure; now consider the environmental variables that change how solvents evaporate and resins crosslink.
You’ll adjust thinning based on climate conditions, weather impacts, seasonal changes, humidity levels, temperature effects, wind influence, UV exposure, and environmental regulations.
Consider:
- High humidity slows cure.
- Low temp delays crosslinking.
- Wind/UV speed solvent loss.
Reduce Overspray When Using Thinned Paint
When you thin exterior paint for a sprayer, overspray can quickly turn a neat job into a messy one, so take steps to control atomization and wind drift.
You’ll use overspray control by lowering pressure, selecting a suitable tip, and keeping the gun closer to the surface.
Adjust your application techniques for tight, overlapping passes, shield nearby plants, and work with calm conditions to minimize drift.
Prevent Runs, Sags, and Orange Peel With Thinned Paint
Controlling overspray helps, but you’ll also need to manage film build and surface wetting to avoid runs, sags, and orange peel when using thinned paint.
Keep thinning minimal, test spray, and adjust technique to balance preventing overspray with achieving smoothness.
- Thin slightly
- Hold proper distance
- Overlap evenly
How Much Material You May Waste When Thinning
When you thin paint for a sprayer, expect some material loss from the thinner itself and from setup and cleanup.
You’ll also lose paint to overspray and bounceback, which grows with higher pressure and finer atomization.
Keep in mind that heavier thinning ratios increase waste because more material escapes as mist or lands on drop cloths.
Expected Material Loss
Expect to lose a small percentage of paint to thinning and equipment retention — usually between 5% and 15% of the mixed volume — depending on your sprayer type and how thoroughly you transfer and clean the system.
You’ll face paint waste and minor coverage loss; plan mixes accordingly.
- Lost in hose/nozzle: 5–8%
- Left in cup/filter: 2–5%
- Disposal/cleanup: 1–2%
Overspray And Bounceback
Those small losses in the hose and cup can be compounded by overspray and bounceback once you start spraying; thinning makes paint atomize finer, so more of it can end up as airborne mist or on surrounding surfaces.
You’ll need overspray control—adjust nozzle, pressure, and distance—and use bounceback techniques like masking and tack cloths to recover edges and limit wasted material.
Thinning Ratio Waste
Thinning paint will eat into your usable gallons — the thinner you go, the more material ends up in the sprayer, hose, and overspray instead of on the surface.
You’ll balance coverage vs. flow using careful thinning techniques and focus on waste reduction:
- Light thin: ~5–10% lost per job.
- Moderate thin: ~10–20% lost.
- Heavy thin: 20%+ lost, more touch-ups required.
Choosing Single Coat vs. Multiple Thin Coats
When deciding between a single heavy pass and several light ones, consider coverage, spray technique, and the paint’s formulation; you’ll usually get smoother, more durable results with multiple thin coats.
A single coat can work for fast jobs or high-build coatings if your sprayer and paint are rated for it. You’ll favor single coat benefits for speed, but multiple coats improve leveling, hide, and longevity.
Thinning Advice by Substrate: Wood, Stucco, Metal
When thinning paint for different surfaces, you’ll adjust for wood’s grain and porosity, stucco’s texture and absorption, and metal’s need for proper adhesion and smooth flow.
For wood you’ll often thin slightly to penetrate and avoid blotches; for stucco you may need a thinner mix to reach crevices without over-sheening.
On metal, focus on flow and adhesion—use the manufacturer’s recommendations and test a spray pattern before coating the whole surface.
Wood: Grain And Porosity
Wood’s grain and porosity directly affect how much you’ll need to thin exterior paint for a sprayer, since open-grained or weathered boards soak up more binder and can clog tips if the viscosity’s too high.
Consider:
- Assess wood characteristics and grain absorption.
- Use surface preparation and sealing techniques to control porosity effects.
- Balance thinning to preserve finish quality, paint adhesion, and stain prevention.
Stucco: Texture And Absorption
Stucco’s rough texture and variable absorption mean you’ll often need a thinner, more fluid mix than for smooth substrates so the sprayer atomizes evenly and doesn’t clog.
Test a small area, adjusting with modest solvent or extender to balance sprayability and coverage.
Account for stucco texture and higher moisture absorption by applying multiple thin passes, letting each coat penetrate before adding more to avoid sagging or waste.
Metal: Adhesion And Flow
Moving from porous stucco to smooth metal, you’ll find adhesion and flow require a very different thinning approach.
You must focus on metal surface preparation and boosting metal paint adhesion before thinning.
Follow these steps:
- Degrease and sand to bare profile.
- Use a primer; thin only per label.
- Adjust thinner for smoother flow, test on scrap metal.
PPE and Ventilation When Thinning Exterior Paint
Because thinning paint releases solvent fumes and can create fine airborne droplets, you should protect yourself with proper PPE and make sure your work area is well ventilated.
Follow PPE guidelines: wear a NIOSH‑rated respirator, chemical splash goggles, gloves, and coveralls.
Ventilation tips: work outdoors or use cross‑ventilation, fans exhausting fumes outdoors, and avoid enclosed spaces until vapors dissipate.
Store and Dispose Mixed Thinners and Leftovers Safely
When you finish thinning, label and tightly seal any leftover solvent or mixed thinner so you and others know what’s inside.
Store containers upright in a cool, well-ventilated area away from heat or open flames.
Follow your local hazardous-waste rules for disposal—do not pour thinners down the drain or into the trash.
Label And Seal Containers
Keep every mixed thinner and leftover paint in clearly labeled, tightly sealed containers so you and others know what’s inside and how to handle it.
Follow safety precautions and proper container labeling to prevent accidents.
Do:
- Note contents, date, and hazards on each jar.
- Use airtight, solvent-resistant lids and secondary containment.
- Store upright, cool, and away from ignition sources.
Local Hazardous Disposal
Now that your mixed thinners and leftover paint are clearly labeled and sealed, you need to handle them according to local hazardous-waste rules rather than tossing them in the trash or down the drain.
Check local regulations for approved disposal methods, use community resources like household hazardous waste events or drop-off centers, and never mix unknown hazardous materials.
Follow guidance to store, transport, and document pickups safely.
Clean Sprayer Parts After Different Thinners
Different thinners leave different residues, so you’ll want to match your cleaning method to the solvent you used.
For proper sprayer maintenance and thinner compatibility, flush and disassemble promptly, then clean parts with the appropriate solvent.
Follow this quick guide:
- Water-based: rinse with warm water and mild soap.
- Mineral spirits: use fresh spirits, then wipe dry.
- Lacquer thinner: ventilate, use lacquer solvent, rinse, and dry.
Troubleshoot Common Spray Issues After Thinning
After thinning, you’ll want to fine-tune the spray pattern to get even coverage without runs.
Check viscosity consistently with a cup or viscosity meter so the paint atomizes properly.
If you see orange peel, adjust pressure, tip size, or thin a bit more to smooth the finish.
Adjust Spray Pattern
1 simple tweak to your sprayer’s controls can fix many common issues you’ll see after thinning paint: adjust the spray pattern.
You’ll improve spray consistency by changing fan width and checking nozzle selection for correct tip size. Try small adjustments, then test.
- Narrow fan for reach
- Wide fan for coverage
- Overlap passes slightly
Check Viscosity Consistently
Once you’ve tuned the fan and nozzle, keep an eye on paint viscosity—it’s the single variable that most affects atomization and finish.
Check viscosity consistency with a cup or viscosity reader between batches and after thinning. Small shifts change spray droplet size and clogging.
Maintain records of thinner ratios and ambient conditions so you can reproduce paint performance and avoid surprises during large jobs.
Prevent Orange Peel
If you’re seeing a textured, dimpled finish—orange peel—stop and check a few key factors before applying more coats.
Adjust spray technique and thinning to improve paint application. Verify surface preparation and cleanliness.
Follow these steps:
- Thin to manufacturer specs, test spray pattern.
- Hold gun at correct distance and speed.
- Sand and clean between coats; recoat only when tack-free.
Choose Thinning vs. Switching Nozzle Size
Choosing whether to thin your paint or swap to a larger nozzle comes down to the paint’s viscosity, the sprayer’s capabilities, and the finish you want. You’ll weigh thinning techniques against nozzle selection: thin to improve atomization without losing hiding power, or change nozzle for thicker coats. Consider flow, finish, and cleanup.
| Option | When | Effect |
|---|---|---|
| Thin | low viscosity | finer atomization |
| Nozzle | high viscosity | thicker laydown |
Field Test: Small‑Scale Trial Before Full Application
Before you commit to thinning ratios or nozzle changes across the whole job, run a small-scale field test on a scrap piece or an inconspicuous area so you can judge spray pattern, coverage, and finish in real conditions.
Before changing thinners or nozzles, test a 1 sq ft patch to confirm spray, coverage, and finish.
Pick field selection carefully, note application timing, and evaluate results.
Test steps:
- Spray a 1 sq ft patch.
- Wait full dry time.
- Check coverage and finish.
How Pros Document Recipes and Settings for Repeatability
When you want consistent results from job to job, document every recipe and setting so you — or anyone on your crew — can reproduce the same finish.
Note brand, batch, reducer type and percentage, tip size, pressure, temperature, and humidity.
Store photos of test panels, serial numbers, and date.
Use a simple log template for paint documentation to guarantee recipe consistency.
Step‑by‑Step Thinning Checklist for Exterior Paint and Sprayers
Start with a clean, organized workspace and a clear plan: gather the paint, approved reducer, measuring tools, mixing sticks, strainers, test panels, and your sprayer’s manual so you can follow manufacturer specs.
Follow this checklist to dial in paint consistency and sprayer maintenance:
- Measure and add reducer incrementally.
- Mix thoroughly and strain.
- Test spray, adjust, document settings.
Frequently Asked Questions
How Does Thinning Affect Paint Warranty or Manufacturer Guarantees?
Thinning can void warranties if you alter specified ratios, so you’ll check manufacturer instructions and test for paint performance. Warranty implications vary; don’t deviate without approval, and keep records to support any future claims.
Can Thinning Change VOC Levels and Regulatory Compliance?
Yes — you’ll alter VOC regulations applicability and could violate compliance guidelines; don’t play cowboy with thinner. Consider environmental impact and health concerns, follow label limits and local rules to stay legal and safe.
Will Thinning Alter Paint Adhesion to Previously Painted Surfaces?
Yes — if you thin too much, you’ll weaken adhesion factors; proper surface preparation and using manufacturer-recommended reducers preserves bond strength. You should test adhesion on a small area before spraying the entire previously painted surface.
How Does Thinning Impact Long‑Term UV Resistance and Colorfastness?
You’ll barely notice a difference—thinning can slightly reduce UV stability and color retention if overdone, but if you follow manufacturer ratios and use UV‑stable formulations, you’ll preserve long‑term fade resistance and vibrant color.
Can Thinners Interact Badly With Common Exterior Caulks or Primers?
Yes — you can encounter compatibility issues: some caulk types (silicone, polyurethane) resist solvents, so thinner selection matters. Test joints, follow primer and caulk labels, and adjust application methods to avoid softening or adhesion loss.
