How to Thin Exterior Paint for Smooth Application
You’ll thin exterior paint only when it’s too thick for your tool or conditions; signs include brush drag, roller skip, or sprayer clogging. Match thinner to paint—water for latex, manufacturer solvent for alkyd—and add small amounts (about 5–10% for sprayers) while stirring and testing on scrap. Thin more in hot, fast-dry weather and less in cool, humid conditions. Wear protection and ventilate. Keep tests and notes so you can refine technique and learn more as you go.
When to Thin Exterior Paint: Quick Answer
If your exterior paint is thick, gummy, or won’t spray or level properly, you should thin it; most modern acrylic and latex exterior paints rarely need more than a few percent water, while oil-based paints sometimes require a compatible solvent.
You’ll spot the need when finish texture, nozzle clogging, or brush drag appear.
Follow simple thinning techniques and application tips to restore flow without over‑thinning.
How to Decide: Thin vs. Use Full-Strength?
Check your paint type first—water-based and oil-based formulas behave differently and may only need specific thinners or none at all.
Then consider the application conditions like temperature, humidity, and tool choice, since those affect flow and drying time.
Use that combo—paint chemistry plus conditions—to decide whether thinning will improve application or just weaken coverage.
Paint Type Matters
Because different paints have different formulations and performance requirements, you’ll want to decide whether to thin or use paint full-strength based on the type you’re working with.
For latex you can slightly thin to improve paint consistency and flow without compromising adhesion.
Oil-based paints often need full-strength for durability, since thinning can extend drying time and reduce hardness—follow manufacturer guidance.
Application Conditions
Now think about the conditions you’ll be painting in, since they often dictate whether thinning helps or hurts performance.
You’ll assess surface temperature, humidity, and wind — weather considerations that affect drying and film formation.
For brushing, rolling, or spraying, match application techniques to conditions: thin slightly for sprayers in hot, fast-dry weather; use full-strength in cool, humid, or windy situations to maintain coverage and durability.
How Thinning Improves Flow, Leveling, and Adhesion
When you thin exterior paint correctly, it flows more smoothly out of the brush or sprayer, fills microscopic surface irregularities, and bonds more evenly to the substrate—so you get fewer brush marks, better coverage, and stronger adhesion. You’ll notice flow improvement and clear adhesion benefits: thinning improves leveling, reduces visible strokes, and promotes uniform film formation.
| Benefit | Effect |
|---|---|
| Flow | Smoother application |
| Leveling | Fewer brush marks |
| Adhesion | Stronger bond |
| Coverage | More uniform |
| Finish | Professional look |
How Exterior Paint Types Respond to Thinning
Different paint bases will react quite differently to thinning, so you’ll want to match your approach to the product.
You’ll notice water-based latex tolerates small water additions before viscosity and film suffer, while specialty exterior coatings may need specific solvents.
Test small batches, measure paint viscosity, and document thinning techniques and amounts so you can repeat results without compromising color, coverage, or durability.
Solvent-Based (Alkyd) Paints: Best Thinners & Ratios
Because alkyds cure by solvent evaporation and chemical crosslinking, you’ll need thinners that match their chemistry to keep drying time, flow, and gloss on track.
Use mineral spirits or high-quality turpentine sparingly — typically 5–10% by volume for brushing, up to 15% for spraying.
Follow best practices: test small batches, stir thoroughly.
Avoid common mistakes like over-thinning or mixing incompatible solvents.
Latex & Acrylic Paints: Water and Additives
When you’re working with latex or acrylic exterior paint, you’ll usually thin only a small amount with clean water to improve flow or sprayability.
Use water for minor adjustments and manufacturer-recommended additives—like flow improvers or mildewcides—only when needed, following product labels.
Aim for small, incremental additions and mix thoroughly, keeping within the paint maker’s suggested ratios to avoid over-thinning.
When To Use Water
If your latex or acrylic paint is too thick to spread smoothly or it’s pulling away from brush or roller, you can thin it with water to improve flow and leveling.
Use room-temperature, clean water—water temperature and water quality affect thinning effects and paint consistency.
In paint mixing, add small amounts, test application techniques, note thinning methods, and record paint storage conditions to maintain performance.
Recommended Additive Types
One common rule: start with water for latex or acrylic paints, then consider specific additives only when water can’t achieve the flow or performance you need. You’ll get additive benefits like better leveling or freeze resistance; avoid common mistakes like over-thinning. Choose surfactants for flow, coalescents for film formation, mildewcides for damp areas.
| Additive | Use | Tip |
|---|---|---|
| Surfactant | Flow | Small amount |
| Coalescent | Film | Follow label |
| Mildewcide | Prevent | For damp |
Mixing Ratios And Technique
Now that you’ve picked whether to start with water or a specific additive, you’ll want clear mixing ratios and a clean pouring technique to get predictable results.
You’ll use mixing proportions for latex and acrylic, measure precisely, and follow application techniques to maintain film integrity.
- Measure by volume
- Stir slowly
- Add incrementally
- Test spray/brush
- Record mix for repeatability
Oil-Modified and Hybrid Paints: Special Notes
Because oil-modified and hybrid paints blend solvent- and water-based chemistries, you’ll need different thinning approaches than you use for straight latex or traditional oil paints.
Oil-modified and hybrid paints mix solvent and water chemistries—thin carefully, test small batches, and follow manufacturer guidance.
You should follow manufacturer guidance for oil modified benefits and hybrid formulations, test small batches, and thin incrementally.
Use compatible thinners, stir thoroughly, and allow longer flash times.
Don’t assume water or solvent alone will work.
What Thinner to Choose for Sprayers, Brushes, Rollers
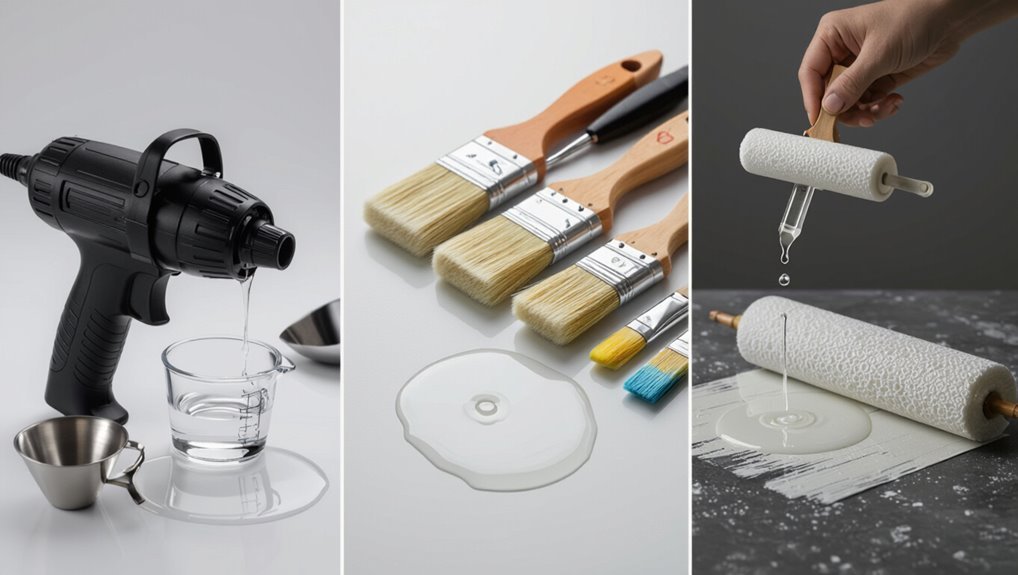
After handling oil‑modified and hybrid paints, you’ll need to pick thinners based on your application method—sprayers, brushes, or rollers—since each requires different viscosity and drying behavior.
Choose thinner types to match paint chemistry and adjust for application techniques. Test small mixes, note drying times, and avoid over‑thinning.
- Sprayer: low‑viscosity
- Brush: minimal thinning
- Roller: moderate thinning
- Solvent choice: match paint
- Test and record ratios
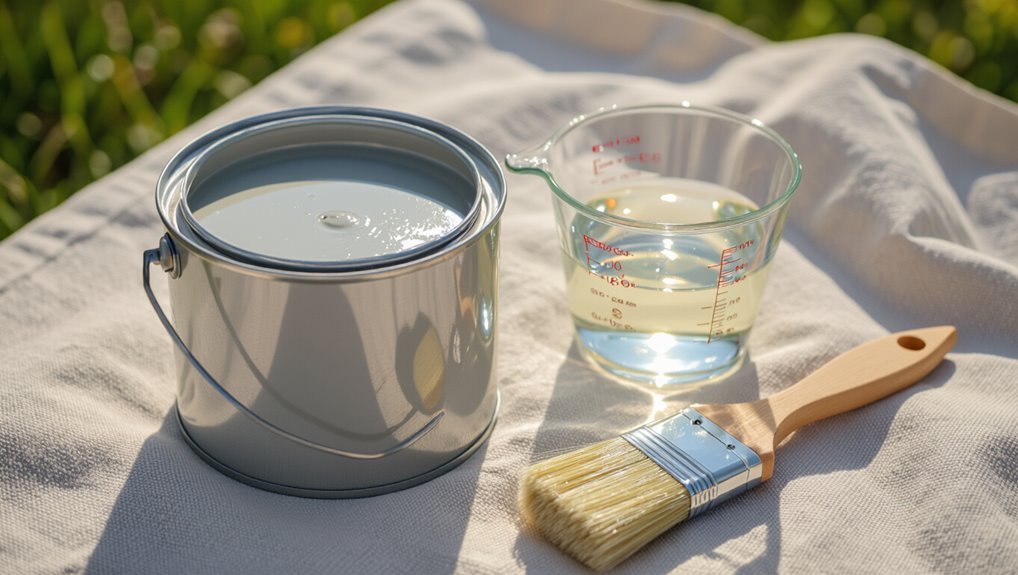
What Tools and Materials You Need Before Thinning Paint
Before you start thinning, gather the right safety gear—gloves, goggles, and a respirator—to protect your skin, eyes, and lungs.
You’ll also need mixing supplies like clean measuring cups, stir sticks, and a graduated container for accurate ratios.
Having these items ready will keep the job safe and the paint consistent.
Safety Gear
If you’re thinning exterior paint, wear the right safety gear to protect your skin, lungs, and eyes from solvents and overspray.
You should use proper safety goggles and a respirator mask, choose gloves protection, maintain workspace organization, and plan safe paint disposal.
- Safety goggles
- Respirator mask (rated for solvents)
- Chemical-resistant gloves protection
- Ventilation and workspace organization
- Approved paint disposal containers
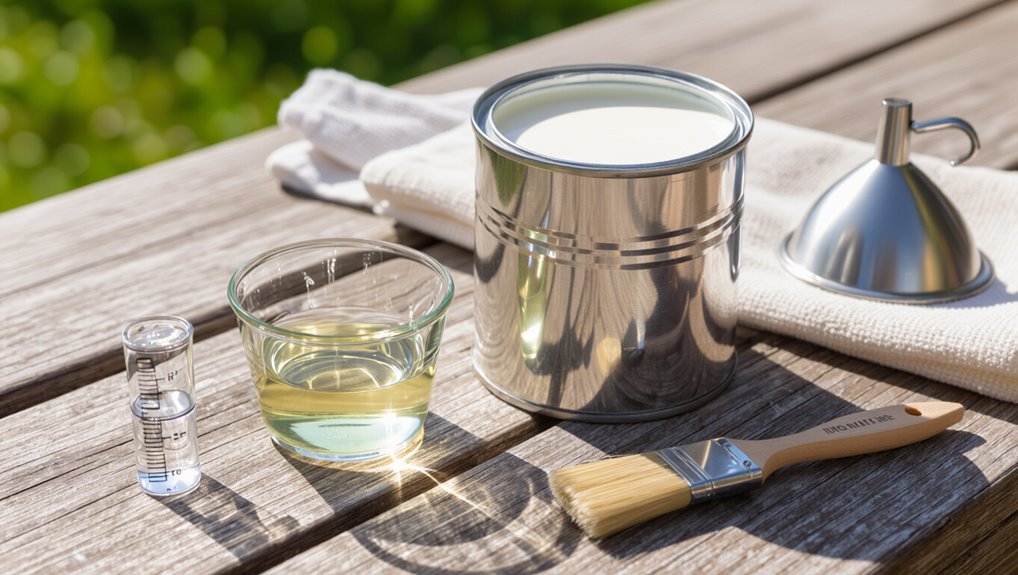
Mixing Supplies
Gather the right mixing supplies so you can thin exterior paint safely and accurately.
You’ll need clean mixing containers in various sizes, graduated for measuring, plus an airtight container for leftovers.
Use sturdy stirring tools—a paddle, paint stick, or drill mixer—for consistent blending.
Keep a funnel, strainers, and labeled measuring cups nearby.
Have rags and a small scale for precision.
How to Read Paint Can Thinning Instructions
Anyone can learn to decode the tiny print on a paint can, and doing so will save you time and keep your finish consistent.
Read the product label for paint can symbols and the manufacturer’s guidelines about thinning methods, proper dilution, and paint viscosity so you mix confidently.
- Check symbol meanings
- Note solvent type
- Follow temp/humidity notes
- Use recommended tools
- Recheck label before applying
Calculating Thinning Percentage by Volume
Before you thin paint, you’ll want to calculate the paint volume you have so you know how much thinner to add.
Convert cans or gallons to a single unit, then decide the percentage of thinner by volume based on the product’s recommendation.
Multiply the total paint volume by that percentage to get the exact thinner-to-paint ratio you’ll use.
Calculating Paint Volume
To figure out how much thinner to add, first calculate the paint volume you’ll be working with so you can express the thinner as a percentage of that total.
Measure cans, combine amounts, and note units. Consider paint viscosity and common thinning techniques when estimating.
- Measure each can’s fluid ounces or liters
- Add volumes accurately
- Convert units if needed
- Record total volume
- Use totals to plan thinning percentages
Determining Thinner Ratio
When you know the total paint volume, calculate the thinner ratio as a simple percentage of that volume so you can add a predictable amount; for most exterior latex paints, start with 5–10% and adjust from there based on viscosity and the manufacturer’s recommendations.
Measure accurately, note thinner types (water, acrylic reducers) and test small batches.
Adjust by 1–2% and evaluate application techniques before full-scale thinning.
How to Thin Paint for Airless Sprayers
Mixing paint for an airless sprayer requires precision—you’ll thin just enough to keep a smooth, consistent flow without sacrificing coverage or durability.
Test small batches, adjust by 5–10% with manufacturer-recommended reducer, and monitor paint viscosity for pump protection.
Use proper sprayer techniques, strain paint, and keep tips clear.
- Start with manufacturer ratio
- Measure viscosity
- Adjust incrementally
- Strain before spraying
- Flush system afterward
How to Thin Paint for HVLP & Cup Sprayers
Start by checking your paint’s label for HVLP or cup-sprayer recommendations, then thin in small increments so you don’t over-dilute the coating. Adjust viscosity for atomization, test on scrap, and refine sprayer techniques and thinning methods until you get a smooth finish.
| Step | Test | Result |
|---|---|---|
| Mix | Small cup | Smooth spray |
| Adjust | +5% thinner | Less clogging |
How to Thin Paint for Brush and Roller Work
If you’ve thinned paint for an HVLP or cup sprayer, you’ll find the approach for brush and roller work is simpler but still requires care.
You’ll thin slightly less for brush techniques and a tad more for roller techniques to maintain body and leveling. Test on scrap, adjust sparingly, and keep strokes even.
Thin a bit less for brushes and slightly more for rollers; test on scrap and adjust sparingly for even strokes.
- Test consistency first
- Use small additions
- Maintain nap compatibility
- Avoid over-thinning
- Clean tools promptly
How to Mix Thinner Into Paint Safely and Evenly
Before you start thinning, pick the correct thinner for your paint type so you don’t ruin the finish.
Measure and add the thinner slowly, stirring thoroughly and checking consistency as you go.
Keep the area well ventilated and wear a mask to protect yourself from fumes.
Choose The Right Thinner
Picking the right thinner matters because different exterior paints require specific solvents to maintain adhesion, color, and durability.
You’ll check thinner properties and follow safe mixing techniques, matching solvent to paint type and job conditions so finish and longevity aren’t compromised.
- Know solvent compatibility
- Consider VOC limits
- Match drying time
- Test on sample
- Use proper ventilation
Measure And Mix Precisely
When you’re ready to thin exterior paint, measure and mix precisely so the finish stays consistent and the paint performs as planned; use the manufacturer’s ratio as your baseline, then adjust only after small test batches.
You’ll monitor paint viscosity with a viscometer or flow cup, add thinner in measured increments, stir thoroughly, and document thinning techniques so you can replicate results and avoid over-thinning.
Maintain Safe Ventilation
After you’ve measured and mixed, focus on ventilation to keep fumes from building up while you add thinner and stir.
You’ll prioritize ventilation methods and airflow importance: open windows, use fans to direct air outward, work upwind, wear a respirator, and limit ignition sources.
Stay alert to smell and dizziness; stop and ventilate further if symptoms appear.
How to Test Thinned Paint for Coverage and Adhesion
Wondering whether your thinned exterior paint will still cover and stick?
Do quick coverage tests: apply a small panel coat over primed and bare wood, note opacity and drying time.
For adhesion checks, tape-test a cured patch and rub with a cloth; look for flaking or lift.
If coverage or adhesion’s poor, adjust thinner amount or recoat per product instructions.
Signs You’ve Over-Thinned Paint and How to Fix It
If the paint looks watery and runs when you load the brush, you’ve probably added too much thinner.
You’ll also notice poor coverage, drips, or an uneven film that later cracks or blisters as it dries.
Fixing it usually means stirring in more paint to regain body or starting a fresh batch at the correct ratio.
Paint Appears Watery
When your exterior paint looks runny or pools in low spots, you’ve likely added too much thinner and lost the paint’s body; this makes coverage uneven and increases drips.
But you can still salvage the batch by testing and adjusting its consistency before you proceed.
Check paint consistency and revise your application techniques:
- Stir thoroughly and retest
- Add small amounts of paint, not solvent
- Use viscosity cup for accuracy
- Strain to remove lumps
- Test on scrap wood
Poor Coverage Or Drips
Although thinning can help flow and penetration, over-thinned exterior paint will give you poor coverage and encourage drips, leaving thin, translucent spots and runs that ruin the finish. You’ll notice coverage issues and sagging. Stop, add manufacturer-recommended paint or reducer sparingly, mix, test, and retouch. Focus on drip prevention: shorter strokes, less load on the brush, and light tipping.
| Thin areas | Runs |
|---|---|
| Translucent | Sagging |
| Patchy | Drips |
Film Cracks Or Blisters
After you thin exterior paint too much, the finish can develop film cracks or blisters that signal the coating’s lost integrity and adhesion.
You’ll need to remove damaged areas, sand to sound edges, and apply proper primer before recoating. Focus on crack prevention and blister treatment to restore durability.
- Identify loose film
- Strip flaked paint
- Sand and feather edges
- Apply bonding primer
- Recoat with correct viscosity
How Temperature and Humidity Affect Thinning Needs
Because paint reacts to both temperature and moisture, you’ll need to adjust thinning to keep flow and drying times consistent; warmer air and lower humidity make paint thinner and dry faster, while cold or humid conditions slow drying and can make paint feel thicker.
Consider temperature effects and humidity factors when mixing: thin slightly in heat to prevent sagging, add less solvent in cool or damp conditions to avoid excessive runniness.
How Surface Type (Wood, Stucco, Metal) Changes Thinning
How you thin paint depends on the surface: porous wood soaks up more and often needs a thinner, while metal and stucco usually require less absorption-based adjustment.
You’ll prep metal by cleaning and scuffing and prep stucco by scraping and sealing to guarantee consistent coverage.
Adjust thinning after prep so the paint flows evenly without sagging or losing hide.
Wood Porosity And Absorption
When you’re thinning paint for exterior surfaces, consider that wood soaks up solvent and binder far differently than stucco or metal.
So you’ll need less solvent on smooth, nonporous materials and more on raw or weathered wood to achieve proper penetration and film formation.
You’ll account for wood absorption and porosity effects to avoid under- or over-thinning.
- Test on scrap wood
- Use less solvent on sealed wood
- Increase for rough, dry grain
- Monitor soak-in rate
- Adjust between coats
Metal And Stucco Prep
Treat a metal surface with minimal solvent and use adhesion promoter; for stucco texture, increase flash time, thin slightly to improve penetration, and test a small area to dial in viscosity before full application.
When to Thin Primer Versus Topcoat
Deciding whether to thin primer or topcoat comes down to function: primers often need thinning to improve penetration and adhesion on porous or weathered exterior surfaces, while topcoats usually stay at manufacturer-recommended viscosity unless you’re spraying or working in extreme temperatures.
Thin primers to boost penetration and adhesion on porous, weathered exteriors; leave topcoats at recommended viscosity unless spraying or in extreme temperatures
You’ll consider primer types and topcoat finishes, substrate, application method, and weather.
- Assess substrate porosity
- Check primer types
- Match sprayer specs
- Consider topcoat finishes
- Monitor temperature
Thinning Strategies for Long Jobs and Recoats
Because long jobs and multiple recoats change paint behavior over time, you’ll plan thinning to keep coverage consistent and drying predictable.
For long job strategies, mix small, measured thinning additions during the day rather than a full batch up front.
For recoat considerations, test film thickness, note solvent evaporation, and match viscosity before each pass to maintain uniform sheen and adhesion.
Safe Storage of Thinners and Thinned Exterior Paint
When you’re not using thinners or thinned paint, store them in tightly sealed, clearly labeled containers away from heat sources and direct sunlight to prevent fumes, solvent loss, and accidental ignition.
You should follow thinner safety and practical storage solutions to protect people and property.
- Keep originals or approved metal cans
- Use secondary spill trays
- Store in ventilated, locked area
- Separate from oxidizers
- Maintain inventory and dates
VOCs and Environmental Tips When Thinning Paint
Although thinning paint can make application easier, it also increases volatile organic compound (VOC) emissions.
So you should choose low-VOC thinners, work outdoors or in well-ventilated areas, and minimize waste by mixing only what you need.
Check local VOC regulations, prefer Low VOC options and Sustainable thinners, adopt Eco friendly practices and Thinning alternatives, and protect Air quality to reduce Environmental impact and support Green painting.
Troubleshooting Spray Problems After Thinning
If your spray gun starts sputtering, runs, or lays down uneven coverage after you’ve thinned the paint, don’t panic—most issues come from viscosity, filtration, or equipment settings that you can adjust quickly.
Check sprayer clogging, adjust paint consistency, and refine application technique to prevent an uneven finish.
- Clean filters and nozzle
- Re-strain mixed paint
- Thin incrementally
- Adjust pressure
- Practice spray pattern
How Thinning Affects Dry Time and Outdoor Curing
Because thinning changes how solvent and resin are balanced, it directly alters both surface dry times and the longer outdoor curing process. You’ll see faster initial evaporation with thinner mixes, but that can also hinder proper film formation if solvents leave too quickly or if the coat is applied too thin.
You should adjust thinning to preserve adequate open time, avoid pinholing, and allow full outdoor curing.
Cost Tips for Thinning Without Hurting the Finish
Now that you know how thinning affects drying and curing, you can protect the finish without overspending.
Use cost effective solutions and budget friendly options: measure additives, buy quality thinner in small quantities, test a scrap, mix slowly, and avoid over-thinning to keep adhesion and coverage intact.
- Measure additives
- Buy small amounts
- Test on scrap
- Mix slowly
- Avoid over-thinning
Quick Pre-Paint Checklist for Thinning and Application
1 quick pre-paint checklist will save you time and prevent costly mistakes: confirm the paint type, check surface condition, measure temperature and humidity, gather your thinner and tools, and set aside scrap for testing. You’ll follow pre paint preparation and proper thinning techniques to test mixes, note ratios, and protect finishes.
| Item | Action |
|---|---|
| Surface | Clean/repair |
| Tools | Gather/test |
| Mix | Record ratio |
Maintenance Tips to Preserve Thinned-Paint Exteriors
Regularly inspecting and maintaining thinned-paint exteriors will extend their life and keep finishes looking professional, so set a simple schedule for washing, touch-ups, and protective checks.
Regular inspections and simple maintenance—washing, touch-ups, and checks—keep thinned-paint exteriors lasting and looking professional.
You’ll protect the paint surface and reinforce correct application techniques by staying proactive.
- Wash gently to remove dirt and mildew
- Inspect seams and flashings
- Touch up chips promptly
- Recoat high-wear areas
- Check caulking and trim
Frequently Asked Questions
Can Thinning Change the Color or Sheen of Exterior Paint?
Yes—you can change color or sheen; thinning can alter color consistency and cause sheen variation if overthinned or mixed improperly. You’ll avoid issues by following manufacturer ratios, testing small batches, and stirring thoroughly before application.
Will Thinned Paint Affect Mildew Resistance or Mold Inhibitors?
Studies show over 50% of exterior failures involve moisture, so you should know: thinning can dilute mildew prevention additives, reducing effectiveness if overdone; maintain proper paint consistency to preserve mold inhibitors and protective performance.
Can I Thin Paint Left Over From a Previous Season?
You can, but check paint consistency and smell first; stir thoroughly, strain, and test application techniques on a scrap. If it’s lumpy, foul, or separates, don’t thin—discard and buy fresh for reliable performance.
Does Thinning Alter Warranty Coverage From the Paint Manufacturer?
Ironically, you’ll love discovering warranties often don’t: yes, altering paint consistency with thinning techniques can void manufacturer coverage if you don’t follow their specs. You should check product instructions and document exact thinning ratios and materials.
Can I Transport Thinned Paint in a Vehicle Safely?
Yes—you can transport thinned paint in a vehicle safely if you follow paint transportation safety precautions: seal cans tightly, use leakproof secondary containers, secure upright, ventilate the car, avoid heat, and follow local hazardous-material rules.
Conclusion
When you go ahead and thin exterior paint, you’re not cutting corners so much as giving it a little breathing room to flow, level, and bond better—just don’t overdo it. Follow manufacturer ratios, test a small area, and pick the right thinner for your paint type to avoid surprises. With a cautious, measured approach you’ll get a smoother finish and longer-lasting protection, keeping your project looking “helpfully relaxed” rather than neglected.