How to Thin Latex Enamel Paint the Right Way
You should thin latex enamel sparingly to keep color and binder balance: start with about 10% clean water, stir well, test, and add small increments up to 30% only if needed. For brushing, 0–5% usually helps; rolling needs minimal change; spraying often benefits from 10–20% for HVLP or 5–10% for airless units. Use flow improvers or acrylic retarders when appropriate, strain the mix, and note proportions so you can refine your process as you go for better results.
Quick Answer: How Much to Thin Latex Enamel and Why
You’ll generally thin latex enamel only when you need better flow for spraying or to fix paint that’s gone too thick; start with 10% water by volume, test for sprayability, and add up to 10–20% more only as needed—don’t exceed about 30% total or you’ll weaken film build and durability.
Use measured thinning techniques, adjust for desired paint consistency, and stir thoroughly.
How to Tell When Latex Enamel Needs Thinning
Wondering if your latex enamel needs thinning? You’ll watch latex enamel characteristics for gloss, leveling, and flow. Check thinning indicators: drag, visible brush marks, or clogging. Use this quick reference:
| Sign | What to look for | Action |
|---|---|---|
| Dragging | Paint resists movement | Thin slightly |
| Brush marks | Poor leveling | Thin/strain |
| Clogging | Sprayer/backloads | Thin/strain |
| Thick finish | Low gloss | Thin carefully |
When to Thin: Brushing vs. Rolling vs. Spraying
Although the base paint is the same, you’ll need to thin latex enamel differently depending on whether you’re brushing, rolling, or spraying—each method demands a specific consistency for proper leveling, coverage, and tool performance.
Although the base paint’s identical, thin latex enamel differently for brushing, rolling, or spraying to suit each tool.
For brushing techniques, aim for body to avoid runs.
Use rolling tips for even nap pickup.
For spraying methods, thin for atomization.
Match thinning to paint application and tool for best results.
Simple Percent Guidelines: How Much Water to Add
Start with small water-to-paint ratios like 5–10% for brushing and 10–15% for rolling, and increase up to 20–25% only for most sprayers.
Remember to back off on thinning for higher-sheen enamels since they thin-out gloss and can affect leveling.
Always test a small mix, adjust in 1–2% increments, and try a sample application before committing to a full batch.
Water-To-Paint Ratios
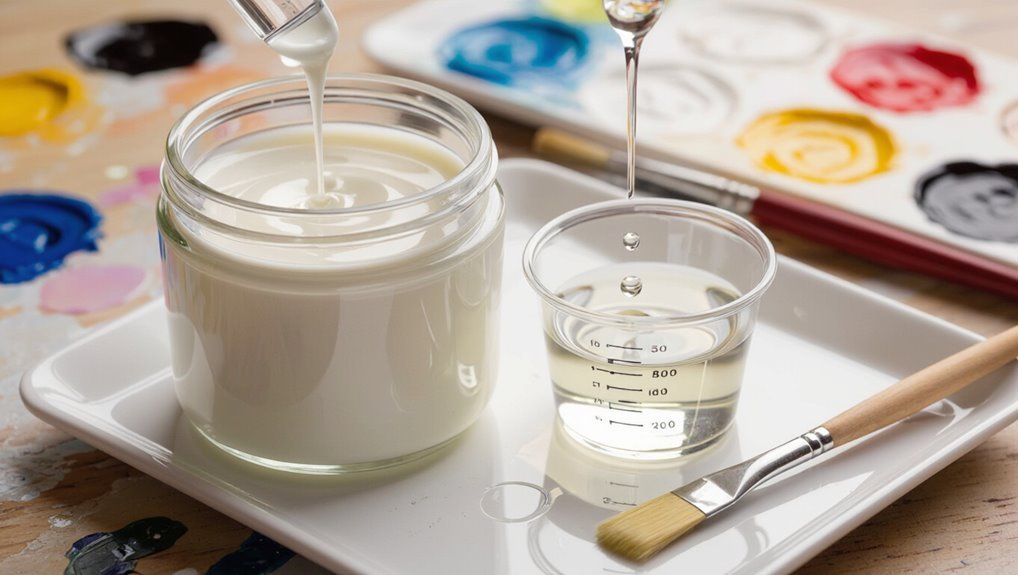
A good rule of thumb is to thin latex enamel in small increments—typically 5–10% water by volume at a time—until you reach the desired flow and spray or brushability.
You’ll test for paint consistency and adapt your application techniques.
Follow these simple ratios:
- 5% for minor flow improvement.
- 10% for spray use.
- 15% maximum for heavy thinning; avoid over-dilution.
Adjustment For Sheen
When you thin latex enamel, small changes in water content can noticeably lower sheen.
So adjust in precise increments and test on a sample panel before committing to a full coat.
For sheen adjustment, start with 5% water (by volume) to reduce gloss subtly, 10% for a matte shift, and avoid over-thinning beyond 15%.
Monitor sheen effects and dry film appearance closely.
Testing And Tuning
You’ve already seen how small water additions affect sheen; now you’ll test and tune mixes so the paint performs and looks right on your surface.
You’ll check latex paint viscosity and try thinning techniques in small batches. Follow these quick steps to dial in feel and flow:
- Measure 5% water, mix, stir.
- Brush test on scrap, note leveling.
- Adjust by 2–3% increments.
Best Thinners & Additives for Latex Enamel
When thinning latex enamel you’ll usually start with clean water or a labeled water-based thinner for stronger reduction without breaking the binder.
For slower drying and better open time on large areas, you can add a small amount of acrylic retarder, and for smoother brush or spray application a flow improver will reduce brush marks and fisheyes.
Always follow the paint maker’s limits and test a small batch before you adjust a full can.
Water-Based Thinner Options
Wondering which products will safely thin your latex enamel without wrecking its finish? You’ll prefer water based advantages and eco friendly options that keep cleanup easy and VOCs low.
Try these:
- Studio acrylic thinner — light, preserves sheen.
- Mild soap-and-water reducer — for small adjustments.
- Manufacturer water-based flow improver — compatible, prevents over-thinning.
Acrylic Retarder Additives
You’ll add small amounts per manufacturer directions to maintain consistency for acrylic applications and control drying times on warm or ventilated jobs.
Use them sparingly to avoid tackiness, test on sample panels, and follow safety and compatibility guidelines.
Flow Improver Recommendations
If slowing dry time helped you control leveling, the next step is improving flow so brush marks and stipple disappear.
Choose the right flow improver types and master application techniques to get smooth latex enamel. Start small, test, and adjust for gloss and adhesion.
- Extenders: boost wetting, reduce brush drag.
- Commercial flow enhancers: balanced, reliable.
- Mild co-solvents: thin without breaking film.
How to Use Retarders & Flow Improvers (Dosage & Safety)
When you need smoother brushstrokes or longer open time, retarders and flow improvers let you adjust latex enamel without over-thinning; use small, measured additions and test as you go to avoid tackiness or film defects. You’ll get retarder benefits and improved leveling with minimal thinning—follow safety precautions and precise application techniques.
| Additive | Typical Dose |
|---|---|
| Retarder | 1–5% |
| Flow improver | 0.5–2% |
| Test batch | 0.5 pint |
Safety First: Ventilation, Gloves, and Respirators

After you’ve fine-tuned the paint with retarders or flow improvers, protect yourself before you pick up the brush.
Use proper ventilation techniques and wear appropriate safety gear to limit exposure. Follow these essentials:
Use ventilation and safety gear—ventilate well, wear gloves and eye protection, and use a respirator in confined or fume-heavy spaces.
- Open windows, use fans, and run exhaust for airflow.
- Wear nitrile gloves and eye protection.
- Use an NIOSH-rated respirator when fumes are strong or space is confined.
Step-by-Step Mixing Process for Consistent Results
Start by measuring the paint’s viscosity so you know how much thinning is needed.
Pick the proper thinner for your latex enamel and add it slowly while stirring.
Blend thoroughly, then strain the mix to remove lumps and get consistent results.
Measure Paint Viscosity
Because consistent viscosity is key to a smooth finish, you’ll want to measure the paint before adding thinner so you know exactly how much to adjust.
Use a viscosity cup or flow cup for accurate viscosity measurement and record results to maintain paint consistency.
Then follow these quick checks:
- Stir thoroughly.
- Test cup flow time.
- Compare to target chart.
Choose Proper Thinner
Now that you’ve measured viscosity and know how the paint flows, pick a thinner that matches your latex enamel’s formulation and application method.
Consider thinner types—water for most latex, specialty additives for spray or high-gloss finishes—and add small amounts. Adjust gradually, testing paint consistency against your target.
Record proportions so you can repeat the mix for consistent results.
Blend Thoroughly And Strain
Mix the thinner in slowly while stirring steadily to guarantee a uniform consistency without creating bubbles.
You’ll use proper blending techniques and check viscosity as you go. Finally, strain the mixture to remove skin and debris.
Follow these straining methods:
- Pour through a fine mesh strainer.
- Use a paint sock for larger batches.
- Re-stir briefly after straining.
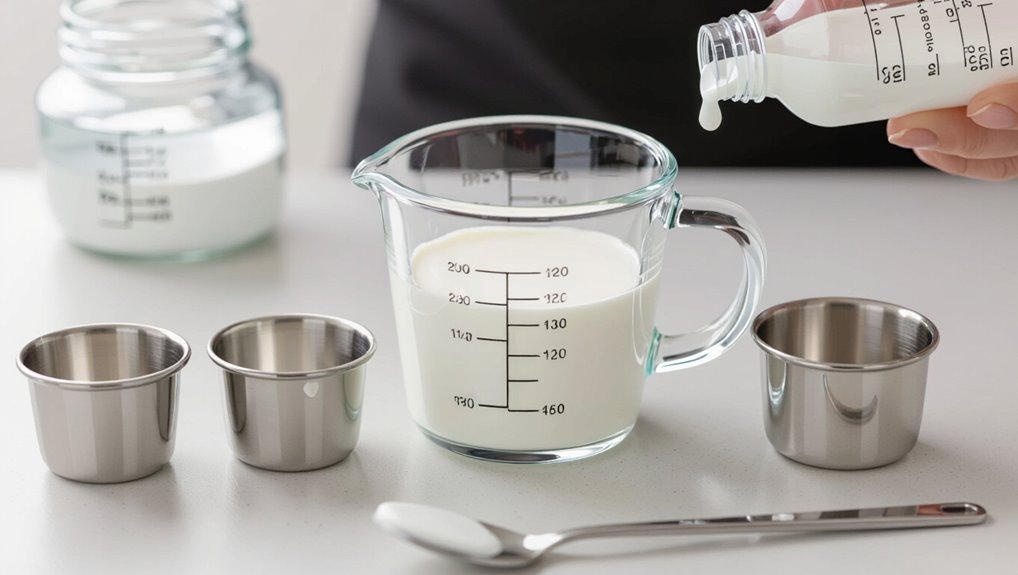
Tools & Containers You Need for Accurate Thinning
Accurate thinning starts with the right tools, and you’ll want measuring cups, graduated mixing sticks, a calibrated syringe or dropper for small amounts, and clean containers with tight lids to store mixed paint.
For a concise tools overview, include labeled cups, nonreactive spoons, and funnel tops.
Choose container types that seal well, resist solvent, and are easy to clean so mixtures stay consistent and contaminant-free.
Measure Latex Enamel Viscosity: Tilt & Drip Tests
Start by holding your paint can at a slight angle and pouring a small ribbon onto a flat mixing board to perform the tilt test, which shows how smoothly the enamel levels.
For the drip test, let a bead fall from your stirring stick and time how long it takes to form and break — that timing tells you whether the paint’s too thick or thin.
Use those observations together to decide precise reducer amounts before you mix more.
Tilt Test Procedure
When you need a quick, low-tech way to check latex enamel viscosity, the tilt test gives you a fast read on how the paint flows and levels; you just pour a small amount on a flat, non-absorbent surface, tilt it, and watch how the edge moves and whether it beads or runs.
Use the tilt method for simple viscosity testing checks.
- Note edge movement speed.
- Look for beading vs smooth flow.
- Repeat at consistent angle.
Drip Test Timing
After you’ve checked flow with the tilt test, try a drip test to gauge how long latex enamel takes to break into droplets under gravity — that timing tells you about viscosity and sag risk.
You’ll record drip timing from first run to separated droplets, noting temperature and tilt angle.
Use that viscosity measurement to decide whether thinning is needed before application.
Interpreting Results
How do you turn the tilt and drip observations into a clear viscosity decision? You compare drip length and tilt runoff to target behavior, noting sagging or too-fast leveling.
Match results to desired paint performance and adjust thinner incrementally. Then test application techniques you’ll use—brush, roller, or spray—to confirm consistency.
- Record measurements.
- Adjust in small steps.
- Re-test for final match.
Use a Viscosity or Zahn Cup for Precision
If you want consistent thinning results, use a viscosity or Zahn cup to measure flow rather than guessing by eye. You’ll get reliable viscosity measurement with simple precision tools, repeatable readings, and faster adjustments. Record cup number, seconds, paint temp, and thinning ratio to reproduce results and avoid wasted batches.
| Cup | Seconds | Notes |
|---|---|---|
| Zahn 1 | 45 | Base |
| Zahn 2 | 60 | Thinned |
| Zahn 3 | 30 | Thick |
| Zahn 4 | 75 | Over-thinned |
Thin Paint Without Ruining Color or Sheen
While you thin latex enamel, keep color and sheen intact by adding only compatible thinners in small increments and testing frequently on a scrap surface.
Concentrate on maintaining pigment-to-binder ratio so you don’t dilute opacity or alter gloss. You’ll protect color preservation and sheen maintenance by measuring, testing, and recording adjustments.
- Measure precisely
- Test on scrap
- Adjust minimally
How Temperature & Humidity Change Thinning Needs
Because temperature and humidity change how fast latex enamel flows and dries, you’ll need to adjust thinning and application accordingly.
In warm, low-humidity conditions, temperature effects speed drying, so add a bit more water or retarder to maintain open time.
In cool, humid environments, humidity impacts slow curing; thin less to avoid sagging and extend drying with gentle heat or airflow instead.
How to Thin and Rework Old or Partially Cured Latex Enamel Safely
Shifts in temperature and humidity can also affect paint you’ve already applied or left sitting in a can, so you’ll want to approach thinning and reworking old or partially cured latex enamel with extra care.
You’ll focus on Old Paint Restoration and Safe Handling:
- Test small sample, note film tack and odor.
- Add water or manufacturer thinner sparingly, stir slowly.
- Strain, retest, then apply thin coats until cured.
Common Mistakes That Cause Runs, Brush Marks, or Clogs
Keep a close eye on what you’re doing—most runs, brush marks, and clogs come from simple, avoidable mistakes like overloading the brush, thinning the paint too much, or rushing between coats.
Learn common pitfalls: poor surface preparation, wrong paint consistency, bad brush techniques, improper roller methods, incorrect spray settings, neglecting drying time, and environmental factors that harm paint application and finish quality.
Adjust Thinning for Spray Guns: Nozzle & Pressure Tips (Latex Enamel)
When you’re switching from brushing to spraying latex enamel, match the paint’s viscosity to your gun’s nozzle size and operating pressure so you get an even atomization without sagging or orange peel.
Tune spray gun adjustments carefully: choose nozzle selection for particle size, set pressure settings per manufacturer, and test paint consistency on scrap.
- Start low
- Increase gradually
- Record settings
Restore Over-Thinned Paint Safely
If your latex enamel feels too thin, first check its viscosity with a flow cup or by stirring and watching how it coats a stick.
Add a compatible binder a little at a time, mixing thoroughly between additions until the body looks right.
Before committing, spray or brush a small test panel and confirm adhesion and the final sheen match your expectations.
Assess Paint Viscosity
Wondering whether your latex enamel’s too thin or just right? Use viscosity measurement and simple observations to judge paint consistency quickly. Check feel, flow, and coverage; don’t guess.
- Watch how it drains from a stir stick.
- Spray or roll a small test patch.
- Note leveling and sag—too much run means it’s over-thinned.
Add Binder Gradually
After you’ve confirmed the paint’s too thin from your tests, restore body by adding binder gradually.
Choose compatible binder types (latex-compatible additives or concentrated acrylic binders) and stir small increments, mixing thoroughly between additions.
Check viscosity after each dose and stop when you reach the desired flow.
Avoid overshooting; it’s easier to add more than to reverse dilution.
Test Adhesion And Finish
Now that you’ve adjusted viscosity, test adhesion and finish on a small, inconspicuous panel or scrap to make sure the paint bonds and looks right.
Perform adhesion testing and finish evaluation before full application. Check drying, hardness, and appearance. If over-thinned, restore with binder gradually.
- Tape pull test
- Dry-time check
- Visual sheen match
Thinning Small Amounts for Touch-Ups and Samples
When you’re doing touch-ups or mixing small sample batches, thin only what you’ll use that day so the rest stays stable; for tiny amounts, water is usually enough—add it dropwise and stir thoroughly until the paint flows smoothly without becoming runny.
Use precise touch up techniques and measured sample preparation: mix in a clean container, test on scrap, note ratios, and discard leftovers to avoid skinning or contamination.
Troubleshooting: Fix Orange Peel, Sagging, and Fish Eyes
If your finish shows orange peel, sagging, or fish eyes, you can usually correct them by identifying the cause and applying targeted fixes—surface prep, thinning, spray technique, or contamination control.
Focus on proper surface preparation, correct viscosity, and clean equipment.
- Orange peel remedies: sand, retime coat, adjust atomization.
- Sagging solutions: thin, shorter passes, faster flash.
- Fish eye fixes: remove contaminants, use additives, clean gun.
Quick Thinning Cheat Sheet for Common Projects
Because projects and tools vary, you’ll want a concise cheat sheet that tells you how much to thin latex enamel for each common application.
For brushes/rollers, thin 0–5% for ideal paint consistency.
For HVLP/spray techniques, thin 10–20% and strain.
For airless sprayers, thin 5–10%.
Always test on scrap, adjust in 5% increments, and note temperature and humidity for repeatable results.
Frequently Asked Questions
Can I Thin Latex Enamel With Rubbing Alcohol or Acetone?
No — you shouldn’t thin latex enamel with rubbing alcohol or acetone; they’ll ruin paint consistency and finish. You’ll want water or manufacturer-recommended solvent alternatives designed for latex to maintain proper flow and adhesion.
Will Thinning Affect Paint Warranty or Manufacturer Recommendations?
Yes, thinning can void coverage, can alter performance, and can shift liability: you’ll face warranty implications if you ignore manufacturer guidelines, so follow their specs, keep records, and consult them before altering any factory-mixed paint.
How Long After Thinning Is Paint Usable Before It Spoils?
You can use thinned paint for several months to a year if you store it properly; thinning slightly shortens paint shelf life, so seal cans tightly, keep them cool and dry, and practice proper storage to avoid spoilage.
Can Primed Surfaces Change Thinning Needs or Adhesion?
Yes — primed surfaces can change thinning needs and adhesion. You’ll consider adhesion factors and surface preparation: sealed primers may need less thinning for proper flow, while contaminated or porous primers demand prep to guarantee strong adhesion.
Is Thinned Latex Enamel Safe for Children’s Toys or Food-Contact Items?
No—thinned latex enamel isn’t safe for kids’ toys or food-contact items; you should choose non toxic alternatives, follow manufacturer guidance, and test drying time and finish—sand, seal, and cure fully before letting children handle.
Conclusion
You’ve learned how little water can smooth a brushstroke and how too much can wreck a finish. Now you’ll choose: thin for flow or keep thickness for coverage. Trust simple percentages for rolling, add a splash more for spraying, and rescue over-thinned paint with more pigment, not panic. Contrast careful tests with bold projects—test, adjust, and paint. That balance between caution and confidence gets you pro results every time.