
How to Treat Moisture in Walls Before It Becomes a Bigger Problem
You can stop wall moisture from becoming a major repair by acting fast: identify stains, musty smells, or cold patches, cut off water sources, dry the area with fans or a dehumidifier, and seal small cracks with silicone or masonry sealant. Check gutters, downspouts, and grading to divert runoff and inspect plumbing and rooflines for leaks. Monitor humidity and use extractor fans. Keep an eye on signs of rising damp or penetrating leaks and keep going to learn practical fixes and prevention.
Who This Guide Is For and What You’ll Learn

Wondering if this guide is for you? You’re a homeowner, renter, or DIYer who wants clear moisture prevention tips and practical wall maintenance strategies.
You’ll learn to spot early signs, prioritize fixes, and choose affordable tools and materials. You’ll get straightforward steps to reduce humidity, direct water away, and plan simple repairs so moisture won’t escalate into costly damage.
Quick Checklist: Can You Stop Wall Moisture Now?
Start with a quick visual inspection: look for staining, peeling paint, damp patches, or mold spots.
If you spot a small leak or failed seal, you can often make immediate small fixes like tightening plumbing joints, re-caulking seams, or replacing a damaged trim.
Those quick steps won’t solve major issues, but they can stop minor moisture from getting worse while you arrange a full repair.
Quick Visual Inspection
Before you call a pro, walk the perimeter of the room and look for obvious signs of moisture: peeling paint, bubbling drywall, dark stains, efflorescence (white powder), or warped trim. Use visual indicators to note locations and moisture patterns; mark high, low, frequency, source, and urgency in this quick table:
| Location | Finding |
|---|---|
| Wall A | Stain |
| Wall B | Bubbling |
| Corner | Efflorescence |
| Trim | Warped |
| Ceiling | Dark spot |
Immediate Small Fixes
If you can’t get a contractor out right away, there are a few quick fixes you can do yourself to stop minor wall moisture from getting worse:
Patch small cracks with silicone or masonry sealant, redirect downspouts and improve grading, run dehumidifiers and fans, apply temporary moisture barriers like plastic sheeting behind baseboards, and monitor spots.
These quick repairs can buy time before professional intervention.
How to Spot Early Signs of Damp Walls

A musty smell or a faint tide mark on skirting boards can be the first clues that moisture’s making a home in your walls; learn to spot these subtle signs early so you can act before mold and structural damage set in.
Check for peeling paint, blistering wallpaper, cold patches, efflorescence and recurring condensation.
Use damp detection techniques and simple moisture assessment methods to confirm and prioritize repairs.
Distinguishing Stains: Mold, Salt, or Paint Failure
How can you tell whether that unsightly stain is mold, salt efflorescence, or just paint failing?
Check texture and color: fuzzy, musty patches suggest mold—use mold detection swabs or kits.
Powdery white deposits wipe away indicating salt identification.
Flaking, blistered paint with no residue points to paint failure.
Document findings, photograph areas, and label samples before remediation.
Why Finding the Moisture Source Comes First
You should start by locating where water is entering—cracks, roof leaks, or faulty flashing are common culprits.
Then decide if the problem is just a surface issue like condensation or a structural leak that needs repair.
Prioritize fixes that stop the water first, because treatments for stains or mold won’t last if moisture keeps coming in.
Locate Water Entry Points
Why hunt for the exact entry points first? You’ll pinpoint where water ingress starts—around windows, rooflines, plumbing joints, or exterior cracks—so you can target repairs.
Use moisture mapping with a probe or infrared scan to trace paths and prioritize fixes. Document locations, timings, and conditions so your next steps stop the source, not just the symptoms.
Distinguish Surface Vs. Structural
Having mapped entry points and documented conditions, the next step is to tell surface moisture from structural wetting so you can fix the root cause rather than just dry a wall. You’ll inspect patterns, test damp depths, and trace moisture sources to guide prevention strategies.
| Indicator | Test | Action |
|---|---|---|
| Stain | Probe | Repair |
| Surface mold | Moisture meter | Clean |
| Deep damp | Infrared | Seal |
Prioritize Immediate Fixes
1 clear priority should be to locate the moisture source before you start repairs, because patching visible damage without stopping the leak just delays recurrence and wastes time and money.
You should inspect plumbing, rooflines, and grading, prioritize urgent repairs, and plan moisture management that targets root causes.
Fixing the source first saves money, prevents mold, and guarantees lasting results.
Inspect Walls With Eyes, Nose, and Hands
Before you grab tools or call a pro, look, smell, and feel each wall to quickly spot moisture issues; your eyes will catch stains and blistering, your nose can detect mildew or damp mustiness, and your hands will reveal cold, damp spots or soft, crumbling plaster. Use moisture detection as a quick check and take preventive measures.
| Sign | Action |
|---|---|
| Stains | Note location |
| Musty odor | Ventilate |
| Soft plaster | Probe gently |
| Blisters | Monitor |
| Cold spots | Measure humidity |
Indoor Hotspots to Check for Wall Moisture
Now that you’ve used sight, smell, and touch to spot problems, focus your inspection on common indoor hotspots where moisture likes to hide.
Check behind and around bathrooms, kitchens, laundry areas, basements, and near HVAC units.
Use moisture detection tools during a thorough wall inspection, probing corners, baseboards, and interior plumbing chases to catch leaks early and prevent mold growth.
Check External Walls, Rooflines, and Gutters
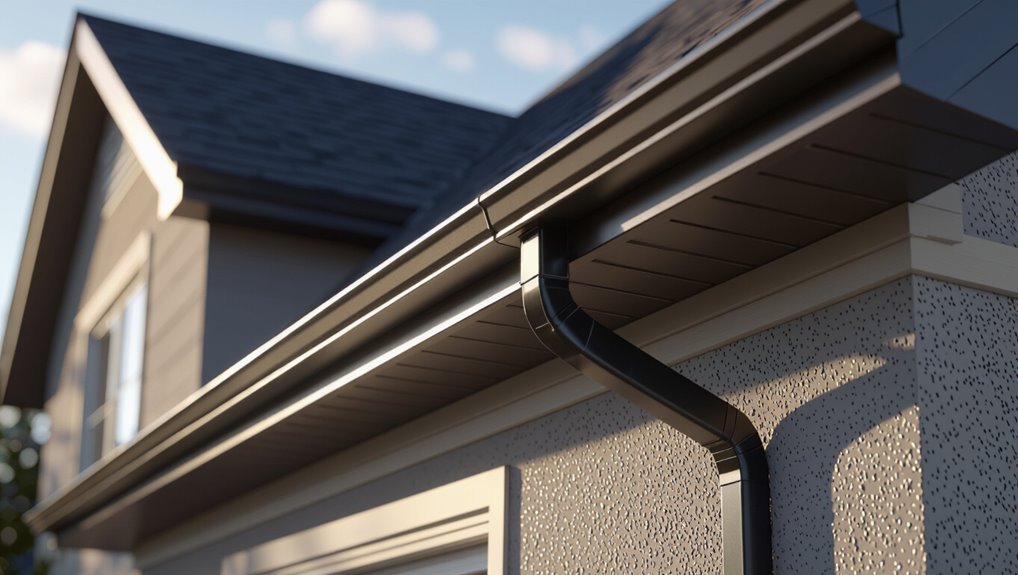
Don’t forget to inspect gutters regularly, since clogged or damaged gutters can send water down walls.
Check roofline seals for gaps or cracked caulking that let moisture in.
Also examine wall flashing to guarantee it’s intact and directing water away from the structure.
Inspect Gutters Regularly
Because clogged or damaged gutters send water where it shouldn’t, inspect external walls, rooflines, and gutters at least twice a year and after severe storms.
For effective gutter maintenance, clear debris, flush downspouts, and check hangers and joints during seasonal inspections.
You’ll prevent overflow, protect siding and foundations, and spot problems early so small fixes stop moisture from reaching interior walls.
Check Roofline Seals
Inspect the seals along your roofline regularly to stop leaks before they start.
Check for cracked roof sealants and loose edges, and schedule flashing inspections where roofs meet chimneys or vents.
Keep seals flexible and replace damaged material promptly.
- Look for gaps or brittle sealant
- Note rust or movement near seams
- Replace failing sealants quickly
- Document inspection dates
Examine Wall Flashing
When you examine wall flashing, focus on the junctions where external walls meet rooflines and gutters, since that’s where water first finds weaknesses.
Look for gaps, lifted edges, corroded metal, or improper overlaps and note any signs of staining or damp inside the building.
You should verify flashing installation is correct, replace damaged sections, and schedule regular flashing maintenance to prevent leaks and hidden wall moisture.
How Plumbing Leaks Cause Wall Damp
If a pipe inside your wall starts to leak, water soaks the plaster, timber, and insulation fast, creating damp patches, peeling paint, and musty odors you’ll notice before structural damage appears.
You should schedule a plumbing inspection and use professional leak detection to find hidden drips, then dry, repair, and monitor affected areas.
- Locate source
- Stop flow
- Replace damaged material
- Verify dryness
How Roof and Flashing Failures Lead to Damp Walls
Because your roof and flashings are the building’s first line of defense, failures there let water reach wall cavities quickly, causing staining, rot, and mold growth.
You should schedule roof maintenance, inspect flashing installation, and test leak detection regularly.
Upgrade roofing materials, improve moisture barriers, apply weatherproofing techniques, add proper drainage solutions and ventilation systems so water won’t penetrate and damage walls.
How Condensation Shows Up on Interior Walls
Though it often happens quietly overnight, condensation on interior walls shows up as damp patches, dark streaks, or a fine film of moisture that appears on cooler surfaces.
You’ll notice mold spots, peeling paint, musty odors, and cold walls when condensation causes issues. Monitor humidity levels and act quickly.
- Mold spots
- Peeling paint
- Musty odor
- Cold walls
Rising Damp vs. Penetrating Damp: Quick Comparison
Condensation often gets the blame for damp patches, but you also need to tell rising damp and penetrating damp apart because they require different fixes. You should note origin, signs, urgency—Rising Damp wicks from ground; Penetrating Damp enters through walls. Compare quickly:
| Type | Source | Typical Sign |
|---|---|---|
| Rising Damp | Ground | Tide marks |
| Penetrating Damp | Exterior leaks | Local wet patches |
| Action | Diagnosis | Repair/ventilate |
Simple Home Tests to Check for Rising Damp
You can run two quick checks yourself to see if rising damp is likely.
Try the salt test by taping a clear plastic bag over a damp patch for a few days and looking for salt crystals when you remove it.
Also inspect mortar joints for crumbling or white powdery deposits, which often indicate salts rising from the ground.
Simple Salt Test
A simple salt test helps you check whether damp rising from the ground is causing flaky, powdery deposits on your walls.
You’ll use salt testing for moisture detection by scraping a bit of powder, sealing it in a bag, and observing recrystallization after drying.
Try these steps:
- Collect sample from affected area.
- Place sample in clear bag.
- Seal and label.
- Check after 48–72 hours.
Visual Mortar Check
Salt testing can tell you if salts from rising damp are present, but inspecting the mortar between bricks gives quick clues about how moisture’s moving through the wall.
Look for crumbling joints, powdery deposits or dark staining during a visual assessment.
Tap suspect mortar—hollow sounds mean reduced mortar integrity.
Note locations, photograph damage, and decide if repointing or a professional damp survey’s needed.
When Humidity Causes Damp: Measure It
How can you tell if household humidity is causing dampness in your walls? Use humidity control and moisture monitoring tools to confirm. Check spots, timing, and air.
Use hygrometers and moisture meters, watch window condensation and mold timing to confirm humidity-driven wall dampness.
- Buy a hygrometer for room readings.
- Note condensation frequency on windows.
- Inspect mold patterns near ceilings.
- Track readings over days to spot trends and act.
Trace Hidden Leaks With Basic Tools
If you suspect moisture is coming from a hidden leak, start with simple tools that give clear clues: a flashlight to inspect dark corners, a screwdriver to probe soft spots, and food coloring or dye in plumbing traps to reveal slow-moving leaks. Use basic leak detection and simple moisture measurement techniques to narrow searches before repairs.
| Tool | Purpose |
|---|---|
| Flashlight | Visual inspection |
| Screwdriver | Probe softness |
| Dye | Trace flow |
| Meter | Quantify dampness |
When to Hire a Professional Leak Detector
When a leak keeps reappearing, spreads despite your fixes, or you can’t pinpoint its source after basic checks, call a professional leak detector—they’ve got specialized tools and experience to find hidden plumbing, roof, or wall leaks quickly and prevent costly damage.
- Detecting leaks with thermal cameras and moisture meters.
- Professional assessment of structural risk.
- Precise leak detection to avoid guesswork.
- Thorough moisture evaluation and remediation plan.
Immediate Steps to Stop Moisture Spreading
First, stop the water at its source by shutting valves or blocking leaks so the problem doesn’t get worse.
Then remove standing water and use fans or dehumidifiers to dry the area quickly.
Finally, open windows and improve ventilation to keep moisture from returning.
Stop Water Source
Start by cutting off the water at its source so you stop new moisture from spreading through walls and causing more damage.
You’ll limit water damage and begin moisture control immediately. Act fast: locate valves, shut mains, stop leaks, and isolate wet areas.
- Turn off main valve
- Close local shutoffs
- Patch visible leaks temporarily
- Move valuables away
Dry And Ventilate
1. You need to dry and ventilate affected walls immediately. Open windows, run fans or dehumidifiers, and remove wet materials so surfaces can dry.
Improve air circulation and install temporary moisture barriers where water seeps in.
Check insulation and wall cavities; ventilate attics and crawlspaces. Acting fast prevents mold, structural damage, and costly repairs.
How to Dry Wet Walls Safely and Quickly
Drying wet walls safely and quickly means acting deliberately: remove standing water, increase airflow with fans and open windows, and lower humidity using dehumidifiers so mold doesn’t take hold.
Dry wet walls fast and safely: remove water, boost airflow with fans and windows, and lower humidity with dehumidifiers.
Use moisture detection to find damp spots and consider compatible wall treatments after drying.
Steps to follow:
- Remove water and wet materials.
- Boost ventilation.
- Run dehumidifiers.
- Monitor until fully dry.
Short-Term Fixes That Buy Time
While you arrange permanent repairs, quick temporary measures can limit damage and reduce mold risk; you’ll want to prioritize sealing leaks, redirecting water, and protecting interiors until professional fixes are in place.
Use temporary solutions like tarps, plumber’s tape, and sandbags to divert moisture.
Install temporary moisture barriers, run dehumidifiers, and ventilate the area so you control spread and buy time for proper repairs.
How to Remove Surface Mold Safely
Start by protecting yourself and the space: put on an N95 mask, gloves, and eye protection, then isolate the area by closing doors and setting up plastic sheeting if possible.
Clean with detergent and water; avoid bleach on porous surfaces. Note mold types to choose proper cleaners. Document damage, ventilate, and dry fully.
- scrape gently
- vacuum HEPA
- clean surface
- dry thoroughly
When to Replace Plaster, Drywall, or Insulation
If you see visible mold or dark staining that doesn’t scrub away, you’ll likely need to replace the affected plaster, drywall, or insulation.
Also replace materials that are crumbling, sagging, or otherwise compromised, since structural integrity can’t be trusted.
And if moisture problems persist after repairs, don’t patch — remove and replace to prevent recurring damage.
Visible Mold Or Staining
Sometimes you’ll find dark spots, fuzzy growth, or discolored patches on your walls — signs that mold or staining has taken hold and may mean you need to replace plaster, drywall, or insulation.
Act quickly: stop moisture, assess extent, remove contaminated materials, and follow mold prevention and staining solutions to prevent recurrence.
- Inspect
- Contain
- Remove
- Restore
Compromised Structural Integrity
Visible mold or staining can signal deeper damage, and when moisture has soaked through materials you’ll need to assess whether plaster, drywall, or insulation can be salvaged or must be replaced. Use moisture detection and structural assessment tools; probe soft spots, sagging, or crumbling. Replace materials if integrity’s compromised.
| Sign | Action |
|---|---|
| Soft or crumbling | Replace |
| Persistent stains | Inspect further |
| Insulation wet | Remove and dry |
Persistent Moisture After Repairs
When moisture returns after repairs, you’ll need to determine whether plaster, drywall, or insulation can be dried and saved or must be replaced. Persistent dampness promotes mold, degrades materials, and hides ongoing leaks that simple fixes won’t address.
- Check moisture retention with meters and probes.
- Inspect for mold, soft spots, and odor.
- Use proven repair techniques when drying and sealing works.
- Replace materials if damage or retention persists.
How to Fix Plumbing Causing Wall Damp
Wondering whether your plumbing is to blame for damp walls? Check pipes, joints, and appliances for leaks; prioritize plumbing maintenance and leak detection. Turn off water, dry the area, and repair or replace faulty sections. If hidden, call a pro. Monitor humidity and recheck after fixes to prevent recurrence.
| Task | DIY? | When to call pro |
|---|---|---|
| Visual check | Yes | – |
| Moisture meter | Yes | – |
| Pipe repair | Sometimes | When inaccessible |
| Appliance check | Yes | – |
| Leak detection | Sometimes | Persistent damp |
Fix Roof and Gutters to Stop Damp Walls
If your roof or gutters aren’t diverting water properly, that runoff can soak exterior walls and work its way inside, causing damp patches and mold.
You should perform regular roof inspection and gutter maintenance to prevent leaks and overflows.
Check these steps:
- Clear debris from gutters.
- Repair sagging sections.
- Replace damaged shingles.
- Confirm downspouts discharge away from foundations.
Treat Rising Damp: Damp-Proofing Options
Fixing roof and gutters helps stop water entering from above, but moisture can also rise from the ground through brick and mortar.
You’ll inspect skirting and plaster for tide marks, then choose damp proofing materials—chemical DPC injection, physical DPM membranes, or retrofit damp-proof courses.
Install moisture barriers at floor level, repair mortar, and allow walls to dry fully before replastering to prevent recurrence.
Reduce Condensation With Better Ventilation
To cut condensation, you’ll want to improve airflow paths so moist air can move out of rooms instead of settling on walls.
Consider installing mechanical ventilation like extractor fans or an HRV system in problem areas to keep air exchanging continuously.
Also monitor and control indoor humidity with dehumidifiers or by adjusting habits like drying laundry indoors.
Improve Airflow Paths
When you open up airflow paths, you give warm, humid air a place to move instead of letting it condense on cold walls; that means sealing unintended gaps, adding vents where air gets trapped, and keeping intake and exhaust routes clear so moisture can escape efficiently.
- Inspect and map airflow improvements.
- Remove obstructions from pathways.
- Add passive vents in stagnant zones.
- Balance supply and exhaust ventilation strategies.
Install Mechanical Ventilation
Install a mechanical ventilation system to control indoor humidity and stop warm, moist air from condensing on cold surfaces. These systems move air reliably where passive methods can’t, especially in tightly sealed or multiroom buildings.
You’ll choose balanced ventilation systems with heat recovery to exchange stale air, reduce surface condensation risk, and improve air quality.
Maintain units regularly to guarantee consistent performance.
Control Indoor Humidity
Since excess moisture makes surfaces colder and fuels condensation, you should keep indoor humidity within recommended limits to prevent damp patches and mold on walls.
Use humidity control methods and ventilation to improve indoor air quality.
Try these steps:
- Install extractor fans in kitchens/bathrooms.
- Run a dehumidifier when needed.
- Ventilate during cooking/showering.
- Monitor humidity with a hygrometer.
Use Dehumidifiers Effectively in Problem Rooms
If a room stays damp despite fixing leaks and improving airflow, you’ll get faster results by using a dehumidifier targeted to that space; place it where humidity problems start—near exterior walls, behind furniture, or in corners—and set it to maintain relative humidity between 40–50% to prevent mold and plaster damage.
You’ll optimize dehumidifier placement, schedule regular humidity monitoring, and empty or drain cartridges promptly.
Best Paints and Coatings for Damp-Prone Walls
Once you’ve controlled room humidity with a dehumidifier, protect the surfaces themselves by choosing paints and coatings made for damp-prone walls.
Use moisture resistant paints and waterproof coatings to block damp and prevent mold.
Use moisture-resistant paints and waterproof coatings to seal out damp and stop mold before it starts.
Consider these options:
- Acrylic masonry paint
- Breathable waterproof membrane
- Anti-mold enamel
- Limewash with sealant
How to Replaster Walls After Moisture Damage
First, you’ll assess and remove any loose or crumbling plaster back to a sound edge so new material will bond properly.
Then you’ll clean and prime the exposed surface, repair any underlying damp sources, and apply a suitable base and finishing plaster in thin, even coats.
Finish by sanding lightly and sealing with a moisture-resistant primer before repainting.
Assess And Remove Damaged Plaster
Start by inspecting the plaster for soft spots, bubbling, cracking, or visible mold so you know exactly how much needs removal and where repairs will be focused.
You’ll perform a plaster assessment, mark damaged areas, and guarantee moisture removal before proceeding.
- Probe weak plaster
- Cut out loose sections
- Dispose contaminated material
- Dry and recheck structure
Prep And Replaster Surfaces
Prepare the surface by removing loose dust and old bonding agents, sweeping the area with a stiff brush and vacuuming the debris so new plaster will adhere properly. Choose appropriate plaster types, apply a primer, and install moisture barriers where needed. Mix and trowel in thin coats, sanding between layers. Finish with a final skim and seal.
| Step | Action |
|---|---|
| 1 | Clean |
| 2 | Prime |
Replace and Protect Insulation in Wet Walls
When your walls have been soaked, you’ll need to remove any wet or water-damaged insulation and replace it with dry, appropriate materials to stop mold, restore R‑value, and prevent future moisture problems.
You should focus on insulation replacement and installing moisture barriers, sealing gaps, and choosing treated or closed-cell options.
- Remove damaged insulation
- Dry framing
- Install vapor/moisture barriers
- Fit new insulation tightly
Prevent Mold Coming Back After Treatment
After you’ve repaired wet walls and replaced insulation, make a plan to stop mold from returning by controlling moisture, improving airflow, and keeping surfaces clean and monitored.
Use mold prevention strategies like dehumidifiers, exhaust fans, and quick repairs to leaks. Regularly inspect problem areas, dry spills promptly, and choose mold-resistant paints and materials as long term solutions to keep mold away.
How Landscaping and Drainage Affect Wall Damp
Because water follows the easiest path, the way you grade soil, place plants, and route downspouts directly determines whether rain soaks into your foundation or gets carried away.
Good landscaping and drainage keep walls dry, while poor choices funnel moisture against them and cause persistent damp.
- Regrade soil away from walls.
- Extend downspouts with drainage solutions.
- Choose plants with shallow roots.
- Use landscaping design to divert runoff.
Improve Cavity Wall Performance
To improve cavity wall performance, you should check that insulation runs continuously without gaps and that any damaged or missing sections are repaired.
Seal and repair mortar joints, wall ties, and openings to stop moisture paths through the cavity. These steps cut heat loss and prevent damp penetration from undermining the wall.
Improve Insulation Continuity
If your cavity walls have gaps, compressions, or thermal bridges, heat and moisture will find the weak spots and undermine the whole wall system.
You should restore insulation continuity to get insulation benefits and stop thermal bridging.
Actions:
- Fill cavities with appropriate insulating material.
- Replace crushed or damp insulation.
- Seal joints and service penetrations.
- Verify with thermal imaging and local repairs.
Fix Damp Penetration Paths
When water finds a path through cracks, gaps around windows, or poorly sealed service entries, it undermines the cavity’s ability to drain and ventilate, so you should identify and stop those entry points before repairing insulation or finishes. Use damp proofing techniques and moisture barrier solutions: seal gaps, repoint masonry, and install proper flashings.
| Task | Method | Priority |
|---|---|---|
| Seal gaps | Sealant/foam | High |
| Repoint | Mortar | Medium |
| Flashings | Metal/EPDM | High |
| Inspection | Camera | Medium |
Seal External Cracks and Masonry Joints
Start by inspecting the exterior for hairline cracks, gaps in mortar, and deteriorated joints—these openings are where water first finds its way into your walls.
You’ll perform crack sealing and routine masonry maintenance to stop leaks, then repoint and use compatible sealants.
Follow this checklist:
- Clean debris from joints
- Remove loose mortar
- Apply flexible sealant
- Repoint with matching mortar
Maintain Gutters, Downspouts, and Drains
Check your gutters regularly for leaves and damage so rainwater can’t spill onto walls or the foundation.
If downspouts are blocked, clear them promptly to keep water moving away from the house.
Make sure drainage directs water well away from the building to prevent wall moisture problems.
Inspect Gutters Regularly
If your gutters, downspouts, and drains aren’t kept clear, water will pool at your foundation and find its way into walls. Inspecting them regularly prevents blockages and directs runoff away from your home.
You should schedule simple gutter maintenance and check water drainage paths so moisture won’t threaten siding or basements.
- Inspect for debris
- Check pitch and seams
- Look for rust or holes
- Verify connections
Clear Downspout Blockages
When leaves, twigs, or nests clog a downspout, water backs up into gutters and can seep into your walls or foundation.
So clear blockages promptly to keep runoff flowing away from the house. You should inspect and remove debris, use a plumber’s snake or pressure washer for stubborn clogs, and schedule regular downspout maintenance.
These simple drainage solutions protect siding and prevent moisture damage.
Ensure Proper Drainage
Because water follows the path of least resistance, you should keep gutters, downspouts, and yard drains clear and properly pitched so runoff moves away from your walls and foundation.
Use simple drainage solutions and good water management to prevent seepage.
- Clean gutters seasonally.
- Extend downspouts away.
- Grade soil to slope outward.
- Inspect yard drains regularly.
Balance Heating and Ventilation Seasonally
As seasons change, you’ll need to adjust heating and ventilation together to keep wall moisture under control. Heating lowers relative humidity while fresh air removes excess indoor moisture, so using them in tandem prevents condensation and mold.
Monitor seasonal humidity and adopt ventilation strategies: lower heating at night, run timed extractor fans during activities that add moisture, and briefly air rooms daily to balance comfort and dryness.
Low-Cost Fixes Renters Can Use Without Permission
If you rent, you can still cut wall moisture with a few simple, low-cost fixes that don’t need landlord approval:
- Use a dehumidifier or moisture-absorbing packs in damp rooms.
- Seal small cracks and gaps with removable caulk.
- Improve airflow with fans and vent blockers for window condensation.
- Hang breathable wall-mounted shelving to prevent trapped damp.
These DIY moisture solutions are renter friendly strategies.
When Landlords Must Act: Safety & Legal Triggers
When wall moisture threatens health, safety, or habitability, your landlord is legally required to take action.
You should document damage, report promptly, and request written confirmation.
Insist they follow safety protocols for mold removal and structural repair.
Know your local legal responsibilities and deadlines for responses.
If they ignore requests, pursue local housing authorities or legal advice to enforce repairs and protect your living conditions.
How to Budget for Professional Damp Repairs
Once you’ve documented issues and pushed your landlord to act, you’ll need to plan money for professional damp repairs—both to get the job done right and to avoid surprise costs.
- Get multiple quotes to compare repair costs.
- Prioritize fixes; use budgeting strategies for urgent work.
- Ask for itemized estimates and timelines.
- Set aside a contingency (10–20%) for unexpected findings.
Common Mistakes That Make Wall Moisture Worse
While it’s tempting to try quick fixes, certain common mistakes actually make wall moisture worse and cost you more in the long run. You’ll avoid patching symptoms, ignoring moisture sources, overpainting without fixing leaks, or blocking ventilation. Use proper prevention methods instead.
| Mistake | Consequence |
|---|---|
| Painting over damp | Trapped moisture |
| Ignoring leaks | Structural decay |
| Blocking vents | Mold growth |
| Poor drainage | Rising damp |
Set a Yearly Routine to Prevent Wall Moisture
Set aside one weekend each year to inspect and maintain your walls so small issues don’t become major repairs.
Use moisture prevention strategies and seasonal maintenance tips to guide checks. Prioritize quick fixes and documentation.
- Check for stains, peeling paint, or musty odors
- Inspect gutters, downspouts, and grading
- Test ventilation and dehumidifiers
- Seal cracks and re-caulk openings
Frequently Asked Questions
Can Wall Moisture Cause Long-Term Structural Damage to My Home?
Absolutely — yes, or your walls could start swallowing the house whole; you’ll spot problems early with diligent damp detection, act fast, and use moisture prevention so it won’t rot beams, warp floors, or ruin foundations.
Can Household Plants Significantly Increase Wall Dampness?
Not usually — you won’t get significant wall dampness from household plants unless you have lots of large plant types with poor drainage. Their moisture absorption is limited; overwatering and stagnant pots near walls can raise local humidity, though.
Will Regular Repainting Hide Underlying Moisture Problems?
About 70% of hidden leaks go unnoticed; no, repainting won’t fix them. You should use moisture detection first, then proper repainting techniques only after repairs. Otherwise you’ll just conceal damage and invite mold.
Can Certain Furniture Types Worsen Condensation on Walls?
Yes — heavy, unventilated furniture like wardrobes against exterior walls can worsen condensation; you’ll trap moisture, raise local humidity levels, and reduce airflow. Move pieces slightly away, allow air circulation, and monitor humidity levels with a hygrometer.
Are There Insurance Policies Covering Moisture-Related Home Damage?
Absolutely—some policies cover moisture-related damage; you’ll want homeowners insurance, though many exclude gradual leaks. Check policy terms for insurance coverage and moisture claims limits, document damage fast, and consider endorsements or flood riders.
