How to Use Dry Paint Again (Simple Revival Methods)
You can often save slightly dried latex or acrylic paint by checking the smell and texture, removing any skin, then slowly stirring in small amounts of water or acrylic medium until it reaches the right consistency; strain and let it rest before testing on scrap material. For oil-based paint, use mineral spirits or turpentine sparingly and ventilate well. Discard moldy or foul-smelling cans. Follow simple tests and storage tips to decide whether to revive or replace, and keep reading to learn practical steps and safety pointers.
Quick Answer: When to Save Paint Versus Replace It
If the paint’s only slightly thickened or has a skin on top, you can often save it; toss it when it smells foul, shows mold, or won’t mix back to a smooth consistency.
You’ll evaluate paint lifespan by checking manufacturer dates and odor; do a quick cost analysis—revival supplies versus new can—and choose saving when quality, color match, and price make sense.
Who This Guide Is For and What It Covers
You’ve just decided whether to save or replace a can, and now you’ll want to know if this guide fits your situation.
You’ll get practical paint preservation techniques and eco friendly practices for small jobs.
This guide is for you if you:
- Have partially dried cans
- Want DIY revival steps
- Prefer sustainable options
- Need quick, safe tips
What Kind of Search Intent This Guide Serves
You’re probably searching because you have dried paint and need practical fixes now, so this guide focuses on searcher problem intent.
It also covers transactional repair intent when you’re ready to buy additives or tools to restore the paint.
You’ll get clear options for diagnosing the issue and deciding whether to repair or replace.
Searcher Problem Intent
Why are you looking up how to use dry paint again?
You’re driven by practical search intent and wanting quick user engagement with clear fixes.
You need steps that match your problem:
- Assess dryness level.
- Choose revival method.
- Test small area.
- Decide to salvage or replace.
This guide helps you diagnose and act without wasted effort.
Transactional Repair Intent
Now that you’ve diagnosed the paint and tried simple fixes, think about transactional repair intent: you’re looking for step-by-step solutions and the products or services that will get the job done quickly and reliably.
You want clear paint restoration techniques, recommended tools, and where to buy them.
Focus on practical paint longevity tips, estimated costs, and fast service options to finish the job with confidence.
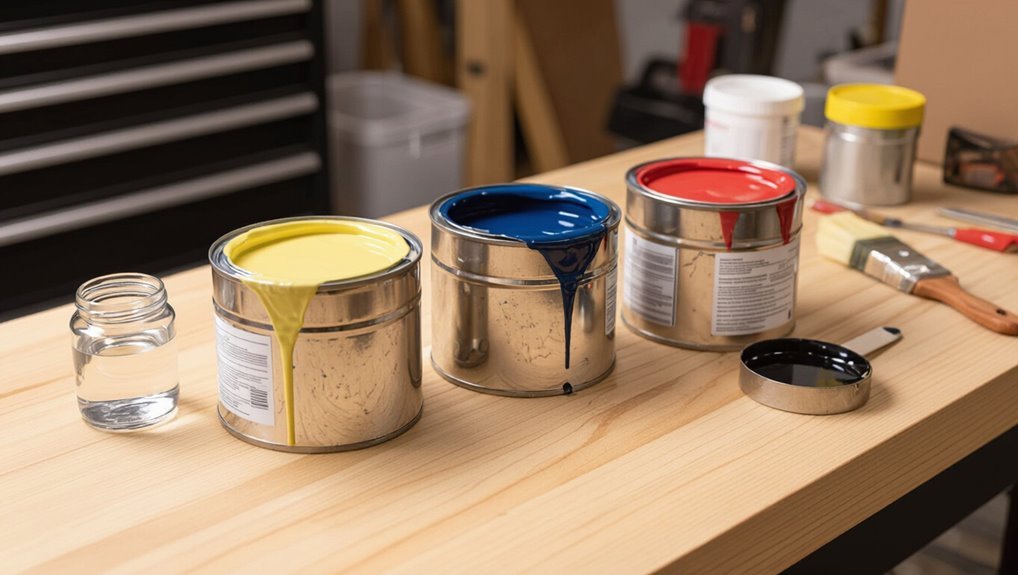
How to Tell What Type of Paint You Have
Wondering whether that dried paint is acrylic, latex, or oil? You’ll use paint characteristics and simple paint identification cues:
- Smell — oil smells stronger.
- Texture — acrylic feels plastic-like.
- Solvent test — water cleans latex/acrylic, mineral spirits affect oil.
- Label or can remnants — always confirm manufacturer info when possible.
Simple Paint Freshness Test
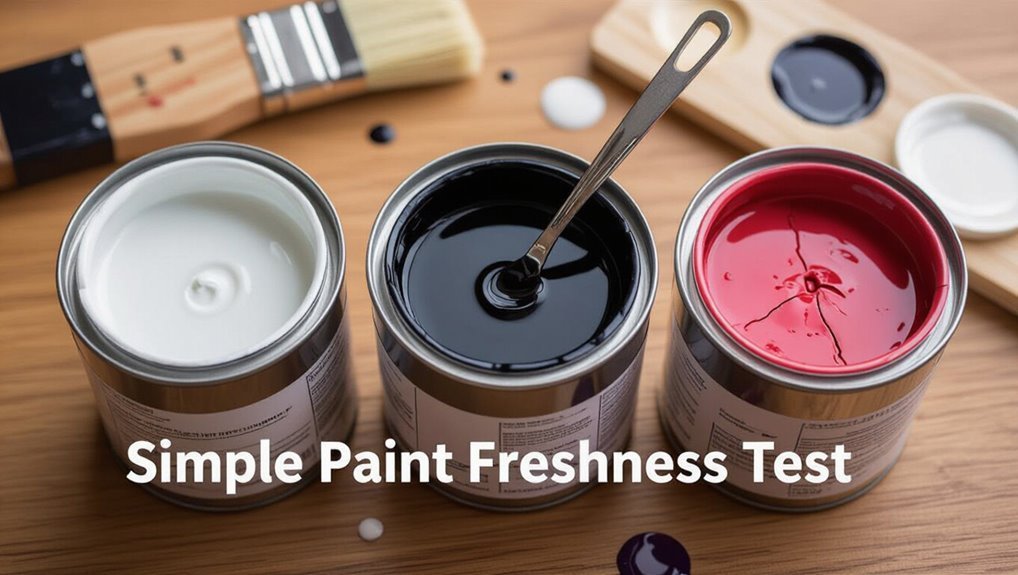
Once you’ve identified the paint type, you’ll want to check whether it’s still usable before attempting any restoration.
Scoop a small amount, stir, and observe paint consistency and smell; lumps or foul odor mean discard.
Test a tiny brush stroke on cardboard after stirring—if it levels and dries properly, your paint storage was adequate.
If it cracks or separates, don’t use it.
Tools and Supplies You’ll Need to Revive Paint
Gather a few basic tools and the right additives before you start reviving paint so you won’t be interrupted mid-process.
You’ll need items for testing and adjusting paint consistency and for better paint storage. Consider these essentials:
- Stir sticks and funnels
- Additives (water, thinner, or conditioner)
- Fine strainers
- Clean containers and labels
Keep tools clean and measure additives carefully.
How to Safely Open Dried or Swollen Paint Cans
When a can’s lid is stuck or the metal looks swollen, you’ll want the right tools so you don’t hurt yourself or spill paint.
Use a flat screwdriver or a paint-key and pry gently around the rim, tapping the lid lightly with a rubber mallet if needed.
Work slowly over a drop cloth and keep rags or a small container ready to catch any drips.
Safe Can-Opening Tools
One or two proper tools will make opening dried or swollen paint cans much safer and easier than prying with a screwdriver.
Use safe can opening techniques and follow essential safety precautions. Choose tools that give control and leverage:
- Paint-can opener
- Pry bar with flat tip
- Rubber mallet
- Bench vise or clamp
You’ll reduce spills and injury risks.
Preventing Paint Spills
Before you pry a stuck lid, clear and protect the area so spilled paint won’t spread—lay down a tarp or drop cloth, keep rags and paper towels nearby, and work on a stable, level surface. Use gloves, open slowly with a flat tool, and tip cans minimally for paint safety and spill prevention.
| Tool | Tip | Caution |
|---|---|---|
| Pry bar | Gentle leverage | Avoid bending lid |
| Screwdriver | Tap rim | Wear gloves |
| Rubber mallet | Even taps | Don’t puncture can |
Check Paint Thickness: Pour, Stir, and Separation Signs
Start by pouring a small amount of the paint into a clear container and stirring it gently; you’ll immediately see whether it’s still the right consistency or has thickened with time.
Use paint consistency and visual inspection to decide next steps.
- Check for lumps.
- Note separation layers.
- Smell for spoilage.
- Test a small brush stroke.
How to Rehydrate Latex and Water-Based Paints
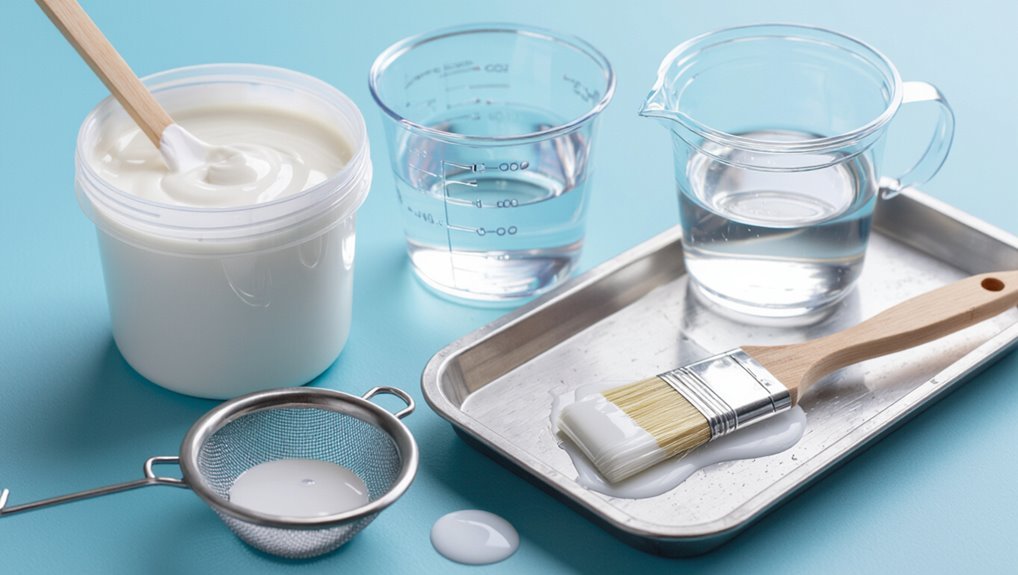
Rehydrate latex or other water-based paints by gradually adding water and stirring until you reach the original consistency. You’ll perform latex paint rehydration slowly, testing texture and coverage. Aim for even paint texture adjustment; avoid overwatering. Strain if needed and let rest 15–30 minutes, then remix. Store revived paint airtight.
| Step | Action |
|---|---|
| 1 | Add water |
| 2 | Stir |
| 3 | Test |
| 4 | Strain |
| 5 | Rest |
How to Thin Acrylic Craft Paints Without Ruining Color
When you need to thin acrylic craft paint, start by adding water sparingly—aim for about 10–20% water to paint for most colors so the pigment stays strong.
If you want more flow or translucency without losing color, mix in a dedicated acrylic medium instead of extra water.
Test your ratio on a scrap surface before painting to make sure the color and coverage stay true.
Proper Water Ratios
A good rule of thumb is to add water gradually—drop by drop—until the paint flows like creamy milk; that way you thin the pigment without washing it out.
You’ll maintain paint consistency and hydration balance.
Follow these steps:
- Start tiny—one drop.
- Stir and test.
- Repeat until smooth.
- Stop before it runs or loses opacity.
Using Acrylic Medium
1 simple addition—an acrylic medium—lets you thin craft paints without losing pigment strength or finish.
You’ll mix small amounts into thick acrylics to restore flow while preserving color; that’s the primary acrylic medium benefits.
For proper acrylic medium application, stir thoroughly, test opacity, and add gradually.
Use gloss or matte mediums to match finish, and seal when dry for durability.
How to Thin Oil-Based Paints and When to Use Solvent
If your oil-based paint has thickened or won’t flow smoothly, you can restore it by thinning with the proper solvent in small increments until it reaches the right consistency for brushing or spraying.
Choose appropriate solvent types and follow safe paint thinning practices.
- Mineral spirits
- Turpentine
- Paint thinner
- Specialty solvents
How to Mix and Stir Paint for Best Results
Now that your oil-based paint’s consistency is right, you’ll want to mix and stir it properly to guarantee uniform color, viscosity, and performance.
Use gentle folding motions, scrape sides and bottom, and avoid whipping air in.
Fold gently, scraping sides and bottom—stir without whipping to avoid entraining air.
Employ recommended Mixing Techniques and maintain Proper Ratios when adding thinner or rejuvenator.
Stir at a steady pace until homogeneous; check color and texture before use.
How to Use a Drill Mixer for Large Paint Batches
When you’re tackling large paint batches, pick a drill mixer that’s the right size and has variable speed so you can match the job.
You’ll want to follow safe operation—secure the can, wear eye protection, and start slow to avoid splashes.
Use steady, controlled strokes and tilt the mixer slightly to pull settled pigment up for a uniform blend.
Choosing The Right Mixer
For large paint batches, picking the right mixer matters: a drill-mounted paddle gives the power and control you need to rehydrate and blend thick paint evenly without overworking it.
You’ll weigh mixer types and mixing techniques: match paddle size to volume, choose variable speed, prefer sealed bearings, and use gentle strokes to avoid aeration.
- Match paddle
- Variable speed
- Sealed bearings
- Gentle strokes
Safe Mixer Operation
1. You’ll prioritize mixer safety before starting: wear goggles, gloves, and secure long sleeves.
Check mixer types to confirm compatibility with paint volume and paddle size. Attach the paddle tightly, start at low speed to prevent splatter, and increase gradually.
Keep the drill’s cord clear, brace the container, and stop immediately if vibration or binding occurs to avoid accidents.
Mixing Technique Tips
Now that you’ve confirmed safe mixer setup and secured PPE, focus on your stirring pattern and speed control to blend large paint batches evenly.
Use these mixing techniques to restore paint consistency and reduce bubbles:
- Start slow to lift settled pigments.
- Gradually increase speed for uniform shear.
- Sweep container edges and bottom.
- Finish with brief high-speed flare for homogeneity.
How to Strain Lumps and Skin From Paint
Straining lumps and skin from dried paint restores a smooth, brushable consistency so you can reuse what’s left instead of tossing it.
Pour softened paint through a fine mesh or nylon stocking into a clean container, scraping solids gently for lump removal.
Use a magnet or fine sieve for remaining bits.
Clean tools and lid seals to aid skin prevention on future jars.
Reviving Paint: Distilled Water vs Tap Water
When you need to thin dried water-based paint, choosing distilled water over tap water can make a noticeable difference: distilled water is free of minerals and additives that can alter paint consistency or encourage clumping, while tap water’s hardness and chlorine may affect drying and finish.
You’ll notice:
- distilled water benefits: consistent thinning
- improved color fidelity
- reduced clumping risk
- tap water drawbacks: unpredictable results
Use Glycerin or Fabric Softener to Restore Flow (Dosage Tips)
If your water-based paint has become gummy but not fully cured, adding a small amount of glycerin or liquid fabric softener can restore smooth flow without over-thinning the binder.
Start with one drop per tablespoon of paint, mix thoroughly, test on a scrap, and increase slowly.
For glycerin usage and fabric softener, choose pure, dye-free products to avoid contaminants and color shifts.
How to Safely Use Mineral Spirits and Turpentine
Although mineral spirits and turpentine are effective at loosening dried oil-based paints and cleaning brushes, you’ll need to handle them with care because they’re flammable, volatile, and can irritate skin and lungs.
Use these steps for mineral spirits safety and consider turpentine alternatives when possible:
- Ventilate the area.
- Wear gloves and eye protection.
- Use minimal solvent.
- Dispose of rags safely.
How to Test Revived Paint Before Committing to a Project
Before you start, test the revived paint on a scrap piece of wood or cardboard to check color, coverage, and texture.
Let that sample dry fully and note how long it takes compared to fresh paint.
If the finish, adhesion, or drying time seems off, don’t commit the paint to your project.
Test Paint On Scrap
Grab a clean piece of scrap wood, cardboard, or metal and apply a small swatch of your revived paint to check color, adhesion, and finish before committing to the full project.
Then, you should:
- Evaluate test surfaces for compatibility.
- Inspect paint adhesion after light abrasion.
- Note true color in planned light.
- Confirm finish sheen and texture.
Evaluate Drying Time
Wondering how long your revived paint will actually take to dry? Test a small swatch on scrap wood or cardboard, note time to tack-free and full cure.
Record drying factors like layer thickness, temperature, and ventilation. Check humidity effects—high moisture slows cure.
Adjust additives or wait longer if it’s sticky. Only proceed when timing meets your project’s needs.
Adjust Sheen After Reviving Paint
Once you’ve thinned and stirred the revived paint back to a usable consistency, check its sheen against a clean test patch so you can match or adjust the finish precisely.
After thinning and stirring, test a clean patch to compare sheen and fine-tune the finish.
You’ll perform a quick sheen adjustment to achieve the desired paint finish:
- Apply thin coat to test board.
- Let dry fully.
- Compare sheen under room light.
- Add flatting or gloss medium sparingly.
How to Fix Paint That Smells Musty or Sour
If your revived paint smells musty or sour, don’t use it without treating the odor first—you can neutralize most smells and make the paint safe to apply.
Open the can, stir, add a few tablespoons baking soda or activated charcoal sachets, seal and let rest.
Test smell after 24–48 hours.
Note musty odor solutions and revise paint storage tips to prevent recurrence.
Clean Dried Paint Off Brushes and Rollers (Fast Methods)
Grab a few basic tools and you can usually get dried paint out of brushes and rollers without buying replacements.
Soak bristles or nap in warm soapy water or mineral spirits, then comb and rinse. Focus on brush cleaning and roller maintenance to restore shape and pile.
Try these steps:
- Soak
- Scrub
- Comb/roll
- Rinse/dry
How to Rescue Partially Dried Spray Paint Cans
Cleaning brushes and rollers gets you back to painting by hand, but spray cans need different care when they start to clog or lose pressure.
You can clear nozzles by soaking them in solvent, shake cans vigorously, and invert and spray to purge blockages.
Warm the can gently in warm water (not hot).
Gently warm the spray can in warm water—avoid hot temperatures to protect pressure and performance.
Check pressure, test on scrap, and store upright to prevent future drying.
Repurpose Unusable Paint Into Textured Finishes
When paint has thickened or separated beyond practical use on walls, you can still turn it into rich, tactile textures for furniture, accent walls, or craft projects.
You’ll use paint repurposing to add depth and character.
Try these methods:
- Mix with sand for gritty texture.
- Blend with joint compound for raised strokes.
- Add pumice gel for roughness.
- Layer glazes for relief and shadow.
Make Chalk Paint or Milk Paint From Old Stock
You can turn dried paint into chalk or milk paint by crushing it into a fine powder and rehydrating.
Decide on a binder—like calcium carbonate for chalk paint or casein for milk paint—and follow proper binder-to-powder ratios to get the durability you need.
Tweak the mix with water, pigments, or fillers to adjust texture and color before testing on a scrap piece.
Turn Powder Into Paint
Revive that dried-out paint by turning it into a usable powder-based formula—chalk or milk paint—so you can finish projects without buying new cans.
You’ll grind, sift, mix, and test to achieve powder consistency for varied paint applications.
Follow steps:
- Dry and crumble.
- Grind to fine powder.
- Sift to remove clumps.
- Rehydrate and test coverage.
Choose Binder And Ratio
Decide on a binder based on the finish and durability you want: calcium carbonate or Plaster of Paris mixed with water (for chalk paint) gives a matte, velvety surface, while casein or powdered milk with lime or a commercial milk-paint binder yields a slightly thinner, more authentic milk-paint finish that soaks into wood.
Choose binder types, then follow simple ratio guidelines—typically 1:1 solids to binder, adjust for coverage.
Adjust Texture And Color
Now that you’ve picked a binder and mixed basic ratios, tweak the texture and color to suit your project.
You’ll turn old stock into chalk or milk paint by focusing on texture adjustment and color restoration:
- Add powdered chalk or calcium carbonate for matte body.
- Thin with water or milk for milk paint feel.
- Test pigment strength.
- Adjust binder for durability.
Use Dried Paint as a Colorant for Stains or Glazes
One easy way to reuse dried paint is to grind or crush it and mix the pigment into a clear stain or glaze, letting you tint wood, ceramics, or furniture without buying new colorants.
You’ll explore colorant options by testing small batches, adjusting ratios, and using safe binders.
Keep records of paint mixing ratios, test on scrap, and strain to avoid clumps.
How to Safely Dispose of Paint That Can’t Be Saved
If crushing dried paint for tints doesn’t work or you’ve got cans that have hardened beyond reuse, you’ll need to dispose of them properly to protect people and the environment.
Follow these steps for eco friendly disposal and paint recycling options:
- Check local hazardous waste schedules.
- Use community paint recycling events.
- Seal cans and label contents.
- Never pour paints down drains or trash.
How to Store Revived Paint for Longer Shelf Life
Once you’ve revived paint, pick airtight, rust-free containers that seal tightly so air can’t get in.
Label each container with the color, date revived, and any additives you used so you’ll know what’s inside later.
Store tins upright in a cool, dry place away from temperature extremes and direct sunlight.
Proper Container Choice
Choosing the right container keeps your revived paint usable longer, so pick vessels that seal tightly, resist corrosion, and minimize air exposure.
You should consider container materials and container sizes to match volume and chemical compatibility. Follow these tips:
- Use metal cans with epoxy lining.
- Choose glass jars for small amounts.
- Opt for plastic HDPE for larger batches.
- Avoid rusty or warped lids.
Labeling And Storage
After you’ve packed revived paint into the right containers, label each one clearly and store them properly to keep the paint usable longer.
Write the color, date revived, and any additives on the lid. Use airtight containers, shrink-wrap seals, and upright shelving to avoid leaks.
Keep cans cool, dark, and off concrete. Good paint organization and simple storage solutions prevent spoilage and wasted effort.
Label and Inventory Leftover Paint Effectively
Start by grouping cans by type, then label each with the color name, sheen, purchase date, and where you used it.
You’ll improve paint organization and inventory tracking by noting volume, condition, and mixing notes.
Use a simple log and clear labels so you can find matches fast.
Use a simple log and clear labels to quickly find paint matches and keep your inventory tidy.
- Color
- Sheen
- Date
- Location
How to Prevent Paint From Drying in Future Projects
To keep paint usable longer, store cans tightly sealed in a cool, dry place and pour small amounts into airtight containers for frequent use.
You should also control worksite conditions—minimize dust, temperature swings, and direct sunlight to slow skinning.
Following these simple storage and site habits will cut down on drying and waste in future projects.
Store Paint Properly
When you finish a project, seal and store leftover paint the right way so it stays usable for the next job; a tight lid, a clean rim, and a cool, dry storage spot can keep paint from skinning over or spoiling.
Use proper paint storage and choose container types wisely:
- Label contents and date.
- Transfer to smaller tins.
- Remove air with a plastic wrap.
- Store off concrete.
Control Worksite Conditions
If you want paint to behave predictably, control the jobsite environment: keep temperature and humidity within the manufacturer’s recommended range, work in a well-ventilated but draft-free area, and shield surfaces from direct sunlight or heat sources that speed drying unevenly.
You’ll use worksite ventilation, humidity control, and temperature regulation plus tidy workspace organization to prevent premature drying and guarantee consistent application and curing.
How to Choose the Right Container for Transferring Paint
Before you transfer dried paint, pick a container that’s clean, airtight, and chemically compatible with the paint type so you don’t introduce contaminants or cause reactions that ruin color or adhesion.
Choose container materials and confirm paint compatibility. Consider:
- Glass for solvent paints
- Plastic (HDPE) for water-based
- Metal for long storage
- New lids and seals to guarantee airtightness
Avoid Thinning Mistakes When Reviving Paint
Before you add any solvent, make sure you know the paint type so you use a compatible thinner.
Always measure solvent carefully—start small and mix gradually to avoid over-thinning.
If the paint doesn’t respond, stop and reassess rather than dumping in more solvent.
Know Paint Type
Wondering whether that dried paint can be revived with a splash of thinner? You need to know the paint type first: understand paint properties and expected paint lifespan before acting.
Check label, finish, and base (oil vs. water). Don’t guess—wrong thinner ruins paint.
- Label
- Base
- Finish
- Age
Measure Solvent Carefully
When you decide to revive dried paint, measure the solvent precisely so you don’t ruin the batch with too much or too little thinner. You’ll pick solvent types, use proper measurement techniques, and add tiny amounts, stirring and testing. Visualize ratios:
| Solvent | Amount | Result |
|---|---|---|
| Water | 5% | Smooth |
| Mineral | 2% | Restored |
| Acetone | 1% | Thin |
How to Handle Flaking or Gelatinous Paint Solids
If your dried paint has flaked into hard, crumbly bits or turned into gelatinous clumps, don’t throw it out immediately—you can often rescue the usable portions.
Use these steps for flaking solutions and gelatinous paint:
Use these simple steps to rescue flaking or gelatinous paint and recover any usable portions.
- Remove hard flakes with a sieve.
- Scoop semi-solid gel into a jar.
- Add tiny solvent, stir slowly.
- Test consistency, adjust sparingly.
How to Salvage Artist and Specialty Paints (Watercolor, Gouache)
Watercolor and gouache have unique binders and behave differently from acrylics or oils, so you’ll need gentler, paint-specific approaches to revive them.
Rehydrate dried pans or tubes with distilled water dropwise, let rest, then stir gently. Use minimal surfactant or glycerin for stubborn cake-like pans.
Test color and flow on scrap paper, apply watercolor techniques carefully. Gouache revival favors light touch.
Use Revived House Paint: Touch-Ups Versus Full Coats
You’ve seen how gentle rehydration works for delicate artist paints; house paints are sturdier but need different judgment once revived.
You’ll decide between small fixes or larger jobs using clear criteria:
- Test adhesion and color.
- Use touch up techniques for chips and trim.
- Reserve full coat considerations for uneven sheen.
- Dispose if separation won’t emulsify.
How to Manage Color Shift After Reviving Old Paint
When you revive old paint, always test a swatch on cardboard first to see any color shift before you commit.
If the shade’s off, add tint in small increments and mix thoroughly until you get the hue you want.
Once matched, seal the area with a clear coat to lock in color and finish.
Test Color On Cardboard
Before committing revived paint to your project, test a small swatch on cardboard so you can see the true hue, opacity, and any unexpected shifts after drying.
Use simple test techniques and smart cardboard selection.
Then evaluate:
- Dry color match
- Opacity/transparency
- Texture/finish
- Adhesion and coverage
Record results so you’ll know if the revived paint’s ready.
Adjust Tint Gradually
Although reviving old paint can change its hue, you can correct shifts by tinting slowly and testing as you go; add tiny amounts of pigment or compatible fresh paint, stir thoroughly, and apply a swatch to see the true dry color before adding more.
You’ll practice adjusting colors using careful tinting methods, record ratios, and repeat small adjustments until the shade matches your intent.
Seal With Clear Coat
If you want to lock in the color you’ve corrected, apply a compatible clear coat to prevent further shifts and protect the finish.
You’ll gain clear coat benefits like UV protection and gloss retention.
Consider sealant options for surface and solvent compatibility.
Steps:
- Clean surface
- Test spray
- Apply thin coats
- Cure fully
How to Blend Revived Paint With Fresh Paint Safely
When you blend revived paint with fresh paint, test small batches and match consistency and color first so your final coat lays down evenly and looks uniform.
You’ll use paint blending techniques like gradual mixing and strainers, and check paint compatibility considerations—solvent type and sheen.
Apply a discreet patch, dry fully, then adjust ratio or discard revived paint if adhesion, texture, or color differ.
How to Estimate Coverage of Revived Paint
Because revived paint can vary in thickness and pigment strength, you’ll want to measure coverage before committing to a full coat:
- Stir thoroughly and note texture for coverage estimation.
- Thin small batch, apply a 1 ft² test patch.
- Let dry, inspect opacity and adhesion.
- Calculate needed coats: compare test area to project square footage, adjust thinning or mix with fresh paint if coverage is insufficient.
Use Revived Paint in Craft Projects and Molding
Once you’ve properly thinned and strained revived paint, you can use it for small craft and molding projects without waste.
Apply thin, even coats to small molds to avoid drips and preserve detail, letting each layer dry before adding another.
Finish your pieces with a clear sealer to protect the paint and give the craft a durable, polished look.
Preparing Revived Paint
Start by testing the consistency of your revived paint on a scrap surface so you can see how it spreads and adheres; thin it slightly with the manufacturer-recommended medium or water (for water-based paints) to reach the body you need for crafts or molding.
Keep good paint storage, confirm paint consistency, then follow:
- Strain lumps.
- Stir thoroughly.
- Adjust viscosity.
- Seal unused paint.
Applying To Small Molds
1. You’ll do mold preparation first: clean and dry small molds, add a release or light spray if needed.
Stir revived paint thinly so it flows into details. For paint application, use a fine brush, syringe, or toothpick to push pigment into crevices.
Work in thin layers, letting each dry slightly before adding more to avoid drips and clogging detail.
Sealing Finished Crafts
After you’ve built up details with your revived paint and let layers set, sealing your finished piece will protect the work and unify the surface.
Use appropriate craft sealing techniques and paint preservation tips to finish molds and mixed-media crafts.
Choose a sealant, test gloss level, apply thin even coats, and cure fully.
- Select
- Test
- Apply
- Cure
Teach Helpers or Kids Safe Paint-Revival Steps
When you show helpers or kids how to revive dry paint, keep instructions simple, demonstration-based, and focused on safety so they learn the steps without making a mess or getting harmed.
Explain paint safety tips: gloves, ventilation, and no tasting.
Let kids’ involvement be limited to stirring with safe tools and measuring small amounts while you handle solvents and lids.
Supervise closely.
Time and Cost Savings From Reviving Paint
Showing helpers or kids safe paint-revival steps also pays off in practical ways: reviving a jar of dried paint saves you time and money compared with buying a new can or stripping and repainting a surface.
Teach helpers safe paint-revival steps — save time, money, and waste by restoring usable paint instead of replacing it
You’ll gain cost efficiency and promote paint sustainability by salvaging usable product.
- Save cash
- Reduce waste
- Cut project time
- Extend supplies
Spot and Avoid Hazardous Additives or Contamination
If you’re planning to revive dried paint, first check for hazardous additives or contamination so you don’t expose yourself or ruin the job.
Inspect smell, texture, and separation for signs of contamination sources like mold, oil, or solvents.
Wear gloves and a mask, discard suspect cans, and never mix unknown additives.
When in doubt, replace the paint.
Label and Log What Worked: Revival Notes for Next Time
After you’ve ruled out contamination and either revived or discarded a can, label what you did and log the results so you don’t repeat mistakes.
Keep notes concise: date, method, additives, outcome. Good logs improve revival techniques and paint storage habits.
- Date
- Method
- Additive/ratio
- Result
How to Decide When to Buy New Paint Instead of Reviving
When should you stop trying to salvage a can and buy new paint instead?
You should choose replacement when paint quality is compromised—foul odor, severe skinning, lumps, or separation that revival techniques can’t fix.
If color shifts, coverage fails, or repairs cost more time than value, buy new.
Prioritize safety and finish consistency over saving a problematic can.
Frequently Asked Questions
Can Revived Paint Be Used Outdoors After Weather Exposure?
Yes — you can use revived paint outdoors, but you’ll test durability first; if it cures properly and resists cracking, it’ll handle outdoor conditions. You’ll prep surfaces, apply primer, and monitor performance over weeks.
Will Pigments Fade Faster in Revived Paint Over Time?
Yes — ironically, your “rescued” paint might outlive your patience, but pigments often show reduced pigment longevity and weaker color stability over time, so you’ll want fresh, proper storage and testing before trusting long-term results.
How to Handle Paint Contaminated With Mold or Insects?
You should discard heavily contaminated paint; for minor issues, wear gloves and a mask, scoop out mold, add fungicide or biocide per label, strain paint, and seal containers tightly to aid mold removal and insect prevention.
Can Revived Paint Be Used for Food-Contact Surfaces?
No — you shouldn’t. Picture a sealed jar hiding chemistry; food safety depends on paint composition, and revived paint can contain altered binders, contaminants, or solvents that make it unsafe for food-contact surfaces. Use certified food-safe coatings.
Are There Health Risks From Inhaling Revived Paint Fumes?
Yes — you can face fume exposure risks; you’ll experience acute health effects like headaches, dizziness, nausea, and respiratory irritation, and long-term exposure may cause chronic problems, so ventilate well and use respirators when reviving paint.
Conclusion
You’ve got options: many paints can be revived, but know when it’s worth it. Surprisingly, Americans throw away about 10% of their household paint each year—so reviving even a few cans saves money and landfill space. Test, thin, and strain cautiously; skip anything with mold, foul odor, or unknown additives. Label successful fixes and note what didn’t work. If color, coverage, or safety’s compromised, buy fresh paint instead.