How to Use Goo Gone on Painted Walls Without Damage
You can safely remove sticky residue from painted walls by testing a hidden spot, wearing gloves, and using a pea-sized amount of Goo Gone on a cotton swab or soft cloth; dab gently, wait about a minute, then blot and lift from the edges toward the center. Rinse the area with warm, soapy water, dry with a microfiber cloth, and inspect for dulling or tackiness; repeat cautiously only if needed, and keep going for more tips to prevent damage and choose the right method.
Who This Guide Helps (Search Intent)
Who’s this guide for?
You’re a homeowner, renter, or DIYer needing safe paint care and effective cleaning tips for sticky residues on painted walls.
Homeowners, renters, and DIYers seeking safe, effective ways to remove sticky residues without damaging painted walls.
You want clear steps that prevent damage, avoid harsh scrubbing, and preserve finishes.
This guide targets people who prefer practical, tested methods and want to remove glue, tape residue, or stickers without repainting.
Short Answer and Safety Summary
You can safely remove sticky residue from painted walls with Goo Gone by following a few quick steps.
Start with a spot test, apply a small amount, wait briefly, then wipe gently and rinse to avoid damage.
Wear gloves, guarantee good ventilation, and don’t leave the product on too long to protect the paint.
Short Safety Overview
A quick safety tip: test Goo Gone on an inconspicuous spot first, wear gloves and adequate ventilation, and avoid prolonged contact or inhaling fumes.
You’ll follow safety tips and product precautions to protect paint and yourself.
- Wear chemical-resistant gloves
- Work in a ventilated area
- Avoid skin or eye contact
- Keep away from children/pets
- Rinse residue promptly
Quick Usage Steps
Now that you’ve covered safety basics, here’s a concise rundown for using Goo Gone on painted walls:
Test a hidden spot, apply a small amount, wait a minute, gently rub with a soft cloth, then wipe with warm soapy water.
If necessary, compare Goo Gone alternatives and other adhesive removal techniques.
Dry and inspect; repeat cautiously if residue persists.
Key Precautions
1 important precaution: always spot-test Goo Gone on an inconspicuous area before full use, since painted finishes can soften, discolor, or dull when exposed to solvents.
- Wear gloves and ventilate the room for paint preservation.
- Use minimal product; blot, don’t rub.
- Don’t soak textured or damaged paint.
- Try adhesive alternatives first on delicate finishes.
- Rinse thoroughly and dry to prevent residue.
Which Painted Surfaces Are Safe to Treat With Goo Gone
You can usually use Goo Gone on glossy painted surfaces with minimal risk, since the finish is tougher and less likely to soften.
For matte and eggshell finishes you’ll want to test a hidden spot first because those paints are more delicate and can dull.
Specialty coated walls—like textured, washable, or moisture-resistant paints—may react differently, so check the manufacturer’s guidance before treating them.
Glossy Painted Surfaces
- Use gentle cleaning techniques first.
- Do minimal surface preparation.
- Apply small amounts.
- Wipe promptly.
- Rinse and dry well.
Matte And Eggshell Finishes
If your walls have a matte or eggshell finish, they’re generally more forgiving than high-gloss surfaces but still more delicate than semi-gloss or satin—so test a small, hidden spot first and use Goo Gone sparingly.
Gently dab Goo Gone, wait briefly, then wipe with a soft cloth and mild soap. Matte finishes and eggshell finishes can lift paint if soaked, so rinse and dry quickly.
Specialty Coated Walls
When dealing with specialty coated walls—like those with water-resistant, epoxy, or commercial-grade finishes, you’ll generally find they’re more tolerant of Goo Gone than standard residential paints.
However, you should still proceed with care. Test first on an inconspicuous area to check specialty finishes and wall textures.
Don’t soak; blot gently. Rinse thoroughly. Avoid prolonged exposure.
- Test a small spot
- Use minimal product
- Blot, don’t rub
- Rinse well
- Monitor drying
Which Painted Surfaces to Avoid Using Goo Gone On
Because Goo Gone dissolves adhesives and some finishes, you should skip using it on delicate or poorly cured paint jobs.
Avoid soft or chalking paint types, fresh latex under two weeks, and flat or porous surface finishes that can absorb solvent.
Don’t use it on specialty textured coatings, murals, or antique painted surfaces—test first elsewhere and choose gentler removal methods for sensitive areas.
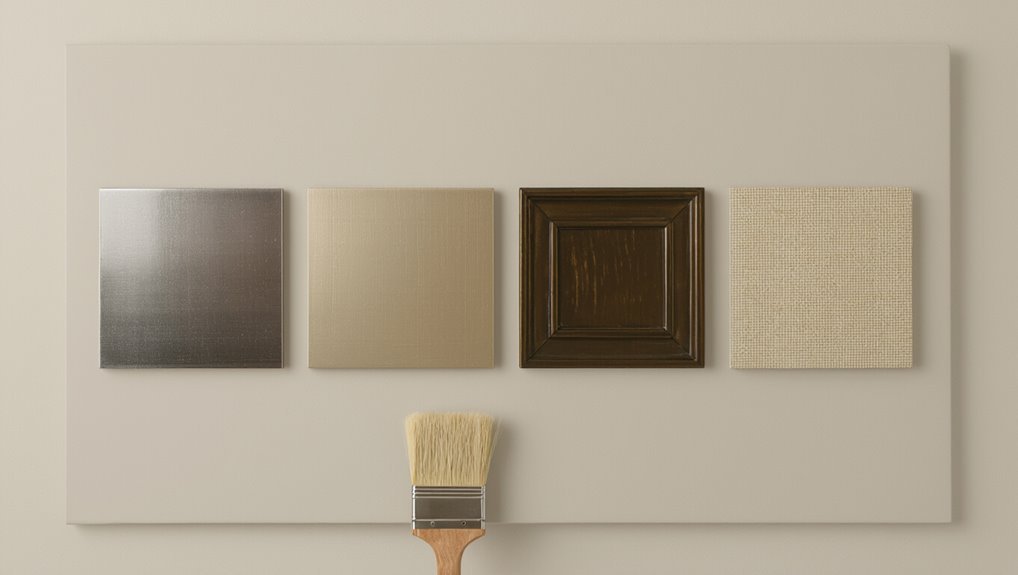
How Paint Finish Affects Goo Gone Safety
After avoiding Goo Gone on fragile or fresh paints, consider how the sheen of your finish affects its resistance to solvents.
You’ll judge Finish compatibility and Paint durability by testing small areas, using gentle application, and preferring higher-sheen surfaces.
Follow these quick checks:
- Test hidden spot first
- Use minimal product
- Blot, don’t rub
- Rinse residue promptly
- Prefer semi-gloss or gloss
How Paint Age and Condition Change Your Risk
If your paint is older, chalky, or already showing cracks, you’re asking for trouble by using solvents like Goo Gone without extra caution. You’ll need to take into account paint lifespan and paint maintenance before applying anything. Inspect and proceed gently; softer, aged surfaces absorb solvents and lift finish.
| Condition | Risk | Action |
|---|---|---|
| New | Low | Spot test |
| Aged | High | Gentle wipe |
| Chalky | Very High | Avoid solvent |
| Cracked | Very High | Repair first |
Why Testing on a Hidden Spot Is Essential
When you test Goo Gone on a hidden spot first, you’ll confirm how the solvent reacts with your paint without risking visible damage; a quick trial reveals staining, softening, or finish loss so you can choose a safer approach.
- Do a patch test in hidden areas.
- Watch for color change.
- Note texture shifts.
- Time exposure carefully.
- Photograph results for comparison.
Where to Perform a Safe Patch Test
Now that you’ve checked a hidden spot for reactions, pick an area that mirrors the wall’s visibility, finish, and lighting to get meaningful results.
Choose inconspicuous patch test locations like behind furniture, inside a closet, or near a baseboard. Avoid obvious focal points.
Consider multiple hidden areas on different wall faces to account for sheen or sunlight variations before full application.
Patch-Test: How to Do It and Interpret Results
Choose a small hidden area and apply a drop of Goo Gone to the paint.
Wait at least 15–30 minutes, then inspect for discoloration, softening, or tackiness.
If the finish looks and feels unchanged, it’s safe to proceed; if not, stop and try a different method.
Small Hidden Area
Before you apply Goo Gone to a visible section of wall, pick a small hidden area—behind a furniture edge, inside a closet, or at the top of a baseboard—and test there first.
Use hidden spots to check paint reaction during wall cleaning. Observe for color change, softening, or residue.
- Dab small amount
- Wait briefly
- Blot, don’t rub
- Note any damage
- Photograph results
Wait And Inspect
After you’ve dabbed and blotted, wait at least 10–15 minutes and then inspect the spot closely; this pause lets the solvent interact with the paint and reveals any immediate reactions.
Check for softening, discoloration, or sheen changes. Your wait time confirms safety.
Use inspection tips: view from multiple angles, feel gently with a clean fingertip, and record results before proceeding or choosing another method.
How to Read Patch-Test Results Correctly
When you check the patch-test spot, look for changes in color, texture, or raised areas—these tell you if the Goo Gone affected the paint.
Use patch test techniques and interpreting results to decide next steps. Compare against surrounding paint, note timing, photograph, and wait 24–48 hours before concluding.
- color change
- softening
- flaking
- residue
- edge lifting
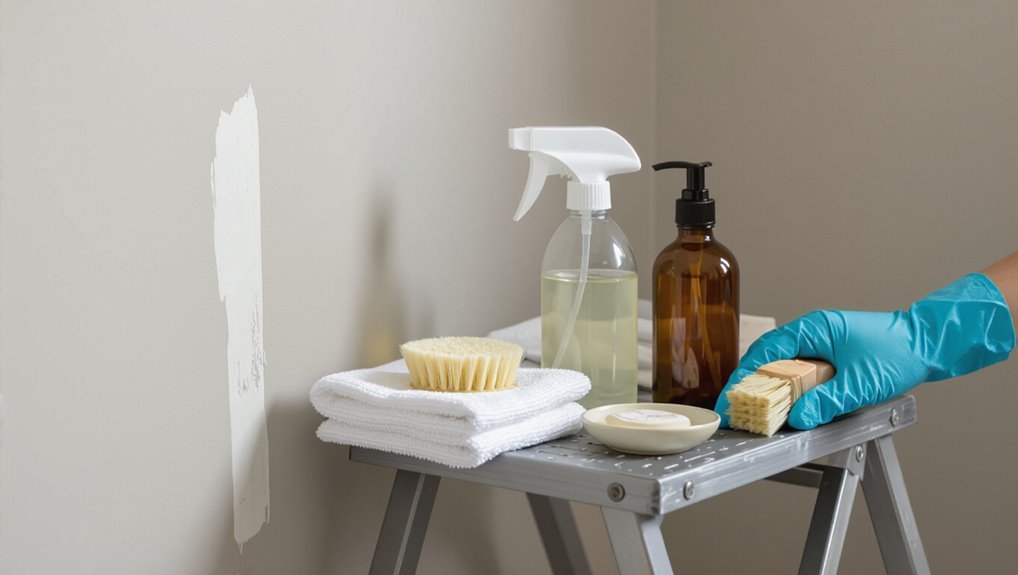
Tools and Supplies for Safe Goo Gone Use
Gather a few key items so you can remove adhesive safely and avoid damaging the paint: soft microfiber cloths, a plastic scraper or old credit card, cotton swabs, mild dish soap, a small bowl of warm water, and the Goo Gone product you tested.
Use gentle application techniques, perform a careful surface evaluation before starting, dab solvent sparingly, scrape softly, and keep cleaning supplies handy for immediate rinsing.
Personal Protective Equipment to Use With Goo Gone
A few basic protective items will keep you safe while using Goo Gone: nitrile gloves to protect your skin, safety glasses to shield your eyes from splashes, and a well-ventilated workspace or a respirator if you’re working in a confined area.
Use proper safety gear and protective gloves, follow label instructions, and avoid contact.
Use proper safety gear and gloves, follow label directions, and minimize skin contact when handling Goo Gone.
- Nitrile gloves
- Safety glasses
- Long sleeves
- Closed-toe shoes
- Disposable rags
Preparing the Work Area and Ventilation
Now that you’ve put on your gloves and safety glasses, clear and protect the surrounding space before you use Goo Gone.
Move furniture, cover floors and trim with drop cloths, and mask nearby fixtures.
Create cross-ventilation by opening windows and doors; use a fan to direct fumes outside.
Follow ventilation tips: avoid enclosed rooms and keep kids and pets out of the work area.
How to Remove Loose Dirt and Dust Before Treatment
Before you apply any solvent, remove loose dirt and dust so Goo Gone can work on the actual sticky residue.
You’ll use simple dirt removal techniques and basic cleaning tools to prevent abrasion and spread.
- Dry dust with a microfiber cloth
- Vacuum with soft brush attachment
- Lightly tack with damp microfiber
- Use a soft-bristle brush for crevices
- Inspect area before solvent use
Proper Dilution and Product Choices for Walls
Choosing the right Goo Gone formulation and diluting it correctly matters for painted walls: you’ll want a gentler product (like the water-based or citrus gel variants) and only the minimum concentration needed to lift residue so paint and sheen aren’t damaged.
Test small areas to confirm surface compatibility and product effectiveness. Use clear ratios, note dwell time, and rinse promptly to protect finish.
How to Apply Goo Gone Without Soaking the Paint
Before you start, test Goo Gone on a hidden spot to make sure the finish won’t react.
Use only a small amount on a cloth or cotton swab so you don’t saturate the paint.
Blot gently instead of rubbing to lift the residue without damaging the surface.
Test On Hidden Area
When you’re about to use Goo Gone, pick a discreet spot—like inside a closet or behind a baseboard—and dab a tiny amount with a cotton swab to see how the paint reacts; this lets you confirm colorfastness and finish integrity without soaking the surface.
Check test conditions and paint compatibility before proceeding.
- Wait 24 hours for results
- Use minimal dab
- Note gloss changes
- Record temperature
- Photograph spot
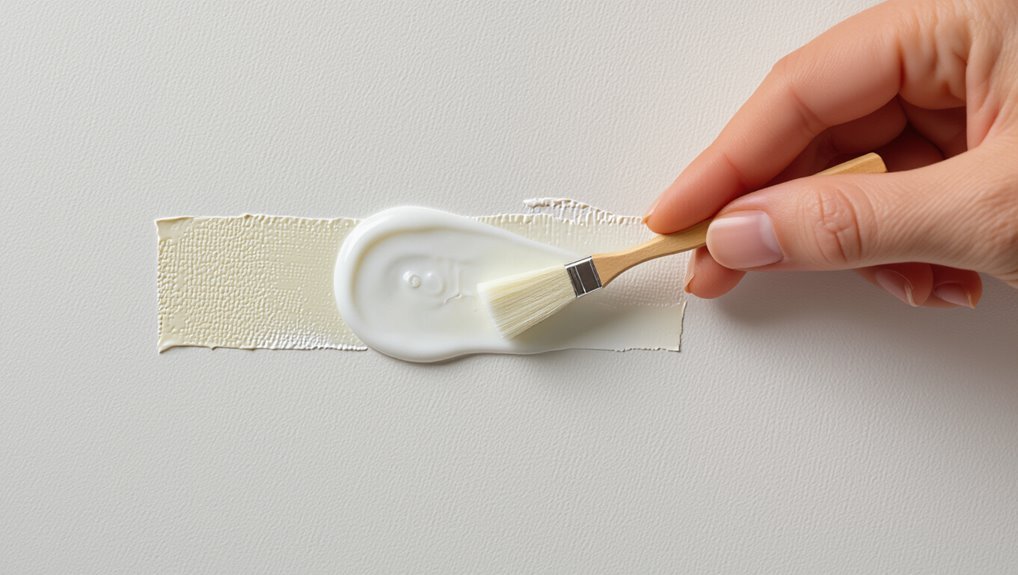
Use Minimal Product
Use only a pea-sized amount of Goo Gone on a cotton swab or soft cloth and dab the spot gently—don’t pour or spread the liquid across the paint. You’ll preserve finish with minimal application while keeping product effectiveness high. Monitor for lift, then rinse.
| Step | Tool | Goal |
|---|---|---|
| Dab | Swab | Targeted |
| Small amount | Cloth | Control |
| Rinse | Water | Remove residue |
| Check | Eye | Finish |
Blot: Don’t Rub
Blot gently with a cotton swab or soft cloth instead of rubbing to lift residue without abrading paint—press, hold briefly, then lift so the solvent works into the spot rather than spreading it across the finish.
You’ll use precise blotting techniques to avoid soaking paint; avoid rubbing risks that smear or thin the finish.
- Use small, controlled taps
- Work from edge inward
- Refresh swab often
- Test hidden area
- Dry promptly
Recommended Contact Times by Paint Type
Because different paints react differently to solvents, you should tailor how long Goo Gone stays on the surface based on the paint type. Test first on hidden spot to protect adhesion strength and finish. Use shorter contact on delicate finishes.
| Paint types | Suggested time | Emotional note |
|---|---|---|
| Gloss | 30–60s | Relief |
| Eggshell | 20–40s | Caution |
| Flat | 10–20s | Tenderness |
How to Soften Adhesive Without Rubbing the Paint
After you’ve tested contact times for your paint, gently soften the adhesive before doing any rubbing to reduce the risk of finish damage.
You’ll choose methods based on adhesive types and paint compatibility, using low-risk approaches that loosen residue without disturbing the finish.
- Apply Goo Gone sparingly
- Use a damp microfiber cloth
- Warm slightly with your hand
- Let solution sit briefly
- Blot, don’t scrub
Gentle Removal Techniques for Tape and Stickers
When you’re ready to remove tape or stickers, peel slowly and steadily at a low angle to reduce stress on the paint. If the adhesive resists, warm it briefly with your hand or a hair dryer on low before lifting.
Use gentle tape removal techniques: pull back along the wall, support nearby paint with your free hand, and blot any tacky areas.
For sticker residue solutions, apply a small amount of Goo Gone, wait, then wipe clean.
How to Lift Stubborn Residue With a Plastic Scraper
Pick a soft plastic scraper so you won’t gouge the paint.
Soften the residue first with a little Goo Gone or warm soapy water, then let it sit a minute.
Hold the scraper at a shallow angle and push gently to lift the softened residue.
Choose A Gentle Scraper
Start with a soft plastic scraper designed for paint-safe work so you don’t gouge or lift the finish; you’ll apply firm, even pressure and slide at a low angle to coax stubborn Goo Gone residue off without scratching.
Use gentle techniques and consider scraper options that match paint type and contours.
- Rounded plastic blade
- Flexible putty knife
- Soft-edged razor guard
- Card-style scraper
- Replaceable tips
Soften Residue First
After you’ve chosen a gentle scraper, soften the stuck-on goo so the plastic blade can lift it without tugging at the paint. Apply Goo Gone, wait a few minutes, blot excess, then work edges gently. Different residue types and adhesive materials respond differently; test first in an inconspicuous spot.
| Material | Action |
|---|---|
| Sticker | Soak |
| Tape | Blot |
| Glue | Repeat |
| Label | Peel |
Scrape At Shallow Angle
Angle the plastic scraper so it rides almost flat against the wall—about 15–30 degrees—and push forward with steady, even pressure to lift softened residue without digging into the paint.
You’ll protect finish during adhesive removal and wall cleaning.
- Use a plastic putty knife
- Test low-visibility area
- Reapply Goo Gone if needed
- Wipe with microfiber
- Inspect for paint lift
When to Switch From Goo Gone to Soap and Water
Once the adhesive or residue has lifted and there’s no greasy film left, switch to soap and water to remove any solvent traces and restore the paint’s finish.
You should switch when the area feels dry and non-tacky. Use gentle soap, a soft cloth, and steady pressure.
Consider Goo Gone alternatives for sensitive paints and safe cleaning techniques to avoid overworking the surface.
How to Rinse Goo Gone Residue Safely From Walls
Start by blotting the treated spot with a clean, damp cloth to lift loosened Goo Gone residue without smearing it across the wall.
Then gently rinse the area, using minimal water to avoid paint damage.
Then gently rinse the area with just enough water to remove residue, taking care not to damage the paint
- Use a soft microfiber cloth
- Rinse cloth frequently
- Work outward from stain
- Avoid abrasive scrubbing
- Pat area dry with a soft towel
How to Dry and Inspect the Treated Area
After rinsing, gently blot the area with a dry microfiber cloth and let the wall air-dry for 15–30 minutes while keeping traffic and humidity low; this helps prevent streaks and lets you see whether any residue or paint damage remains.
Use gentle drying techniques—pat don’t rub—and avoid heat.
For inspection tips, view from different angles and under good light, noting any tackiness, discoloration, or surface irregularities.
How to Treat Scuff Marks Left After Cleaning
Scuff marks can linger even after you’ve removed greasy residue, so treat them with targeted, gentle steps to avoid harming the paint.
Use soft, nonabrasive methods for scuff mark removal and follow safe cleaning techniques to preserve finish.
- Try a magic eraser gently
- Use mild soap and water
- Test a spot first
- Rub with a soft cloth
- Rinse and dry promptly
Fixes for Minor Discoloration or Dulling
Minor discoloration or dulling from Goo Gone can usually be corrected without repainting if you act carefully.
Gently buff the area with a microfiber cloth and warm water, then try a mild soap rinse.
For stubborn spots, test a 50/50 water-isopropyl mix in an inconspicuous spot.
Use recommended discoloration remedies and targeted dulling solutions like a polish or restorer sparingly, then dry.
When to Repaint Instead of Trying More Cleaners
If buffing and gentle treatments don’t restore the paint’s appearance, it’s time to contemplate repainting rather than chasing more cleaners.
Check paint condition honestly and decide repaint timing based on damage, fading, stains, smell, or patchwork. If repairs are extensive, repainting saves time and risk of surface harm.
Assess paint honestly — if damage, fading, stains, odor, or patchwork persist, repainting often saves time and prevents further harm.
- severe peeling
- uneven sheen
- embedded stains
- widespread discoloration
- frequent touchups needed
Cleaning Painted Trim and Baseboards With Goo Gone
Start by clearing dust and loose dirt from trim and baseboards so Goo Gone can target sticky residues and scuff marks directly; apply a small amount to a soft cloth, test an inconspicuous spot, then gently rub along the painted surface to remove adhesive, crayon, and grime without overworking the finish.
Rinse with mild soap and water, dry, and consider a light protective wax for paint care and surface protection.
Using Goo Gone Near Electrical Outlets and Switches
Before you start, turn off the power to the outlet or switch at the breaker to eliminate shock risk.
Remove or cover switch plates and outlet covers so Goo Gone won’t contact the wiring.
Work with a lightly dampened cloth and keep liquids away from the openings.
Turn Off Power
1 simple step can prevent a dangerous accident: shut off the power to any outlet or switch you’ll be treating with Goo Gone.
You must follow safety precautions and basic electrical considerations before starting. Confirm power is off, then proceed carefully.
- Turn off breaker
- Test with a voltage tester
- Inform others
- Wear rubber-soled shoes
- Keep Goo Gone away from exposed wiring
Protect Switch Plates
When you’re working with Goo Gone near outlets and switches, cover the switch plates and surrounding wall to keep the solvent off metal and wiring, and avoid removing plates until the area is fully protected.
Use painter’s tape and clean, dry protective coverings to seal edges.
Dab Goo Gone carefully, keep liquids away from openings, and remove coverings only after surfaces are dry and residue-free.
How to Protect Adjacent Surfaces (Furniture, Flooring)
Start by clearing or covering anything near the painted area so Goo Gone and dissolved residue can’t drip onto furniture or floors.
Use surface protection and furniture covering to prevent stains and finish damage. Seal off the work zone, work slowly, and blot spills immediately.
- Lay drop cloths or plastic sheets
- Move small furniture away
- Tape edges securely
- Use cardboard for heavy items
- Keep a cleanup kit nearby
Goo Gone on Textured Paint and Wallpapered Walls (Cautions)
If your walls have texture or are papered, take extra care—Goo Gone can soften wallpaper adhesive and lift paint or texture finish if left too long or applied too aggressively.
Test an inconspicuous spot first, blot gently, and limit dwell time. For textured paint, avoid scrubbing; use minimal product.
With wallpaper caution, work slowly and stop at first sign of lifting or discoloration.
How Temperature and Humidity Affect Cleaning Results
Temperature changes how Goo Gone’s solvent behaves, so you’ll get stronger action in warm conditions and slower activity when it’s cold.
High humidity will slow drying and can leave residue longer, while low humidity speeds evaporation but can increase smearing if the surface is still tacky.
Also watch surface temperature—cold or hot paint can alter how well the adhesive releases and how the product adheres.
Temperature’s Effect On Solvent
Because solvents react faster in warm conditions, you’ll find Goo Gone works more quickly on painted walls when the room’s warmer and drier.
You should note temperature sensitivity; higher temps speed solvent evaporation and shorten dwell time, so act promptly and test first.
- Work in a warm room
- Test a hidden spot
- Apply briefly, wipe quickly
- Avoid prolonged soaking
- Store product cool and sealed
Humidity Alters Drying Time
Humidity also changes how quickly Goo Gone and similar solvents dry on painted walls, so you’ll want to factor moisture levels into your plan.
You should monitor humidity effects because high moisture slows evaporation, increasing dwell time and risk to paint.
Low humidity speeds drying, reducing contact time but may leave residue.
Adjust ventilation and drying considerations accordingly to balance effectiveness and safety.
Surface Temperature And Adhesion
When your wall is cool to the touch, adhesives grip more tightly and Goo Gone needs longer to soften residues.
So check surface temperature before you start and plan for extra dwell time on cold days. You’ll notice surface temperature changes affect adhesion strength and drying; adjust solvent amount, wait longer, and test a small area.
- Check temp with your hand
- Increase dwell time
- Use minimal solvent
- Test paint first
- Work in stages
Common Mistakes That Damage Paint With Goo Gone
Although Goo Gone can be safe in many cases, misusing it often strips or softens paint — especially if you leave it on too long, scrub too hard, or apply it to untested surfaces.
Don’t soak glossy finishes, ignore ventilation, or mix solvents.
Test small areas, rinse promptly, and consider Goo Gone alternatives for delicate coatings.
Prioritize paint preservation by using gentle tools and timed applications.
How to Avoid Spreading Stain or Residue While Cleaning
Start by testing Goo Gone on a small hidden spot so you know how the paint reacts.
Work from the outside of the stain toward the center to keep residue contained.
Blot gently with a clean cloth instead of rubbing to lift the spot without spreading it.
Test Small Hidden Area
Pick a tiny, out-of-the-way spot—behind a door, inside a closet, or near a baseboard—and apply a dab of Goo Gone to check for color change, peeling, or residue spread before you treat visible stains.
Always test a hidden area as a patch test to confirm compatibility and avoid spreading residue.
- Wait 10 minutes
- Blot, don’t rub
- Inspect under good light
- Rinse gently
- Note paint type
Work From Outside In
Work from the outer edges toward the center so you don’t push the stain or Goo Gone residue beyond the affected area; apply small amounts with a soft cloth or cotton swab, blotting gently and moving inward until the spot is contained and lifted.
After cleaning, inspect paint application and overall wall preparation; touch up only as needed to match sheen and color, avoiding excess solvent.
Blot Don’t Rub
Blot gently with a soft cloth or paper towel instead of rubbing, since rubbing can spread the Goo Gone and push residue deeper into the paint.
You’ll avoid smears and protect finish using precise blotting techniques for safe adhesive removal.
- Use light pressure
- Work outward from edges
- Replace soiled cloths
- Pat, don’t scrub
- Test on hidden spot
How to Remove Residue From Semi-Gloss and Gloss Paint
Start by testing Goo Gone on a small, inconspicuous patch of your semi-gloss or gloss paint to make sure it won’t dull the finish.
Use a soft cloth, apply sparingly, and let sit briefly. Wipe with light pressure, then rinse with mild soapy water.
For stubborn residue from different adhesive types, repeat gently and finish by buffing to restore the paint finish.
How to Remove Residue From Flat and Matte Paint
Because flat and matte paints are more porous and show cleaning marks easily, you’ll want to be especially cautious when using Goo Gone.
Because flat and matte paints are porous and show marks, use Goo Gone sparingly and test first.
Use gentle residue removal steps to preserve paint protection and finish.
- Test in an inconspicuous spot first
- Apply a tiny amount, don’t saturate
- Blot gently with a soft cloth
- Rinse area with mild soap and water
- Pat dry, avoid scrubbing
Oil-Based vs. Latex Paint: Safe Steps
If your wall has oil-based paint, you’ll need to test Goo Gone in an inconspicuous spot and use it sparingly to avoid softening the finish.
For latex-painted walls, you can be a bit more liberal but should still blot gently and rinse promptly to prevent lifting or streaking.
Always dry the area and inspect before treating larger sections.
Oil-Based Paint Considerations
When you’re deciding whether to use Goo Gone on painted walls, first confirm what kind of paint you’re dealing with—oil-based paint is less forgiving than latex and can react differently to solvents.
Check adhesion and finish before proceeding. Test a small hidden spot, use minimal product, blot don’t rub, and ventilate well.
- Test in an inconspicuous area
- Check for softened finish
- Use sparing amounts
- Blot residue gently
- Ventilate space
Latex Paint Precautions
Although latex paint generally tolerates mild solvents better than oil-based finishes, you still need to proceed cautiously to avoid softening or discoloration.
Test Goo Gone in an inconspicuous spot, blot—don’t rub—and rinse promptly.
For latex paint care, use minimal product, soft cloths, and gentle pressure.
Know paint finish types; flat and eggshell are more sensitive than satin or semi-gloss.
Child- and Pet-Safe Alternatives to Goo Gone
Because you want a safe solution around kids and pets, try gentle, non-toxic cleaners that break down sticky residues without harsh chemicals.
You can choose eco friendly options and natural alternatives that won’t harm finishes. Test a small spot first, blot don’t rub, and rinse thoroughly to remove residue.
- Warm soapy water
- Vinegar solution
- Baking soda paste
- Olive oil spot treatment
- Commercial non-toxic remover
Household Substitutes That Work on Painted Walls
If you need to remove sticky residue without special products, everyday household items can do the job safely on painted walls—just pick the gentlest option and test a hidden spot first.
Try mild dish soap and warm water, white vinegar diluted with water, or a small amount of vegetable oil.
Use soft cloths, avoid scrubbing, and consider commercial household cleaners labeled safe for painted surfaces as gentle adhesive removers.
When Store-Bought Removers Are Better Than DIY Fixes
When DIY solutions don’t safely lift stubborn residue or risk damaging the paint, reach for a store-bought remover designed for painted surfaces.
You’ll get tested formulas, predictable results, and labeled instructions that reduce risk. Recognize store bought benefits over DIY limitations and choose products made for your finish.
- Faster stain breakdown
- Gentler on paint
- Clear usage directions
- Consistent performance
- Safety testing
How to Test and Compare Alternative Products Safely
Before you try a new remover, spot test it on an inconspicuous area to check for color loss or softening.
Compare ingredient labels so you avoid strong solvents that can damage paint.
Watch the test spot for several hours to monitor any delayed reaction.
Spot Test First
Want to know which cleaner won’t damage your paint? You should always do a patch test in hidden areas before full use.
Try small amounts, wait, and inspect for softening, discoloration, or sheen change. Record results and choose the mildest effective product.
- Test in a closet or behind furniture
- Use cotton swab
- Wait 24 hours
- Note color change
- Rinse area
Compare Ingredient Labels
Start by lining up ingredient labels side by side so you can spot harsh solvents, abrasives, or oils that might strip or dull your paint.
Focus on solvents like limonene, mineral spirits, or acetone and avoid products listing strong alcohols or silicone-based additives if your paint is waterborne.
Check for eco friendly alternatives, prioritize ingredient safety, and choose products with simple, transparent ingredient lists to minimize risk.
Monitor Surface Reaction
1 simple patch test tells you more than label-reading ever will: apply each Goo Gone alternative to a hidden, small area of the painted wall, wait the manufacturer-recommended dwell time, then blot and gently rub to see if the finish softens, dulls, peels, or discolors.
Then record results, noting surface sensitivity and performing basic adhesion testing.
- Note time and product
- Photograph before/after
- Smell and residue check
- Try gentle abrasion
- Compare nearby paint types
Eco-Friendly and Low-VOC Options for Sensitive Rooms
Because sensitive rooms like nurseries and bedrooms need extra care, choose low-VOC or biodegradable Goo Gone alternatives that won’t leave harmful fumes.
You should pick eco friendly alternatives and low voc options labeled non-toxic, plant-based, or fragrance-free.
Test a small painted patch, ventilate the room, use minimal product, blot gently, and rinse thoroughly to protect paint and indoor air quality.
How to Handle Large Areas of Adhesive or Heavy Buildup
Start by evaluating the painted surface for softness, texture, and any existing paint damage so you know how aggressively you can work.
Tackle the area in small sections, applying Goo Gone, letting it sit briefly, and gently scraping or blotting as needed.
Rinse and repeat the process until the buildup is gone, drying each section before moving on to avoid spreading residue.
Assess The Surface
When you’re facing large patches of adhesive or heavy residue, first gauge how much paint and texture you’re dealing with so you can choose the right technique and protector.
Assess surface types and wall textures for fragility, gloss level, and previous repairs.
Consider primer, testing, and protection.
- Identify paint finish
- Note porous areas
- Check for peeling
- Look for patched zones
- Plan protective coverings
Work In Small Sections
Tackle the wall in manageable, overlapping sections so you can control how much Goo Gone you apply and immediately see how the paint responds.
Use a deliberate work technique: treat each small area as its own test, apply product sparingly, wait briefly, and gently lift residue.
This section approach prevents over-saturation, helps spot paint sensitivity, and keeps cleanup localized if you need to adjust your method.
Rinse And Repeat
If a small-section approach shows the paint holds up, expand outward and rinse and repeat for larger swaths of adhesive or heavy buildup.
You’ll use gentle rinse techniques between repeated applications, working systematically so solvent doesn’t pool. Stay patient, blot residue, and dry thoroughly before rechecking.
- Work outward in bands
- Use soft cloths
- Rinse frequently
- Reapply sparingly
- Inspect as you go
Troubleshooting: Sticky Residue That Won’t Budge
Although Goo Gone usually lifts sticky residue easily, some spots cling stubbornly to paint and need a different approach.
You’ll try sticky residue solutions like warm soapy water first, then apply a small amount of Goo Gone with a soft cloth.
For tougher areas, use gentle adhesive removal techniques—soft plastic scraper, cotton swab, and short dwell times—testing discreetly to avoid damage.
Troubleshooting: Paint That Darkened After Cleaning
If the cleaned area looks darker, first check whether the paint was fully cured before you applied Goo Gone—wet or uncured paint can absorb solvents and change tone.
If cure time isn’t the issue, test a hidden spot to see if the solvent reacted with the paint binder or finish.
Based on that test, you’ll know whether the darkening is temporary (surface residue) or a chemical change that may need repainting.
Check Paint Cure Time
Before you assume the solvent caused the darkening, check how long it’s been since the paint was applied — fresh paint can look darker until it fully cures.
Wait recommended paint curing times, especially with primer or new topcoats.
Consider adhesive types previously removed; some leave residues that affect appearance.
- Note manufacturer cure times
- Wait 7–30 days when unsure
- Test hidden spot later
- Clean residue gently
- Avoid reapplying solvent
Test For Solvent Reaction
Want to know if the solvent actually reacted with your paint or just left a temporary mark?
Gently wipe a hidden test spot with diluted Goo Gone, then blot dry.
Wait 24 hours and inspect under good light.
If color returns, it was surface residue; if it stays dark or softens, solvent compatibility failed and paint durability is compromised—consider touch-up or professional repair.
When to Call a Professional Cleaner or Painter
When stains persist after your best efforts or the paint shows damage like bubbling, peeling, or noticeable color loss, call a professional cleaner or painter to avoid making things worse.
If stains persist or paint bubbles, peel, or fades, call a professional cleaner or painter to prevent further damage.
You’ll get a professional assessment, cleaning expertise, and options for paint restoration and ongoing wall maintenance.
- Assess structural damage
- Match paint color
- Use safe solvents
- Repair underlying issues
- Schedule preventative checks
How to Prevent Adhesive Marks in the Future
1 simple habit can save you hours of scraping: use low-residue adhesives and proper mounting methods from the start.
You can choose removable hooks, painter’s tape for temporary holds, and adhesive squares labeled low-residue.
Follow adhesive prevention tips like cleaning surfaces before application and avoiding prolonged contact.
Plan future cleaning strategies by testing products on hidden spots and scheduling regular inspections to catch residue early.
Best Practices for Removing Labels and Stickers Cleanly
Removing labels and stickers cleanly starts with patience and the right sequence of steps: warm the adhesive with a hair dryer or heat gun on low, peel slowly from an edge at a shallow angle, and stop if the label tears so you can reheat and lift the remaining pieces.
Use proper label removal for different adhesive types and finish gently.
- Test heat on a hidden spot
- Peel near corners
- Reheat stubborn areas
- Use plastic scraper
- Clean residue safely
Checklist: Safe Goo Gone Use on Painted Walls
Start by gathering everything you’ll need so you can work quickly and minimize solvent contact with the paint: a soft cloth, a plastic scraper, Goo Gone, mild dish soap, water, a spray bottle, and several clean cotton swabs or cotton balls.
Test a hidden spot, work gently, blot not rub, ventilate, and time short exposures.
Consider Goo Gone alternatives and gentle adhesive removal techniques if paint softens.
Paint-Type Cheat Sheet (Quick Actions)
Now that you’ve got your supplies and safety steps down, match your quick actions to the paint type so you don’t damage the finish.
Use Surface preparation, evaluate Paint types, and pick Cleaning techniques or Eco friendly options for Adhesive removal.
Follow Safety measures, test in a hidden spot, and compare Product comparisons for Residue management.
- Gloss: gentle solvent, dab, wipe
- Semi-gloss: test, low solvent
- Satin: mild cleaner
- Eggshell: minimal agitation
- Flat: avoid solvents, scrape gently
Frequently Asked Questions
Can Goo Gone Remove Crayon or Marker From Painted Walls?
Yes — you can often remove crayon or marker with Goo Gone. You’ll use crayon removal techniques and marker stain solutions gently, testing first, applying briefly, wiping clean, then rinsing to protect paint from damage.
Will Goo Gone Harm Washable Kids’ Wall Paints or Chalkboard Paint?
Like sunlight on glass, Goo Gone effectiveness can vary: you’ll usually be fine with washable kids’ paint but you shouldn’t assume chalkboard paint is safe—test first for Paint surface compatibility, then blot gently and rinse.
How Long Before Repainting After Using Goo Gone on a Wall?
You should wait at least 24 hours before repainting after using Goo Gone; you’ll guarantee paint drying and proper surface preparation by wiping residue with soapy water, rinsing, and letting the wall fully dry to avoid adhesion problems.
Can I Use Goo Gone Near HVAC Vents or on Ceiling Paint?
Yes — but cautiously. For example, a homeowner used Goo Gone safely around a vent, protecting duct openings and wiping spills quickly. Follow Goo Gone safety: avoid direct vent contact, ventilate, and don’t over-saturate ceiling paint during HVAC cleaning.
Does Goo Gone Affect Paint Warranties or Home Resale Disclosures?
Yes — using Goo Gone can affect paint warranty implications, so you should check manufacturer terms; for resale disclosure considerations, you’ll need to disclose any chemical treatments that altered finishes or caused repairs to avoid legal issues and buyer disputes.
Conclusion
You can usually use Goo Gone safely on semi-gloss and gloss painted walls, but always test first. One useful stat: consumer reports found solvents damage 22% of painted finishes when not spot-tested. That shows why a small patch test and quick wipe are worth it. Work gently, avoid prolonged saturation, rinse well, and consider heat or adhesive removers designed for delicate paints. Those steps cut risk and help keep your walls looking new.