How to Soften Dried Paint for Easy Removal
Match the softening method to paint type and surface: rehydrate latex with warm soapy water or vinegar, use mineral spirits or commercial strippers for oil-based paint, apply controlled heat for thick layers, and try enzyme or rubbing alcohol for fabrics. Test a small area, protect surrounding finishes, and use gentle scrapers or soft brushes after the paint softens. Wear gloves and ventilate the space. Continue for step-by-step surface-specific techniques and safety tips.
Who This Guide Is For
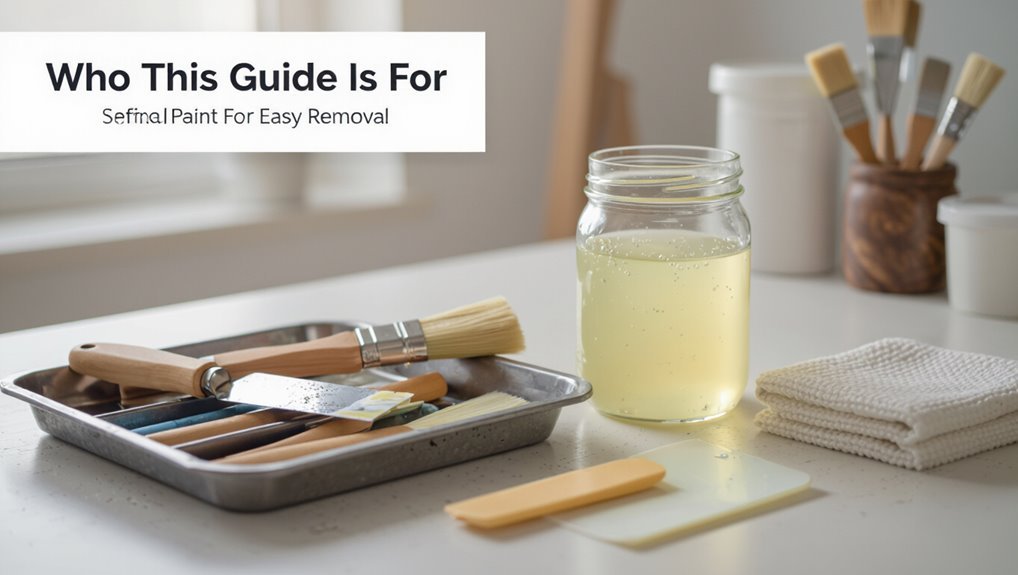
Who’s this guide for? You’re a DIYer, renter, or pro facing stubborn dried paint on walls, trim, or furniture.
You’ll learn which paint types respond to gentle solvents versus mechanical methods and choose safe removal techniques that match surfaces and finishes.
If you need quick fixes or heavy-duty stripping, this guide helps you pick appropriate, effective approaches without needless risk.
Quick Answer: Fastest Safe Ways to Soften Dried Paint
Start by matching the paint type to the gentlest effective method: water-based paints soften with warm soapy water or a vinegar solution, oil-based paints respond to mineral spirits or commercial paint removers, and stubborn or multi‑layer films often need heat or a chemical stripper. Use appropriate paint removal techniques and check surface compatibility.
| Method | Best for | Notes |
|---|---|---|
| Soap/vinegar | Water-based | Gentle |
| Mineral spirits | Oil-based | Test first |
| Heat | Thick layers | Avoid scorch |
| Chemical stripper | Multi-layer | Follow safety |
Decide: Soften or Fully Strip Dried Paint
First check how thick the paint is, since thin splashes usually soften faster than multiple heavy coats.
Then think about the surface—wood, metal, or plastic will handle solvents and scraping differently.
Finally, weigh how much time and what tools you’ve got to decide whether to soften in place or strip it down completely.
Assess Paint Thickness
Before you decide whether to soften or fully strip dried paint, evaluate how many layers and how thick they’re by inspecting the surface visually and with simple tools.
Tap, scrape gently, and use a razor to judge adhesion. Note paint consistency—brittle, chalky, or flexible—to choose removal techniques.
Thin, well-adhered layers suit softening; thick, flaky buildup needs full stripping.
Evaluate Surface Material
Consider what the substrate is and how it reacts to solvents and abrasion, because that determines whether you can safely soften paint or must strip it entirely.
Inspect for fragile finishes, porous wood, metal corrosion, or plastic warping.
Test a small area to check surface compatibility and paint adhesion.
If the substrate risks damage, opt for full stripping with gentler mechanical methods or professional help.
Consider Time And Tools
When you’re deciding whether to soften dried paint or strip it completely, weigh how much time you have and which tools you can realistically use: prioritize time management—short windows favor heat guns or chemical softeners, longer projects suit sanding or stripping.
Assess tool selection for surface safety and access. Pick the method matching your schedule, skill, and available equipment to avoid damage or rework.
How Substrate Guides Your Method (Glass, Wood, Metal, Fabric)
How you approach dried paint depends on the surface: glass calls for non-abrasive scrapers and solvent-soaked pads, while porous materials like wood and fabric need gentler, absorbent treatments.
You’ll use different solvents, application times, and agitation techniques to avoid damage on each substrate.
Keep in mind that what works on smooth, nonporous glass can ruin porous surfaces, so match method to material.
Glass Surface Techniques
Glass demands a gentler, non-abrasive approach because its smooth, non-porous nature lets softened paint lift off without soaking in—so you’ll rely on solvents and controlled mechanical action rather than heavy scraping.
Identify paint types, test a small area, use a mild solvent or commercial glass cleaning product, work with a plastic scraper or razor at low angle, then wipe residue with lint-free cloth and solvent.
Porous Material Approaches
Because porous substrates soak up liquids and resist scraping, you’ll tailor your softening method to the material: on wood, gently sand then use diluted vinegar or mineral spirits; on fabric, test enzyme cleaners or rubbing alcohol; on concrete, apply poultices; on metal, use solvent-soaked pads.
Use porous surface techniques and natural solvent alternatives to prevent staining, distortion, or residue while softening dried paint.
Basic Safety Gear Before You Start
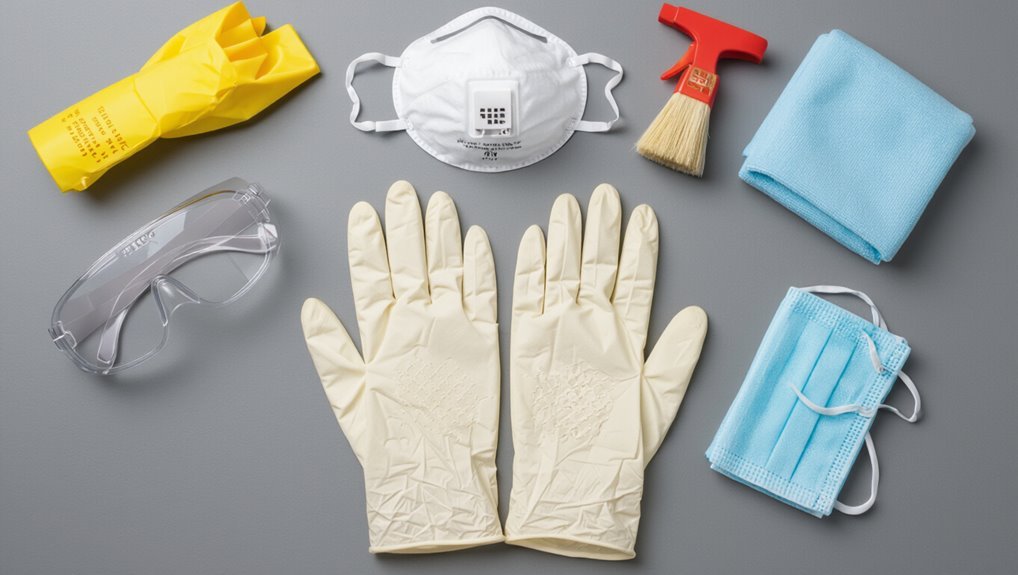
Before you touch any dried paint, put on basic protective gear: gloves to keep solvents off your skin, safety glasses to shield your eyes from splashes and chips, and a respirator or mask rated for organic vapors if you’ll be using strong removers in a poorly ventilated area.
- safety goggles and protective gloves
- respirator mask for fumes
- clear work area and ventilation tips
How to Test a Small Hidden Area First
Before you start softening dried paint, pick an inconspicuous spot—behind trim or inside a cabinet—so any damage won’t be obvious.
Apply your chosen softening method to a very small area and wait the recommended time.
Check for paint lift, surface damage, or finish changes before proceeding to larger sections.
Choose An Inconspicuous Spot
Pick a small, hidden spot—like the underside of a trim, inside a closet, or behind a light switch plate—to test your softening method first.
Use hidden areas to avoid visible damage and note paint types before proceeding.
Try these quick checks:
- Clean a tiny patch.
- Apply your solvent briefly.
- Observe texture and color change.
Perform A Small Test
Now you’ll want to test your chosen method on a tiny hidden area to make sure it softens the paint without causing discoloration or surface damage.
Apply each candidate gently, time it, and note results.
Compare test methods side by side for an effectiveness comparison: softness achieved, surface impact, and odor.
Pick the safest, most effective option before treating visible areas.
Gentle Fix: Warm Water and Soap for Water-Based Paint
If the paint is water-based and only lightly dried, you can usually revive it with warm water and a mild soap; the heat softens the binder while the soap breaks surface tension and lifts loosened pigment.
Try this:
- Test a small area, adjust water temperature for softness.
- Gently scrub with a soft cloth, monitoring soap effectiveness.
- Rinse and blot dry, repeating if needed.
How Vinegar Softens Dried Paint (When to Use)
When you need a mild, non-toxic solvent for dried water-based paint, white vinegar works by breaking down the paint’s binder with gentle acidity so the film softens and rehydrates.
It’s best for thin, crusty layers or paint that’s only partially cured, not for thick, fully hardened enamel or oil-based finishes.
You’ll apply warm vinegar, let it sit, scrub gently, and consider stronger alternative solvents if needed.
Using Rubbing/Isopropyl Alcohol Safely and Effectively
Because isopropyl (rubbing) alcohol evaporates quickly and dissolves many water-based paints, you can use it to soften and remove thin or slightly dried paint without heavy solvents.
Apply it sparingly, let it penetrate briefly, then rub or wipe the softened film away.
- Wear gloves and ventilate for safe handling.
- Test a hidden spot first.
- Blot — don’t scrub — to avoid damage.
Baking Soda Paste to Lift Stubborn Spots
Mix baking soda with a little water to make a thick, toothpaste-like paste you can control.
Apply a thin layer to the stubborn dried paint, let it sit for several minutes to soften, then check; don’t let it dry out.
Finish by gently scrubbing with a soft brush or cloth, using light circular motions to lift the paint without damaging the surface.
Making A Thick Paste
A simple baking soda paste lets you lift stubborn, dried paint spots without harsh solvents, and you’ll make it in seconds using ingredients you probably already have.
Use baking soda plus water and a mild thickening agent to reach ideal paste consistency. Mix until smooth, then:
- Start with 2:1 soda to water.
- Add thickener sparingly.
- Adjust to hold shape.
Application And Dwell
Once you’ve got a spreadable paste, press it onto the dried paint so it fully covers the spot, then let it sit undisturbed long enough to soften the film. Use gentle application techniques and note dwell time for different spots. Check periodically; longer dwell helps stubborn areas.
| Surface | Paste | Time |
|---|---|---|
| Wood | Thin | 10–20m |
| Metal | Medium | 15–30m |
| Tile | Thick | 20–40m |
| Painted trim | Thin | 10–15m |
Gentle Scrubbing Techniques
After the paste has softened the paint, switch to gentle scrubbing with a baking soda paste to lift remaining spots without damaging the surface.
Use gentle exfoliation techniques and effective scrubbing tools to avoid scratches.
- Apply paste, wait briefly.
- Scrub with a soft brush or microfiber in circular motions.
- Rinse and repeat only where needed, drying thoroughly.
Using Steam to Loosen Paint on Nonporous Surfaces
Bring a pot of water to a simmer and you’ll get one of the gentlest ways to loosen dried paint on nonporous surfaces like glass, metal, or glazed tile.
Use the steam method: hold the steamed cloth or nozzle a few inches away, soften paint for a minute, then peel or gently scrape with a plastic tool.
Repeat until residue releases, wiping away softened flakes.
Applying Heat With a Hair Dryer or Heat Gun Safely
Pick the right tool for the job—use a hair dryer for gentle warming and a heat gun on a low setting if you need more power.
Keep the nozzle a safe distance from the paint and move it constantly to avoid scorching.
Protect nearby surfaces with drop cloths or heat-resistant barriers to prevent damage.
Choose Appropriate Heat Source
When you heat dried paint to soften it, choose your tool with safety and surface type in mind: a hair dryer gives gentler, controllable warmth for delicate finishes, while a heat gun produces intense, concentrated heat that works faster on stubborn or thick coatings.
Follow Heat safety and plan Heat application:
- Use low settings for varnished wood.
- Test on hidden area.
- Wear gloves and eye protection.
Maintain Safe Distance
Although heat speeds paint softening, you should keep a safe distance to avoid scorching the surface or burning yourself.
Hold the hair dryer or heat gun 6–12 inches away, move it continuously, and never focus on one spot.
Wear gloves and eye protection, monitor temperature, and stop if you detect fumes or smoke.
Staying alert minimizes paint hazards and reduces injury risk.
Protect Surrounding Surfaces
1 simple precaution is to shield everything around the work area before you apply heat—cover nearby furniture, trim, and floors with flame-resistant drop cloths or heat-resistant foil and tape down edges so they won’t lift.
You’ll protect the surrounding area and guarantee surface protection by following these steps:
- Keep distance and move flammables away.
- Use low heat, steady motion.
- Monitor temperature, ventilate room.
When to Consider Commercial Paint Removers
If a scrap-and-sand approach won’t cut through thick, multiple, or decades-old coatings, consider a commercial paint remover—you’ll save time and get more predictable results than with household solvents or scraping alone.
You’ll want to weigh commercial options for safety, surface compatibility, and removal efficiency. Use proper PPE, test a small area, ventilate well, and follow label instructions to avoid damage and health risks.
Which Chemical Stripper Suits Your Paint Type
Which stripper should you pick depends on the paint type and the surface underneath. You’ll assess chemical properties and paint compatibility to choose safely.
Consider:
- Solvent-based for oil/enamel — aggressive, fast.
- Alkaline for latex — less volatile, good for masonry.
- Specialty for lead or industrial coatings — requires precautions and testing.
Match stripper to substrate and finish, and follow label instructions.
Using Citrus- or Soy-Based Removers for Gentler Action
When you want a milder option that still lifts dried paint, citrus- and soy-based removers offer plant-derived solvents that cut through coatings without the harsh fumes of traditional strippers.
You’ll appreciate citrus benefits like pleasant scent and rapid grease cutting, and soy advantages such as slower evaporation and safer disposal.
Apply, wait per label, then scrape gently; test first on an inconspicuous area.
Paint Thinner and Mineral Spirits for Oil-Based Paint
Citrus- and soy-based removers are great for gentle cleanup, but oil-based paints usually need stronger solvents like paint thinner or mineral spirits.
Use them safely:
Use solvents safely: ventilate, wear gloves and eye protection, and follow proper disposal rules.
- Ventilate the area and wear gloves and eye protection.
- Apply a small amount, let it soften, then scrape gently with a plastic tool.
- Wipe residue with a clean rag and dispose of solvents per local rules.
Enzyme-Assisted Methods for Paint on Fabrics
When dealing with dried paint on fabrics, you’ll find enzyme-based cleaners—protease, lipase, and amylase—each target different paint binders and residues.
You’ll want to apply them gently, testing on an inconspicuous spot, using the manufacturer’s dilution and contact-time recommendations to avoid damage.
After treatment, rinse thoroughly, launder as directed, and air-dry to check results before repeating or using stronger methods.
Enzyme Types Explained
Although enzymes won’t dissolve every kind of dried paint, they can target specific components—like proteins, fats, or certain binders—so you can choose a product that actually breaks the stain down.
You’ll learn enzyme functions and enzyme benefits quickly:
- Proteases: break protein-based binders.
- Lipases: tackle fatty additives.
- Cellulases: help with plant-fiber paints on fabric.
Safe Application Techniques
If you’re treating paint on fabric with enzyme cleaners, start by testing a hidden seam to verify the product won’t fade or weaken the material.
Apply enzyme solution sparingly, blotting—don’t rub—to lift softened paint.
Use compatible safe solvents for stubborn spots, following label instructions and ventilation guidance.
Choose eco friendly options when possible, and wear gloves to protect skin during application.
Post-Treatment Care
After you’ve tested and applied enzyme cleaners, focus on post-treatment care to lock in results and protect the fabric.
Rinse thoroughly, blot excess moisture, and air dry. For post removal cleanup and surface restoration, follow these steps:
- Rinse with cool water and mild detergent.
- Inspect for residue; repeat enzyme spot if needed.
- Air-dry away from direct heat and treat stains promptly.
Mechanical Removal: Scraping, Sanding, and Scoring Safely
Start by evaluating the surface and choosing the right tools—scrapers, sanding blocks, or scoring knives—so you remove dried paint efficiently without damaging the substrate.
Use scraping techniques with firm, controlled strokes, apply sanding tips like gradual grits, and employ scoring methods for stubborn areas.
Wear eye protection, gloves, and a mask, work with the grain, and keep tools sharp as safety precautions.
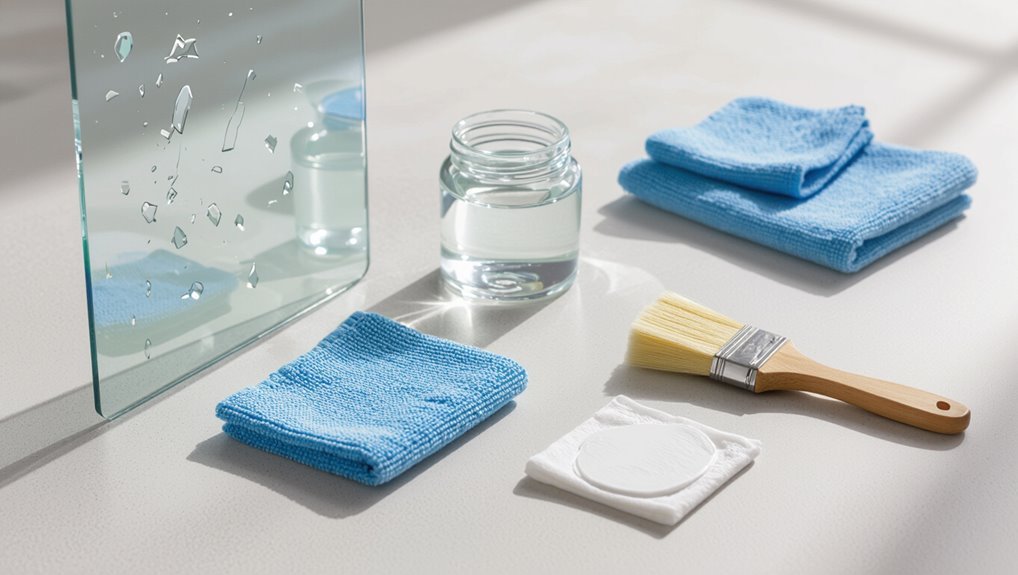
Protecting Glass and Mirrors While Removing Dried Paint
While you remove dried paint, protect glass and mirrors with care to avoid scratches, chips, and stubborn residue that’s hard to clean later.
Use gentle methods focused on glass protection and mirror safeguarding:
- Score softened paint lightly with a razor at low angle.
- Apply a plastic scraper or microfiber pad.
- Clean residue with mild solvent on a cloth, not poured directly on glass.
Protecting Wood Finishes and Avoiding Discoloration
Before using any solvent on wood, test it on a hidden spot to make sure it won’t dull or strip the finish.
Start with the mildest solvent you can—like warm soapy water or mineral spirits—and only step up to stronger solvents if the test patch is safe.
Work gently and wipe frequently to avoid soaking or discoloring the wood.
Test On Hidden Area
Wondering how to protect a wood finish while softening dried paint? You should always test in hidden areas first.
Try simple test methods to confirm finish compatibility and colorfastness:
- Apply a tiny amount and wait 10–15 minutes.
- Blot gently with a clean cloth.
- Inspect for sheen loss, swelling, or discoloration.
If damage appears, stop and choose another approach.
Use Gentle Solvents
If your hidden-area test shows the finish holds up, reach for mild solvents to loosen dried paint without harming the wood. You’ll use gentle solvents like isopropyl alcohol or mineral spirits sparingly, blotting and rinsing. Consider safe alternatives such as citrus-based removers. Monitor for discoloration and stop if finish softens.
| Solvent | Use |
|---|---|
| Isopropyl | Spot test |
| Citrus | Short contact |
Removing Dried Paint From Metal Without Causing Rust
When you need to remove dried paint from metal without causing rust, choose methods that lift paint gently and keep moisture off the bare metal.
Use soft scrapers, mild solvent swabs, and quick drying.
- Scrape gently with plastic tools.
- Dab solvent, then wipe dry.
- Coat exposed metal with oil or primer.
Practice metal care and rust prevention.
Lifting Dried Paint From Clothing and Linens
If you get paint on clothing or linens, act fast to prevent it from setting.
Pretreat the stain with an appropriate solvent—testing it on a hidden spot first—then launder as usual.
After washing, inspect the fabric and repeat treatment if any residue remains.
Act Quickly After Spills
Although dried paint can seem hopeless, acting fast gives you the best chance to remove it from clothing and linens without permanent damage. You should follow paint spill prevention habits and prioritize immediate cleanup.
Do this:
- Scrape excess gently.
- Blot with cold water.
- Air dry and reassess.
Handle stains promptly and avoid heat until the paint’s gone.
Pretreat With Solvent
Because dried paint bonds quickly, you’ll need a solvent to break it down before washing—pick one that matches the paint type (water for latex, mineral spirits or acetone for oil-based).
Test it on a hidden seam first, and work in a well-ventilated area while wearing gloves.
Blot loosened paint, use small brushes and cloths, rotate solvent types cautiously, and follow recommended application techniques to avoid fabric damage.
Wash And Inspect Carefully
Once the solvent has loosened the paint, launder the item promptly to remove residue and inspect for remaining stains.
Use gentle agitation and appropriate detergent, avoiding heat until stains are gone. Apply targeted treatments if needed; repeat solvent pretreatment cautiously.
- Blot excess, don’t rub.
- Check fabric care labels.
- Compare paint removal techniques and surface cleaning methods for best results.
Soften Dried Paint on Textured or Porous Surfaces
Textured and porous surfaces trap paint in nooks and fibers, so you’ll need gentler, more patient techniques than you’d on smooth walls.
Dampen the area, apply a low‑odor solvent or mild stripper in small sections, and let it soak longer.
Dampen the surface, work in small sections with a low‑odor solvent, and allow extra dwell time for removal.
Use soft brushes and repeated gentle blotting to lift softened paint.
Rinse and repeat until textured surfaces show clean substrate for final paint removal.
Essential Tools for Removing Softened Paint
Before you start scraping, make sure you’ve got the right safety gear—gloves, goggles, and a respirator—so you don’t inhale fumes or irritate your skin.
Pick a solvent that’s appropriate for the paint type and surface, and test it in a hidden spot to confirm it softens without damage.
Prep the area by cleaning, protecting surrounding surfaces, and having scrapers, brushes, and rags handy for efficient removal.
Safety Gear Essentials
While you’re softening dried paint, don’t skip proper safety gear—chemical strippers, heat tools, and scraping can expose you to fumes, dust, and sharp edges.
Use safety equipment and protective gear every time.
Essentials:
- Respirator mask (organic vapor + particulate)
- Chemical-resistant gloves and goggles
- Long sleeves, pants, and closed-toe shoes to prevent burns and cuts
Solvent Selection Guide
Because different paints and surfaces react very differently, you’ll want to match your solvent to the paint type and substrate to get effective, safe removal. Consider solvent properties, toxicity, and environmental impact when choosing. Use this quick reference:
| Paint Type | Suggested Solvent |
|---|---|
| Latex | Soap/water, citrus |
| Oil | Mineral spirits |
| Enamel | Acetone |
| Varnish | Paint stripper |
Surface Preparation Tips
Now that you’ve matched solvents to paint types, gather the right tools so you can remove softened paint cleanly and safely.
Check paint compatibility and plan surface cleaning before you start. Bring protective gloves, goggles, and respirator.
Prepare tools:
- Plastic scrapers and stiff brushes
- Microfiber cloths and buckets
- Solvent-safe trays and drop cloths
Step-by-Step: Remove Softened Paint Safely
Gather your tools and set up a safe workspace before you begin removing softened paint; doing so keeps the job tidy and reduces hazards.
Wear gloves, goggles, and a mask.
Apply gentle scraping with a plastic or metal scraper, using paint removal techniques suited to the surface.
Work in small sections, reapply paint softening methods if needed, and dispose of loosened paint safely as you go.
Clean Residues and Prepare the Surface Afterward
After you’ve removed the bulk of the softened paint, wipe the area with a damp cloth or sponge to pick up dust and small fragments.
Then rinse with clean water to prevent residue from interfering with adhesion.
Rinse thoroughly with clean water to remove residue and ensure proper adhesion before proceeding.
Follow for effective residue cleaning and surface preparation:
- Scrape loose bits, then vacuum.
- Degrease with mild detergent.
- Dry fully before next steps.
Restore or Refinish After Paint Removal
Assess the surface to decide whether you’ll spot-repair, repaint, or fully refinish it; choose a compatible primer and paint or stain that matches the substrate and the surrounding finish.
You’ll sand feathered edges, fill gouges, and select paint restoration techniques aligned with the material.
Consider refinishing options like clear coats or stains, match sheen, and test a small area before completing the job.
Dispose of Paint Waste and Contaminated Rags Responsibly
Proper disposal of leftover paint and any solvent‑soaked rags prevents fire hazards and environmental harm, so you should segregate oil‑based and water‑based wastes, store them in sealed, labeled containers, and follow local hazardous‑waste rules for drop‑off or pickup.
Dispose leftover paint and solvent‑soaked rags safely: separate oil- and water-based wastes, seal and label containers, and use hazardous‑waste collection.
- Use approved hazardous‑waste sites for paint disposal.
- Air‑dry small amounts in a safe, ventilated area before disposal.
- Bag and seal contaminated rags; don’t burn them—follow rag management guidelines.
Troubleshooting: When Paint Won’t Soften
If the softened paint doesn’t respond to your usual solvents or methods, don’t assume it’s ruined—there are specific reasons and fixes you can try before discarding it.
Check age, cure time, and substrate; gently rehydrate latex with water plus a mild detergent, or use a recommended solvent for oil-based types.
For paint consistency issues, try mechanical scraping, heat, or targeted stubborn paint solutions before giving up.
Preventing Dried Paint Problems During Projects
When you plan ahead and follow a few simple habits, you’ll cut the chances of paint drying out mid-project.
You should use solid project planning and smart paint selection, keep lids sealed, and work in batches.
Follow these steps:
- Prep surfaces and mix only needed paint.
- Store cans airtight and cool.
- Use slow-dry formulas or retarder additives.
DIY vs. Pro: Cost and Time Comparison
How much could you really save by doing the work yourself versus hiring a pro? You weigh DIY Techniques against Professional Services, performing a Cost Analysis and Tool Comparison while factoring Surface Considerations and Time Efficiency. Below is an emotional snapshot:
| Choice | Cost | Time |
|---|---|---|
| DIY | lower | longer |
| Pro | higher | faster |
| Hybrid | moderate | balanced |
When to Call a Professional Paint Removal Service
Because some paint problems go beyond a weekend project, you should call a professional paint removal service when the dried paint covers large areas, involves multiple layers, contains lead, or sits on delicate surfaces that could be damaged by DIY methods.
You’ll want expert advice about paint removal options and rely on professional services for safe, efficient removal.
- Safety
- Scale
- Complexity
Common Mistakes That Damage Surfaces and How to Avoid Them
If you rush into scraping, sanding, or applying harsh chemicals without the right prep, you can easily gouge wood, etch metal, or strip finish from furniture and trim. You should use surface protection, check paint compatibility, and follow proper cleaning techniques. Balance removal efficiency with solvent safety, avoid excessive heat application, and favor gentle scrubbing methods to prevent damaging chemical reactions.
| Mistake | Fix |
|---|---|
| Using wrong solvent | Test compatibility |
| Overheating surface | Use controlled heat |
| Aggressive scrubbing | Try gentler methods |
Quick Reference: Best Method by Surface and Paint Type
Use the precautions above as your baseline, then pick the method that matches both the surface and paint type to avoid damage and extra work.
Use the precautions above, then choose the removal method that matches your surface and paint to avoid damage.
Match paint removal techniques and paint softening agents to materials:
- Wood: heat gun or biodegradable stripper.
- Metal: solvent-based softeners, then scrape gently.
- Glass/tile: razor blade after softening.
Test small area first and wear PPE.
Frequently Asked Questions
Can Softened Paint Be Safely Recoated Without Full Removal?
Yes — you can often recoat softened paint, but you’ll need to address paint adhesion concerns first. You’ll test, clean, scuff, and use proper recoating techniques to guarantee new layers bond and avoid peeling or failure.
Will Softened Paint Harm Antique Finishes or Patina?
About 70% of restorers report solvent-related surface change; you shouldn’t assume softened paint won’t harm antique finishes or patina. You’ll need conservation-grade paint solvents and antique preservation expertise to avoid irreversible damage.
How Long Do Different Softening Methods Take to Fully Penetrate?
Heat application works within minutes to 30+ minutes depending on thickness; solvent types vary: strong solvents act in minutes, milder ones take hours to days. You’ll monitor penetration and repeat until paint softens fully.
Can Softened Paint Release Harmful Fumes During Removal?
Yes — softened paint can blast fume exposure sky-high, so you’ve got to be cautious. Wear respirators, ventilate thoroughly, and follow safety precautions to limit inhalation and avoid headaches, dizziness, or worse.
Are There Eco-Friendly Disposal Options for Paint-Soaked Wipes?
Yes—you can compost biodegradable materials if wipes and paint alternatives are certified non-toxic; otherwise, bag and take paint-soaked wipes to hazardous-waste collection or use solvent-recovery programs, and look for eco-friendly disposal events near you.
Conclusion
Think of dried paint like a stubborn knot in a beloved sweater: with patience, the right tools and gentle coaxing you’ll ease it free without ruining the fabric. You’ve learned when to soften, when to strip, and when to call in help—so pick the method that respects the surface beneath. Take safety gear as your steady hands; test a small spot first; move slowly. Unravel carefully, and the original surface will breathe again.