
Is Oil Paint Good for Interior Walls? The Pros, Cons, and Real Alternatives
You can use oil paint on interior walls, but you’ll trade faster drying, lower VOCs, and easier cleanup for exceptional durability, gloss, and stain resistance—making it best for trim, doors, and high-traffic areas. Expect long cure times, stronger fumes, solvent cleanup, and tricky touch-ups; ventilation and protective gear are essential. Modern water-based alkyds or high-quality latex give similar looks with fewer health and cleanup downsides. Keep going to see practical tips, alternatives, and a simple application plan.
Quick Answer and Decision Framework: Should You Use Oil Paint Indoors?

Wondering whether oil paint belongs on your interior walls? You should weigh oil paint advantages—durability, smooth finish, stain resistance—against oil paint disadvantages like strong fumes, longer cure time, and tricky cleanup.
If you need high-traffic resilience and can ventilate during application, it’s viable. Choose alternatives if you want faster drying, lower odor, or easier maintenance without specialized solvents.
How Oil Paint Differs From Water-Based Paints?
Although both coat walls, oil and water-based paints behave very differently: oil paints use organic solvents as their carrier and cure by chemical oxidation, producing a hard, enamel-like film.
In contrast, water-based (latex/acrylic) paints use water as the carrier and dry by evaporation, leaving a more flexible polymer film.
You’ll notice oil paint characteristics like durable, glossy finishes and longer drying; water-based advantages include easier cleanup, lower VOCs, and better flexibility.
Oil Paint Pros: Why Homeowners Still Choose It
You’ll notice oil paint often outlasts other options, resisting chips and stains so surfaces stay sound longer.
You’ll also get a richer finish and a smoother sheen that highlights trim and architectural details.
These benefits explain why some homeowners still pick oil despite its longer drying time.
Durability And Longevity
Because oil-based paints cure into a hard, resilient film, they stand up to scuffs, cleaning, and frequent contact far better than many latex alternatives.
You’ll notice superior surface resilience in high-traffic areas, reducing repair needs. That durability lowers maintenance frequency and repainting cycles, saving time and money long-term.
You’ll still weigh longer dry times and ventilation needs against those longevity benefits.
Rich Finish And Sheen
When you want walls that catch the light and feel velvety to the touch, oil paint delivers a depth and richness latex often can’t match.
You’ll notice a rich texture and luxurious appearance that pulls a room together. It’s tactile and reflective, making colors sing.
- Warmth and depth
- Elegant, satin sheen
- Timeless, tactile finish
Main Drawbacks of Oil Paint for Interiors
Although oil paint gives a rich, durable finish, it also brings several drawbacks you should weigh before choosing it for interior walls.
You’ll face longer drying times, stronger odors and VOCs impacting indoor air quality, tougher cleanup with solvents, and yellowing over time in low light.
Those oil paint drawbacks also make touch-ups harder and limit use in poorly ventilated rooms.
Key Aesthetic Benefits: Gloss, Depth, and Leveling
Even with those practical downsides, oil paint can deliver visual qualities you won’t get from many water-based options.
You’ll notice a superior gloss finish and richer color richness that boosts depth perception. Skilled application uses a leveling technique to minimize texture variation and enhance aesthetic appeal, making rooms feel more intentional and luxurious.
A superior gloss and richer tones deepen perception, while expert leveling creates smooth, luxurious, intentional walls
- Lustrous surfaces that captivate
- Subtle dimensional warmth
- Smooth, polished walls
Durability of Oil-Painted Walls
Because oil paint forms a denser, tougher film than most water-based paints, you’ll get walls that resist scuffs, stains, and frequent cleaning better over time.
That durability makes oil paint finishes ideal where wear is high, but you’ll face maintenance challenges like careful touch-ups and yellowing in low light.
Expect long-lasting protection; plan for occasional precise repairs rather than frequent repainting.
Drying Time and Project Scheduling With Oil Paint
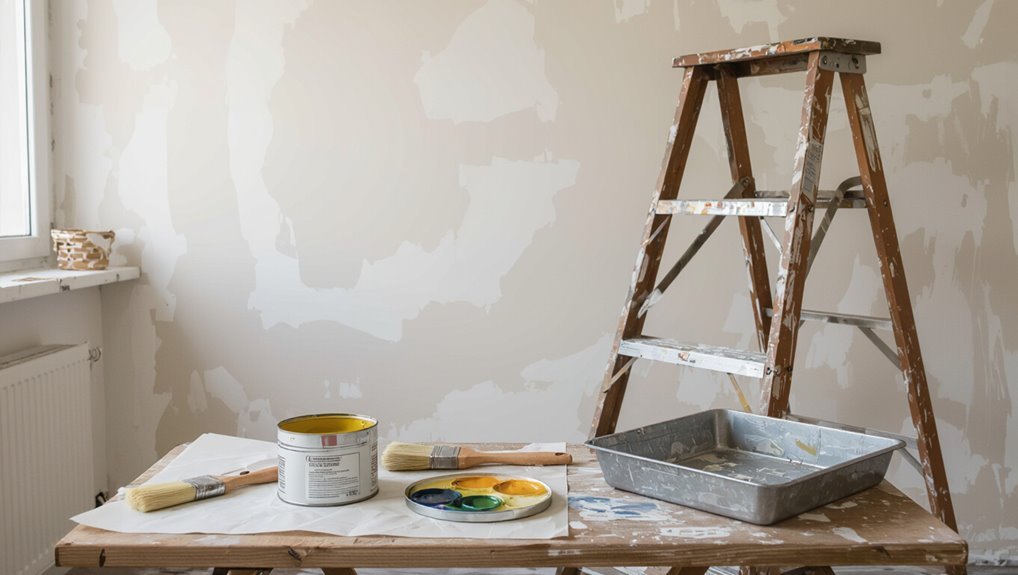
Expect oil paint to take much longer to dry than latex, so you’ll need to plan around extended tack and cure times.
Schedule recoats in stages, waiting the manufacturer’s suggested hours or days between coats to avoid wrinkling or poor adhesion.
Keep the room well ventilated during drying and curing to speed solvent evaporation and reduce odors.
Longer Drying Periods
When you choose oil paint, plan your schedule around considerably longer drying times than with latex—oil can stay tacky for 24–72 hours and take days to recoat or weeks to fully cure depending on temperature, humidity, and layer thickness.
You’ll get a long lasting finish, but expect project delays.
Consider feelings:
- frustrated by waiting
- relieved by durability
- anxious about timing
Staged Recoat Scheduling
If you’re planning a multi-coat job with oil paint, map out each coat’s dry and tack-free windows so you can schedule sanding, touch-ups, and recoat times without stalling the whole project.
Factor in recoat timing per product and ambient conditions, test surface compatibility with a small patch, and plan buffer days for delays.
That keeps workflow efficient and avoids finish issues.
Ventilation And Curing
Scheduling coats is only part of the plan—you also need to control airflow and humidity so each oil layer cures on schedule.
You’ll plan ventilation strategies to shorten curing times, but expect patience: oil can take days.
Balance fans, dehumidifiers, and fresh air without dust.
- Frustration when slow progress
- Relief as layers harden
- Pride at a flawless finish
Surface Preparation for Oil Paint Success
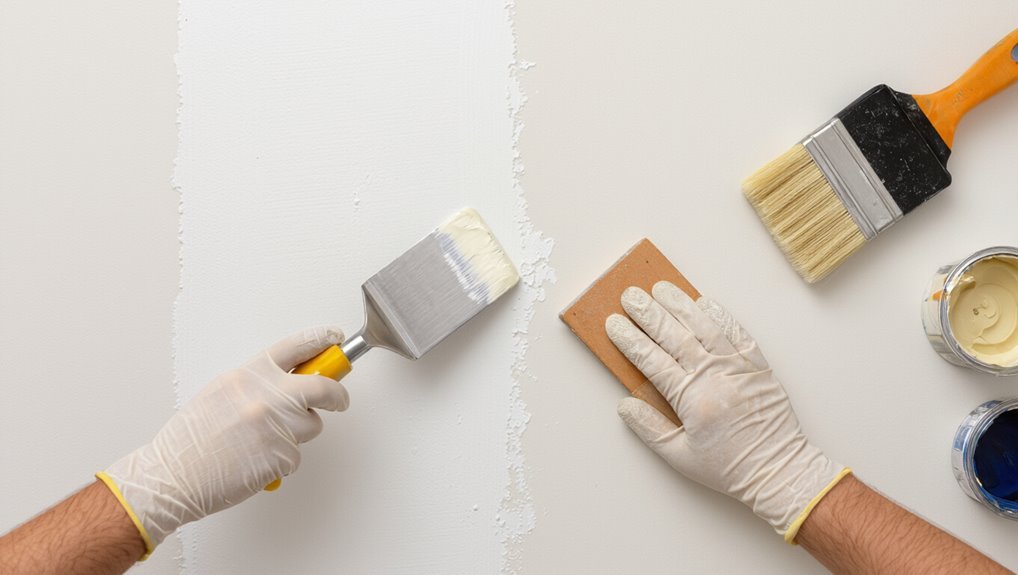
Because oil paint bonds best to a clean, stable surface, you’ll need to remove dirt, grease, and loose material before you start—wipe down walls with a mild degreaser, scrape or sand flaking paint, and repair cracks or holes with a suitable filler.
Then focus on surface cleaning, paint adhesion, primer selection, texture assessment, wall preparation, temperature considerations, moisture levels, tool readiness, surface defects, and color matching.
Choosing Primers and Undercoats for Oil Paint
Picking the right primer makes all the difference when you’re using oil paint indoors. You’ll choose primer types and undercoat options based on surface compatibility; oil-based primers for raw wood, bonding primers for slick surfaces, and stain-blocking undercoats for repairs.
Picking the right primer ensures oil paint adhesion—choose oil, bonding, or stain-blocking undercoats for lasting, flawless indoor finishes
Follow simple application tips to guarantee adhesion and longevity.
- Relief: confidence in durability
- Pride: flawless finish
- Calm: fewer touch-ups
Best Tools: Brushes, Rollers, and Techniques for Oil
You’ll want the right tools to get a smooth, durable oil finish on interior walls.
Use natural-bristle or high-quality synthetic brushes for trim and smooth surfaces, and a short-nap roller designed for oil-based paints on larger areas.
I’ll explain specific brush types, roller choices, and application techniques so you can achieve professional results.
Best Brush Types
When you want smooth, durable coverage with oil paint, choosing the right brushes matters—different shapes and bristle types give you control over stroke texture, cut-in lines, and finish.
You’ll weigh best brush types, brush materials, brush sizes, brush techniques, brush brands, and brush maintenance to get professional results. Choose for edge control, hold, and cleanup.
- Pride in a flawless edge
- Calm from tidy strokes
- Confidence in lasting finish
Roller Choices Overview
Although rollers don’t get the same spotlight as brushes, they’re what speed up large oil-painted surfaces and give you an even laydown; pick the right nap, material, and core stiffness for the surface and solvent-based formula you’re using.
You’ll consider roller materials, roller sizes, and roller textures to match roller application and roller techniques.
Check roller brands, prioritize roller efficiency, and follow roller maintenance.
Application Techniques Explained
After choosing the right rollers, you’ll want to match them with brushes and techniques that let oil paint behave predictably on walls.
You’ll focus on surface preparation, brush techniques, roller application, drying strategies, cleanup methods, project scheduling, and maintenance tips to get smooth, durable results.
- Feel confident as you roll
- Enjoy precise edges with brushes
- Relax during cleanup methods
How Many Coats and Drying Times to Expect
Most interior oil paints need two coats for even coverage and durability, though a single high-quality coat can work on light, well-primed walls.
Choose coat types—primer, first coat, finish coat—and let each dry fully.
Drying conditions matter: temperature, humidity, and ventilation affect tack time and cure.
Expect 8–24 hours between coats, longer in cool or humid spaces.
Repairing and Touching Up Oil-Painted Walls
Start by evaluating the damage so you know whether you’re dealing with a small scuff, a chip, or peeling oil paint.
Choose appropriate touch up techniques: feather edges, use matching oil paint, and sand lightly when needed.
Follow maintenance tips to prevent recurrence.
Embrace the repair—it’s satisfying, restores beauty, and protects your walls.
- Relief
- Pride
- Confidence
Cleanup: Solvents, Tools, and Stain Removal
When you’ve finished repairs, you’ll need the right solvents and tools to clean up safely and remove stains without harming the finish; choose mineral spirits or odorless turpentine for oil paint cleanup.
Keep rags and disposable gloves on hand, and set up proper ventilation. Know solvent types and test discreetly.
Use gentle cleanup techniques: blot stains, avoid scrubbing, and dispose of solvent-soaked rags properly.
Long-Term Maintenance and Cleaning for Oil Finishes
Although oil finishes are durable, they still need periodic care to keep walls looking their best; you’ll prolong the finish by dusting regularly, avoiding harsh cleaners, and addressing spills promptly.
Oil-finished walls endure—dust often, skip harsh cleaners, and wipe spills quickly to preserve their look.
You’ll face long term upkeep and maintenance challenges like staining, glossy wear, and buildup—manage them gently.
- Frustration when marks linger
- Relief after careful cleaning
- Pride in preserved walls
Fumes, VOCs, and Indoor Air Quality Risks From Oil Paint
Be aware that traditional oil paints can release high levels of VOCs during application, which can irritate your eyes, nose, and lungs.
Even after the surface feels dry, these paints can keep off-gassing for months, gradually affecting indoor air quality.
If you’re sensitive or have children, pets, or respiratory conditions, you’ll want to weigh those long-term emissions before choosing oil.
High VOC Emissions
If you’re using traditional oil-based paint indoors, expect strong fumes and elevated VOC levels that can linger long after the job’s done.
You’ll notice high VOCs harming indoor air quality, causing headaches, nausea, and irritation. You should ventilate and consider alternatives.
- It smells overwhelming
- You feel dizzy or sick
- You worry about family health
Long-Term Off-Gassing
When you choose traditional oil paint for indoor walls, the fresh smell isn’t the only problem—it can keep releasing volatile organic compounds (VOCs) and solvents for months or even years, a process called off-gassing. You’ll notice long term off gassing effects that hurt indoor air quality and can trigger headaches, asthma, and fatigue.
| Scent | Fear |
|---|---|
| Lingering | Anxiety |
| Persistent | Regret |
Health Precautions During and After Painting
Although oil-based paints give a durable, smooth finish, they also release strong fumes and volatile organic compounds (VOCs) that you need to manage for your safety.
Although oil-based paints give a smooth, durable finish, they emit strong fumes and VOCs—manage exposure for safety.
You should limit fume exposure, understand health risks, and follow safety measures and painting precautions to protect air quality.
Take these to heart:
- Fear and irritation — don’t ignore symptoms.
- Protect loved ones — act now.
- Rest and ventilate until safe.
Ventilation Strategies to Cut Painting Fumes
Because fumes concentrate quickly indoors, you should plan ventilation before you open a paint can: use window fans and ventilation fans, run exhaust systems, wear a paint mask, and position air purifiers for fume extraction to protect indoor air and bring fresh air in.
| Tool | Purpose |
|---|---|
| Window fans | Bring fresh air |
| Ventilation fans | Move air |
| Exhaust systems | Remove fumes |
| Air purifiers | Filter VOCs |
| Paint mask | Personal protection |
How Oil Paint Performs in High-Humidity Areas
If you’re considering oil paint for rooms with high humidity, know it resists moisture better than many water-based paints but still faces challenges like slow drying and potential yellowing.
Proper surface prep and ventilation are essential to avoid adhesion problems and mildew. You’ll want to manage humidity resistance and watch for mold growth.
- Frustration at slow cures
- Relief from durable finish
- Anxiety about staining
Best Interior Surfaces for Oil-Based Finishes
When you want a hard, durable surface that tolerates frequent cleaning and abrasion, oil-based finishes work best on trim, doors, cabinetry, and furniture; you’ll also find success on properly primed metal and built-up woodwork.
Assess oil finish compatibility with existing coatings and substrates before application.
For reliable oil paint surfaces, sand, clean, and prime glossy or dense materials to guarantee adhesion and longevity.
When Oil Paint Is the Right Choice by Room
In rooms where durability and a smooth, washable finish matter most, oil paint often outperforms waterborne options. You’ll pick it for kitchen cabinets, bathroom trim, baseboards molding, and hallway accents where scuffs happen.
Use it on living room accent walls or ceiling finishes for depth; bedroom walls less so unless you want extra toughness.
Try oil on living room accents or ceilings for rich depth; skip bedrooms unless extra durability is wanted.
- Pride in lasting sheen
- Calm, confident surfaces
- Comfort in easy cleaning
When to Avoid Oil Paint: Sensitive Spaces and Occupants
If you’re painting a nursery, bedroom, or any space used by people with asthma, allergies, or chemical sensitivities, skip oil-based paints because they emit higher VOCs for longer.
You shouldn’t use them in poorly ventilated areas like small bathrooms, basements, or closets where fumes can build up.
Choose low-VOC or water-based options to protect occupants and indoor air quality.
High VOC Emissions
Because oil-based paints release higher levels of volatile organic compounds (VOCs), you should avoid them in spaces with sensitive occupants or prolonged occupancy—like nurseries, bedrooms, elderly care facilities, and poorly ventilated rooms.
Follow VOC Regulations, protect Indoor Air Quality, and consider Health Risks, Long Term Effects, Environmental Impact, Safe Alternatives, Mitigation Strategies, and Painting Precautions.
- You’ll worry about lingering fumes.
- You’ll fear hidden harm.
- You’ll want safer choices.
Occupants With Sensitivities
Lingering fumes and high VOC levels already make oil paint a poor choice for many rooms, but you should be especially cautious when occupants have heightened sensitivities. You’ll want to avoid triggers that cause sensitivity reactions and choose alternative materials like low‑VOC or water‑based paints for nurseries, bedrooms, or allergy sufferers’ spaces.
| Occupant | Risk | Recommended alternative |
|---|---|---|
| Infant | High | Water‑based low‑VOC |
| Asthma | High | Natural paints |
| Elderly | Moderate | Acrylic latex |
| Chem Sensitive | High | Zero‑VOC agents |
Poor Ventilation Areas
When rooms lack fresh airflow, oil‑based paints concentrate VOCs and solvent fumes that can irritate eyes, throats, and lungs.
So you should skip them in basements, small bathrooms, or windowless hallways.
In spaces with poor air circulation or risk of mold growth, choose water‑based or low‑VOC alternatives to protect health and surfaces.
- You’ll feel trapped
- You’ll worry about breathing
- You’ll regret the choice
Common Mistakes First-Timers Make With Oil Paint
If you’re new to oil paint, you’ll likely trip over a few predictable mistakes—skipping proper ventilation, using the wrong brushes or solvents, and underestimating drying times are the usual culprits. You’ll face application challenges and misjudge surface compatibility; clean, primed surfaces and correct tools matter.
| Mistake | Fix |
|---|---|
| Poor ventilation | Ventilate or wear a respirator |
| Wrong brush | Use hog or synthetic bristle |
| Rushing layers | Wait full drying between coats |
| Wrong solvent | Match solvent to paint type |
How to Test Oil Paint in Your Home Before Committing
Before you commit, patch a small, inconspicuous area with the oil paint to see how it looks on your wall.
Watch how long it takes to dry and note any tackiness over a couple of days.
Also test how easily you can clean the surface and whether the gloss level matches your expectations.
Patch A Small Area
Start by patching a small, inconspicuous area—about 4×4 inches—so you can see how the oil paint looks, dries, and adheres without committing to the whole room.
Use proper patching techniques and assess color matching under different light. Note texture, adhesion, and smell.
Then decide.
- Relief: ease seeing results
- Hesitation: fear of mismatch
- Confidence: informed choice
Observe Drying Time
When you test oil paint’s drying time in your home, check several small swatches placed in different spots—sunlit, shaded, and near vents—so you can compare how light, temperature, and airflow affect tackiness and cure speed.
Note drying conditions and record times to touch, harden, and fully cure.
Pay attention to temperature impact; cooler, humid rooms slow curing, warmer, drier ones speed it.
Test Cleaning And Gloss
Wondering how oil paint will hold up to daily life? Test a small patch: try gentle cleaning techniques, then tougher scrubs, and note how gloss levels change.
Feel reassured or wary based on results.
- You’ll panic if it stains easily.
- You’ll relax if it wipes clean.
- You’ll decide based on sheen and durability.
Cost Comparison: Oil Paint vs Acrylics vs Alkyd Hybrids
How much you’ll pay for paint depends less on the “oil” label and more on formulation, quality, and planned use.
Your cost analysis should weigh upfront prices, coverage, and labor—alkyd hybrids often sit between traditional oil and acrylics.
Pricing factors include dry time (affects labor), required primer, and longevity.
Aim for total project cost, not just per-gallon sticker price.
Water-Based Acrylics Explained and When to Use Them
If you want a low-odor, fast-drying option that’s easy to clean up, water-based acrylics are a strong choice.
You’ll get good color retention, flexibility that resists cracking, and simpler maintenance compared with traditional oils.
Choose acrylics for high-traffic rooms, rental properties, or when you need quick recoat times and minimal VOC exposure.
Water-Based Benefits
Because water-based acrylics dry fast and clean up with just soap and water, they’re often the practical choice for interior walls.
You’ll appreciate water based advantages: low odor, quick turnaround, and durable finish. They’re also eco friendly options that reduce VOCs.
Choose them when you want speed, safety, and ease.
- Relief: breathe easier
- Pride: healthier home
- Joy: simple upkeep
When To Choose
When you want fast drying, low odor, and easy cleanup, choose water-based acrylics for most interior walls; they give you a durable, low‑VOC finish that’s ideal for living rooms, bedrooms, hallways, and areas where quick turnaround and indoor air quality matter.
You’ll prefer acrylics over oil paint trends when renovating, staging interiors, or following contemporary interior design that favors sustainability and minimal disruption.
Alkyd (Waterborne) Hybrids: Benefits and Trade-Offs
Though they borrow chemistry from traditional alkyds, waterborne alkyd hybrids let you get many of the performance perks of oil-based paints without the heavy solvents and long cure times.
You’ll appreciate alkyd advantages in hybrid formulations: quicker cleanup, lower VOCs, and durable finishes.
- Relief: no toxic fumes
- Confidence: tough surfaces
- Ease: soap-and-water cleanup
Aesthetic Trade-Offs: Sheen, Color Richness, and Texture
Waterborne alkyds give you the performance of oils without the mess, but they can still behave differently on the eye than traditional oil paint. You’ll notice subtle texture variations, deeper color glow in oils, and different sheen preferences; choose based on room lighting and touch.
| Feature | Effect |
|---|---|
| Sheen | Reflectivity shifts |
| Color depth | Richer in oils |
| Texture | Brush marks show |
| Maintenance | Varies by finish |
VOC Rules and Lower-VOC Oil Paint Options
You should know the VOC regulatory limits in your area because they determine which oil-based formulations are legal for indoor use.
Look for low‑VOC or modified oil options and certified products that meet those standards.
Even with lower‑VOC paints, you’ll want to follow safe application practices like ventilating well and wearing appropriate respiratory protection.
VOC Regulatory Limits
How strict are VOC limits for oil-based paints, and what do they mean for your indoor air?
You’ll face VOC regulations and compliance challenges that protect you from lingering health impacts, but they can complicate choices.
Consider practical alternative solutions and weigh risks before painting.
- Anxiety about fumes
- Relief from safer options
- Frustration with rules
Low‑VOC Oil Options
Looking for oil-based paint that won’t bake your room in fumes? You can choose low VOC options like alkyds reformulated with plant solvents or waterborne oil-modified paints. They meet stricter VOC limits and act as eco friendly alternatives while keeping oil-like durability. Compare labels, dry times, and cleanup needs to pick what fits your space.
| Brand | VOC (g/L) | Type |
|---|---|---|
| Modern Alkyd | 50 | Waterborne |
| Plant Alkyd | 70 | Bio-solvent |
| Hybrid Oil | 45 | Alkyd-mod |
Safe Application Practices
Having chosen a lower‑VOC oil option, you’ll want to apply it in ways that minimize fumes and meet local VOC rules.
Practice safe handling: wear protective gear, guarantee proper ventilation, and do workspace preparation to limit exposure.
Plan spill management and waste disposal to protect health considerations and reduce environmental impact.
- Breathe easier — act responsibly.
- Protect loved ones.
- Preserve your home.
Choosing Oil Paint Brands and Reading Technical Data Sheets
Which oil paint brand should you trust for interior walls depends on durability, VOC levels, and the manufacturer’s recommended application?
You should compare oil paint brands by reading technical data sheets to confirm dry times, surface prep, recommended primers, VOCs, and coverage.
Look for clear warranty, certification (low-VOC), and application notes.
If unclear, contact technical support before buying.
Cost-Benefit Checklist: Oil vs Alternatives
When weighing oil paint against latex or hybrid alternatives, you should balance upfront cost, long-term durability, maintenance needs, and indoor air quality to decide which gives the best value for your space.
Weigh upfront cost, durability, maintenance, and indoor air quality to decide which paint delivers the best long-term value.
Do a clear cost analysis comparing price per coat, expected paint lifespan, VOC impact, and repair frequency.
- Frustration when unexpected repairs hit
- Pride in durable finishes
- Relief from lower VOC choices
Step-by-Step Mini Plan for Painting a Room With Oil Paint
Start by clearing the room and laying down drop cloths, because good prep cuts your work and touch-ups in half.
Sand, clean, and prime surfaces. Test color selection and let swatches dry.
Apply oil primer, then two thin coats of oil paint, sanding lightly between coats.
Choose finish types (eggshell, satin, gloss) based on durability.
Ventilate and cure fully before reinstalling fixtures.
Real-World Case Studies: Historic and Modern Examples
Although oil paint dominated historic interiors for centuries, you’ll find valuable lessons in both preserved restorations and contemporary renovations.
You’ll see how historic renovations preserved sheen and durability, while modern applications adapt oil’s qualities for flair.
Consider these emotional takeaways:
- Pride in meticulous restoration
- Warmth from aged patina
- Surprise at contemporary reinvention
Final Recommendation: Choosing the Best Paint for Your Home
If you want a durable, glossy finish and don’t mind longer dry times and stronger odors, choose oil-based paints for trim, doors, and high-traffic areas;
if you prefer faster drying, easier cleanup, and lower VOCs, pick modern water-based alkyds or high-quality latex for walls and ceilings.
Balance paint finish, durability, and maintenance with thoughtful color selection to suit light, room function, and your lifestyle.
Frequently Asked Questions
Will Oil Paint Yellow Over Time on Light-Colored Interior Walls?
About 60% of older oil-based finishes show noticeable change within a decade; you’ll see yellowing over time on light-colored walls because yellowing factors like oxidation and light exposure darken pigments, so expect gradual warm tinting.
Can Oil-Painted Surfaces Be Sanded and Repainted With Water-Based Paint Later?
Yes — you can sand oil-painted surfaces and repaint with water-based paint later. You’ll use sanding techniques to scuff and remove gloss, clean thoroughly, and follow repainting tips: prime with a bonding primer before applying water-based topcoat.
Do Oil Paints Cause Permanent Stains on Clothing or Upholstery?
Oil paint stains can be permanent; they’re like spilled ink darkening fabric fibers. You’ll want clothing protection and quick action—scrape, blot, use solvent recommended for oil paint—otherwise stains often set and resist removal.
How Long Should Furniture Be Kept Out of a Freshly Oil-Painted Room?
You should wait 48–72 hours before furniture placement, though full oil paint drying time can take weeks; during the first week keep items off walls and allow ventilation to minimize tackiness, fumes, and potential staining.
Are There Special Disposal Rules for Leftover Oil Paint and Solvents?
Yes — 60% of households improperly discard paint, so you shouldn’t. You’ll treat leftover oil paint and solvents as hazardous waste, use local hazardous disposal events or recycling options, and never pour them down drains or into trash.
