
Why Is My Fresh Paint Peeling? The Real Causes and How to Fix Them
You’re seeing fresh paint peel because the new film couldn’t bond to the surface—most often from moisture, poor prep, incompatible old coatings, or wrong application conditions like high humidity or extreme temperatures. Check for leaks, chalky or glossy residue, and use a tape or thumb test to gauge adhesion. Fix by drying, repairing substrates, sanding or scraping loose paint, and priming with the correct product before recoating. Keep going to learn step-by-step fixes and prevention tips.
Quick Answer Why Fresh Paint Is Peeling
The most common causes are poor surface prep, painting over damp or dirty surfaces, and using incompatible paint types.
You should act immediately if you see widespread bubbling, cracking, or paint peeling away in large sheets.
For small, isolated flakes you can monitor and touch up, but address moisture or adhesion problems right away to prevent recurrence.
Direct summary of the most common causes
1 simple checklist explains most cases: paint peels because the surface was dirty or wet, the old finish wasn’t compatible or properly prepped, humidity or water intrusion softened the film, or the new coat dried too quickly or too slowly.
You’ll ask, why is my fresh paint peeling? Check these common causes:
- Poor surface cleaning
- Incompatible old finish
- Moisture or humidity
- Improper drying conditions
When to act immediately vs monitor
After checking for dirt, incompatible finishes, moisture, and drying issues, you’ll want to decide whether to act now or watch the problem for a bit.
Act immediately if peeling spreads, exposes bare substrate, or follows water damage—stop sanding and isolate the area.
Monitor small, isolated bubbles or edge lifts for 1–2 weeks; if they worsen, remove loose paint and repair.
How Paint Fails Basic Understanding
When paint peels, you’re seeing failure at the bond — either adhesion to the surface or cohesion within the film.
You’ll learn how layers, the underlying substrate, and environmental factors interact to cause different failure modes.
That interaction creates distinct types of peeling like blistering, flaking, chipping, and delamination.
What peeling paint actually is (adhesion vs cohesion)
If paint is flaking off a wall, it’s because either the bond between the paint and the surface failed (adhesion) or the paint film itself broke apart (cohesion).
You’ll see adhesion failure as large sheets peeling away from substrate; cohesion failure shows as powdery crumbly paint or blistered chips.
Identifying which lets you choose fixes: surface prep and primers for adhesion, reformulation or sealing for cohesion.
How paint layers, substrates, and environment interact
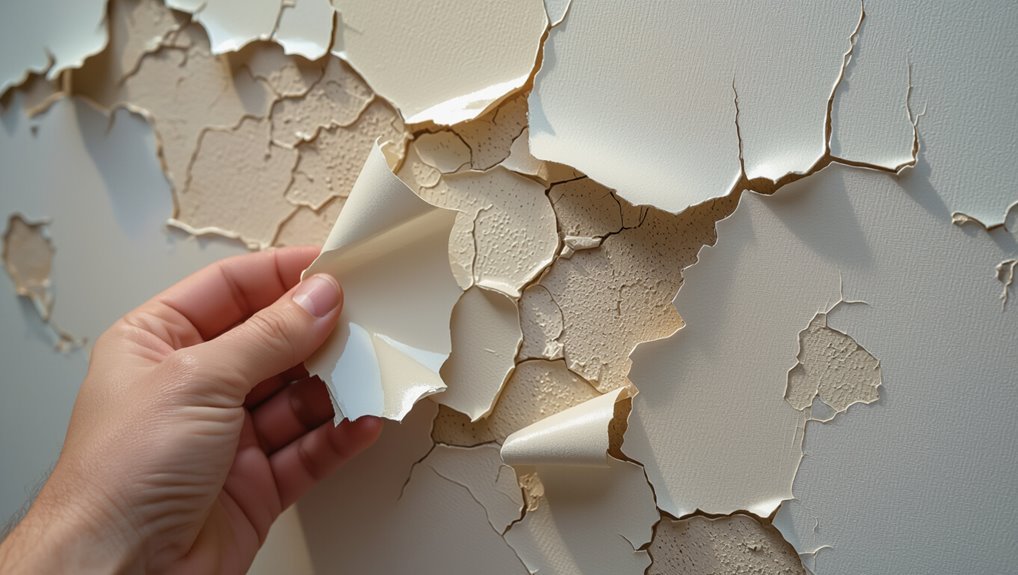
Because paint is a layered system sitting between your substrate and the environment, failures come from interactions among those three parts rather than a single cause.
You’ll see adhesion losses when coatings mismatch surface chemistry, film tension or thickness. Moisture, temperature swings, and contaminants stress bonds.
Poor preparation or incompatible primers amplify problems.
Diagnose by evaluating substrate condition, layer build, and local environmental factors before repair.
Types of peeling (blistering, flaking, chipping, delamination)
You’ve just seen how substrate, coatings, and environment interact, and that interplay shows up in a few distinct peeling patterns you can learn to recognize.
Blistering forms raised bubbles from trapped moisture or solvent.
Flaking peels in thin layers from poor adhesion.
Chipping breaks into small fragments from impact or brittle paint.
Delamination separates full coats from the substrate or between layers.
Primary Causes of Fresh Paint Peeling
You’re probably seeing peeling because the surface wasn’t prepped properly, moisture got behind the paint, or you painted over an incompatible or glossy finish.
You might also be using low-quality or expired paint, the wrong product for the job, or applying it in the wrong temperature, humidity, or thickness so it can’t cure correctly.
We’ll go through each of these causes and how to spot and fix them.
Surface preparation problems
When paint peels soon after application, inadequate surface preparation is often the culprit; failing to clean, sand, or prime properly prevents paint from bonding and makes even high-quality coatings lift or flake.
You should remove dirt, grease, and loose old paint, sand glossy areas for tooth, and apply the correct primer for the substrate.
Skipping steps causes adhesion failure and premature peeling.
Moisture and water-related causes (interior and exterior)
If moisture’s getting into or behind your paint film, it’ll force the coating away from the substrate and cause rapid peeling.
Both interior dampness (like rising damp, plumbing leaks, or condensation) and exterior water intrusion (roof, flashing, or siding breaches) are common offenders.
Find and fix leaks, dry and dehumidify spaces, replace damaged materials, and only repaint once substrates are fully dry to prevent recurrence.
Painting over incompatible or glossy surfaces
Because glossy or chemically incompatible surfaces repel new coatings, paint often fails to bond and starts to peel soon after drying.
If you paint over slick finishes like high-gloss enamel, laminate, or surfaces with silicone, oil residues, or wax, the topcoat won’t adhere.
You should clean, sand, and apply a proper primer or deglosser so the new paint can grip and last.
Poor-quality or expired paint and wrong product choice
Although it might seem like a minor detail, using expired, watered-down, or bargain-brand paint — or simply the wrong product for the surface and conditions — makes peeling far more likely because the coating lacks the proper binders, pigments, or formulation to form a durable film.
You should choose quality, match paint type to substrate, check expiration, and avoid thinning unless manufacturer permits to guarantee adhesion and longevity.
Improper application (temperature, humidity, thickness, drying time)
Choosing the right paint won’t save a job if you apply it under the wrong conditions. You’ll cause peeling by painting in extreme temperatures or high humidity, laying on coats too thick, or not allowing proper drying between layers.
Follow manufacturer temperature/humidity guidelines, apply thin even coats, and wait recommended cure times so new paint bonds and resists lifting or blistering.
Structural issues (rot, rust, trapped contaminants)
When underlying materials are compromised—rot in wood, rust on metal, or grime trapped beneath a coat—paint won’t form a lasting bond and will peel away quickly.
You need to remove damaged material, treat rust with a converter or replace corroded metal, and clean contaminants thoroughly.
Repair or replace rotten wood, verify surfaces are dry and sound, then repaint for lasting adhesion.
Primer failures or omission
Fixing rot or rust won’t help if you skip the primer or use the wrong one — primer creates the bridge between the surface and paint, and without it paint can’t grip properly.
If you omit primer or apply an incompatible type, paint will peel, blister, or flake.
Always choose a primer matched to substrate and paint, apply recommended coats, and allow proper dry time for adhesion.
Underlying substrate movement or flexing
If the surface beneath your paint moves or flexes, the finish can’t hold and you’ll see cracks, chips, or full peeling where stress concentrates.
Carpentry shifts, settling foundations, warped siding, or untreated joints all flex under load or temperature.
You should fix structural movement, add flexible primers or elastomeric coatings, caulk gaps, and use compatible, flexible paints to prevent future separation.
Diagnosing the Cause Step-by-Step Inspection
Start by following a simple step-by-step inspection to pinpoint why your fresh paint is peeling.
Check visually for cracks and blistering, then do thumb, tape, or knife adhesion tests, and use a moisture meter or tape test if needed.
Also identify the substrate and previous coatings and review when and under what weather conditions the paint was applied.
Step 1: Visual inspection checklist
Why does fresh paint peel so soon after application?
Look closely before testing adhesion. Check for surface problems, moisture, and prep errors to narrow causes quickly.
- Cracks, blisters, or bubbling patterns
- Nearby water stains or efflorescence
- Dirty, chalky, or glossy underlying surface
- Incompatible existing coatings or bare patches
Note observations clearly for the next diagnostic step.
Step 2: Touch and adhesion tests (thumb, tape, knife)
Because peeling often reveals itself under light pressure, you’ll want to perform simple touch and adhesion checks—thumb rubs, tape pulls, and a knife scrape—to pinpoint how well the paint is sticking.
Press with your thumb across edges, pull a strong tape at 90°, and gently scrape with a utility knife. Note dusty residue, flaking, or full lifts to identify adhesion failure.
Step 3: Moisture testing methods (meter, tape test)
If your thumb, tape, and knife checks showed flaking or suspicious residue, the next step is to check for moisture—wet or damp substrates will make paint peel no matter how well you prep.
Use a moisture meter across the area; readings above manufacturer limits indicate a problem.
For quick checks, apply clear tape to small spots overnight—condensation or wetness under tape confirms moisture intrusion needing repair before repainting.
Step 4: Identifying substrate type and prior coatings
When you’ve ruled out moisture, turn your attention to what’s under the paint: the substrate and any previous coatings, because different materials and old finishes demand different fixes.
Check whether the surface is bare wood, plaster, drywall, metal, or previously glossy enamel.
Scrape small areas, test adhesion, and note oil- versus water-based primers—each requires specific preparation and compatible topcoats.
Step 5: Environmental and timing review (when painted, weather)
As you inspect the peeling paint, note exactly when the job was done and what the weather was like before, during, and after application; temperature, humidity, wind, and direct sun all affect drying and adhesion.
Check for rainy forecasts, rapid temperature swings, high humidity, or strong winds at application time. These conditions can cause blistering, poor curing, or weak bonds—document timing to pinpoint causes.
How to Fix Peeling Paint Step-by-Step Repair Guide
Before you start, make sure you’ve got ventilation, gloves, and a way to contain dust or paint chips.
You’ll then remove loose paint by scraping or sanding (or using a chemical stripper if needed), fix any moisture, rot, or rust issues, and wash the surface with a suitable cleaner.
Finally, patch cracks and holes with filler or caulk and replace damaged wood so the new paint will adhere properly.
Step 1: Safety and prep (ventilation, PPE, containment)
Because you’re going to be removing loose paint and possibly sanding, put safety and prep first: open windows and use a fan for ventilation, wear appropriate PPE (respirator or mask rated for paint particles and fumes, safety goggles, gloves), and contain the work area with drop cloths and plastic sheeting to protect floors, furniture, and vents.
Check smoke alarms, clear pathways, and keep a fire extinguisher nearby.
Step 2: Remove loose paint properly (scraping, sanding, chemical strippers)
Begin by removing all loose and flaking paint so new coatings can bond to a sound surface. Use a sturdy scraper or putty knife for large chips, then sand edges smooth with medium-grit paper.
For stubborn layers, apply a chemical stripper per label instructions and neutralize residue.
Vacuum and wipe with a tack cloth before priming to guarantee a clean, stable substrate.
Step 3: Address underlying issues (moisture control, rot repair, rust treatment)
If you want your new paint to last, fix the problems that made the old coating fail in the first place: stop moisture sources, repair rot, and treat corrosion so surfaces are sound and dry.
Locate leaks, improve drainage and ventilation, replace rotten wood or epoxy-fill and prime exposed areas, and remove rust then apply rust converter and metal primer before repainting to prevent recurrence.
Step 4: Surface cleaning and decontamination (washing, detergent, TSP alternatives)
Once you’ve fixed structural problems, clean and decontaminate the surface so new paint can bond properly; dirt, grease, mildew, and soluble salts will keep coatings from adhering.
Scrub with a mild detergent or a TSP substitute, rinse thoroughly, and let dry.
For mildew use a diluted bleach or commercial mildew remover.
Wipe oily spots with mineral spirits before painting.
Step 5: Repair and patching (fillers, caulk, wood replacement)
After cleaning, you’ll repair damaged areas so the new paint has a smooth, sound surface to stick to: scrape loose paint back to firm edges, fill gouges and nail holes with a quality exterior filler, and caulk gaps where trim meets siding or around windows.
Replace rotten wood sections, sand filled spots flush, and guarantee surfaces are dry and stable before moving on to the next step.
Step 6: Proper priming (primer selection for substrate and problem)
Because primer bonds your repairs to the new paint, choosing the right one is critical: pick a primer formulated for the substrate (wood, metal, masonry, or previously painted surfaces) and for the problem you faced (stain-blocking for tannin bleed, oil-based or metal primers for rust, or shellac/epoxy for severe adhesion issues).
Apply thin, even coats, let the primer cure fully, then sand lightly before topcoating to guarantee adhesion.
Step 7: Repainting best practices (temperature/humidity, application method, coats)
If you want your repairs to hold, paint under the right conditions and use the right technique: work between 50–85°F and below 60% humidity, follow manufacturer dry-time guidance, and apply thin, even coats.
Use proper tools—brush for edges, roller for flats, or a sprayer for large areas.
Sand lightly between coats and don’t overload the surface; build two to three consistent coats.
Step 8: Curing time and final inspection
Once the last coat goes on, let the paint cure fully before you call the job done: curing (not just drying) gives the film its full hardness and adhesion, so follow the manufacturer’s recommended cure time—often 7–30 days depending on product and conditions.
Keep the area dust-free, avoid heavy contact, and check periodically for soft spots, tackiness, or new lifting.
After curing, inspect seams, edges, and high-wear areas; touch up or reseal as needed.
Prevention Best Practices to Avoid Future Peeling
To stop peeling before it starts, you’ll want a clear surface-prep checklist and the right combo of primer, paint, and finish for your substrate.
Pick the right timing and control temperature/humidity during application, then keep up regular inspections and maintenance.
If the job’s large or problems keep coming back, call a professional.
Surface prep checklist before painting
A reliable surface prep checklist will save you time and prevent paint from peeling later, so start by evaluating and repairing the substrate—clean off dirt and chalk, remove loose or flaking paint, sand glossy surfaces, fill cracks and nail holes, and make sure the area is dry and sound before priming.
Follow these steps to guarantee adhesion and longevity:
- Remove contaminants and loose paint
- Sand and feather edges
- Patch and seal gaps
- Clean and dry thoroughly
Choosing the right paint, primer, and finish
When you pick the right combination of primer, paint, and finish, you’ll prevent many common causes of peeling before they start; choose a primer matched to substrate (wood, drywall, metal), pick paint formulated for the surface and exposure (interior vs. exterior), and select a durable finish (satin or semi-gloss for high-traffic areas).
Follow manufacturer compatibility guidelines to guarantee adhesion and longevity.
Timing and environmental controls (ideal conditions)
If you want your paint to stick and last, apply it only under the right conditions: moderate temperatures (typically 50–85°F or 10–29°C), low humidity, and calm air so solvents can evaporate evenly and the film can cure.
Time coats for warm, dry hours; avoid rain, dew, or strong sun that bakes skin before curing. Use heaters or dehumidifiers indoors if needed.
Regular maintenance and inspections
Because paint failures often start small, you should inspect surfaces regularly and address issues before they spread.
Check for blistering, cracking, flaking, or moisture stains monthly, paying attention to trim, joints, and high-traffic areas.
Clean surfaces, touch up chips, and recaulk gaps promptly.
Keep gutters, downspouts, and ventilation functioning to reduce moisture and prolong coating life.
When to call a professional
Although many touch-ups you can handle yourself, call a professional as soon as peeling points to underlying problems you can’t easily fix—large-area delamination, persistent moisture, rotten substrate, or repeated failures after repainting.
A pro will diagnose causes, recommend repairs like substrate replacement or moisture mitigation, and guarantee proper surface prep and coatings.
Don’t wait; early intervention saves time and expense.
Common Mistakes That Cause Peeling
You’ll often find peeling starts with basic mistakes that compromise adhesion and drying.
Painting over damp or dirty surfaces, skipping or misusing primer, applying coats that are too thick or too thin, working in bad weather, or mixing incompatible paint types all set you up for failure.
I’ll walk through each of these common errors and how to avoid them.
Painting over damp or unclean surfaces
If you slap paint onto damp or dirty surfaces, it won’t stick and will start to peel as the moisture pushes the finish away.
You should always dry and clean surfaces before painting: remove mildew, dust, grease, and efflorescence.
Use a moisture meter on suspect walls, wash with appropriate cleaners, and let them fully dry.
Proper prep prevents adhesion failure and saves rework.
Skipping primer or using the wrong primer
When you skip primer or grab the wrong one, the paint has nothing reliable to bond to and will often lift or flake soon after drying.
Primer seals porous surfaces, evens out absorbency, and promotes adhesion.
Use a stain-blocking primer for stains, a high-adhesion primer for slick surfaces, and a compatible primer for oil- or water-based topcoats to prevent peeling.
Applying paint too thick or too thin
Primer choice matters, but application thickness is just as important—laying paint on too thick or too thin both invite peeling.
If you apply paint too thick, it skins over while underneath stays wet, causing cracks and eventual detachment.
Too thin, and coverage fails, requiring extra coats that don’t bond properly.
Aim for manufacturer-recommended film thickness and use proper tools for even layers.
Painting in unsuitable weather conditions
Because paint cures through evaporation and chemical reactions, you can’t ignore weather—painting in extreme heat, cold, high humidity, or direct sun will prevent proper adhesion and lead to peeling.
You should check temperature and humidity ranges on labels, postpone jobs outside those limits, and avoid painting late afternoon when surface temperatures drop or rise rapidly.
Proper conditions guarantee a durable bond.
Using incompatible paint types (oil over latex, etc.)
If you slap oil-based paint over a cured latex coat (or vice versa) without proper prep, the layers won’t bond and you’ll see peeling sooner than later.
Always test adhesion first, sand gloss, and use a compatible primer or bonding agent.
Match paint bases when possible; if switching types, fully strip or prime to guarantee a stable, long-lasting finish that won’t flake.
Comparison: Repair Options and Costs
You can tackle peeling paint yourself or hire a pro, and each choice affects cost, time, and final quality.
Consider material expenses, labor rates, and whether hidden issues like rot or moisture need repair before repainting.
Also weigh how long each option will last and whether a warranty covers the work.
DIY repair vs professional service
When weighing peeling paint repair, you’ll want to compare what you can realistically do yourself against the time, cost, and guarantees a pro brings. You can tackle small spots with sanding, primer, and paint; hire a pro for large areas or warranty-backed work.
| Option | Best for | Outcome |
|---|---|---|
| DIY | Small areas | Quick, low cost |
| Pro | Large/complex | Durable, guaranteed |
Cost factors to consider (materials, labor, underlying repairs)
Because peeling paint often signals hidden issues, estimate more than just paint and brushes—you’ll need to account for materials, labor, and any underlying repairs.
Factor primer, specialty coatings, and replacement trim or drywall. Labor varies by skill and region; pros cost more but may prevent repeat work.
Budget for moisture mitigation, rust treatment, and surface prep to avoid surprise expenses later.
Longevity and warranty expectations for different approaches
Although the fix might look simple, the lifespan and warranty you can expect depend heavily on the route you take—cosmetic touch-ups, full stripping and repainting, or addressing underlying damage first.
If you do spot repairs, expect shorter life and limited or no warranty.
Full prep and repainting gives years of protection and typical labor warranties.
Fixing root causes yields the longest coverage and reliability.
Tools and Materials Checklist
To fix peeling paint you’ll need the right tools and materials—scrapers, sandpaper, a moisture meter, brushes/rollers, and safety gear—so you can accurately diagnose and repair the problem.
Pick primers, paints, and sealants that match your substrate (drywall, wood, metal, or masonry) and the cause of failure.
I’ll list recommended products and where to use them next.
Essential tools for diagnosis and repair
Before you plunge in, gather the right tools so you can diagnose peeling accurately and make clean, lasting repairs. You’ll need basic inspection, surface prep, and repair gear to assess adhesion, remove failed paint, and restore substrates properly.
- Utility knife and paint scraper
- Sandpaper (various grits) and sanding block
- Moisture meter and putty knife
- Drop cloths, tape, and safety gear
Recommended products (primers, paints, sealants) by substrate
Now that you’ve got the inspection and prep tools lined up, pick products that match the substrate so repairs actually stick and last.
For wood use oil-based or high-quality acrylic primer, exterior latex paint, and silicone or polyurethane sealant.
For masonry choose masonry primer, elastomeric paint, and cement-compatible sealant.
For metal use rust-inhibiting primer, enamel paint, and silicone sealant formulated for metal.
Case Examples Common Scenarios and Solutions
If your siding is peeling after a storm, you’ll want to check for water intrusion and faulty caulking before repainting.
In bathrooms, you’ll learn how persistent moisture and inadequate exhaust cause ceiling paint to fail and what ventilation and paint choices will stop it.
For new drywall, you’ll see how improper prep or skipped primer leads to peeling and how the right primer and sanding fix it.
Exterior siding peeling after rain diagnosis and fix
When your exterior siding peels after rain, you’ll want to quickly identify whether the cause is moisture intrusion, poor surface prep, or a finish failure so you can choose the right repair.
Inspect flashings, caulking, and siding joints for leaks, check adhesion and primer coverage, and confirm wood dryness.
Repair leaks, replace damaged boards, sand, prime with a breathable primer, and repaint with exterior-grade paint.
Bathroom ceiling paint peeling moisture-driven solution
Exterior siding issues often trace back to moisture the same way bathroom ceilings do. However, the bathroom brings its own patterns of steam, poor ventilation, and temperature swings that make ceiling paint peel.
You should improve ventilation, install or repair exhaust fans, and fix leaks. After drying, sand and prime with a mold-resistant primer, then repaint with a quality bathroom-rated paint to prevent recurrence.
Peeling on new drywall after renovation prep and primer fix
Because new drywall can seem flawless until paint starts lifting, knowing the common causes and fixes helps you stop peeling before it spreads.
Often it’s dust, improper joint compound sanding, or skipped primer.
Remove loose paint, sand to feather edges, clean surfaces, apply a quality drywall primer (stain-blocking if needed), then repaint with compatible paint.
Address humidity and allow proper cure times.
Frequently Asked Questions (FAQ)
You probably have a few quick questions like whether you can paint over peeling paint or how long to wait before repainting a repaired spot.
You might wonder if a dehumidifier will stop indoor peeling, whether peeling is normal on new homes, or if it signals structural damage.
Let’s answer these common concerns so you know what to do next.
Can I paint over peeling paint without removing it?
If the paint is flaking or bubbling, don’t just slap new paint on top—you’ll trap moisture and the new coat will fail fast; you need to remove loose material, prep the surface, and address the underlying cause before repainting.
You can spot-prime and feather edges after scraping, sand smooth, clean, and prime.
Never paint over active peeling—repair fully for durability and adhesion.
How long should I wait before repainting a repaired area?
When repairs are fully dry and cured, you can repaint; wait times typically range from a few hours to several days depending on the materials used and conditions.
Check filler, primer, and substrate instructions for specific cure times. Touch lightly to confirm dryness, verify the surface is clean and dust-free, then apply paint in recommended temperature and humidity ranges to guarantee proper adhesion and finish.
Will a dehumidifier stop paint from peeling indoors?
Because high indoor humidity weakens paint adhesion and encourages blistering and mildew, a dehumidifier can often stop or prevent peeling by keeping moisture levels in the recommended range (30–50%).
Use a properly sized unit, run it during damp periods, and monitor with a hygrometer.
Combine dehumidification with improved ventilation and fixing leaks to address root causes and guarantee durable paint.
Is peeling normal on newly built homes?
Should peeling show up on a brand-new house, don’t assume it’s normal—new builds can experience paint issues, but they usually point to specific causes like improper surface prep, high moisture in framing or plaster, or low-quality paint and application.
Check warranties, inspect for visible moisture or poor adhesion, and ask your builder or painter to document causes and remedies so the issue gets corrected promptly.
How do I know if the peeling indicates structural damage?
If your builder or painter blames surface prep but you still worry about underlying problems, look for specific signs that peeling points to structural damage.
Check for cracks that run through multiple layers, bulging or soft spots in walls, doors or windows sticking, uneven floors, or moisture stains that recur after repairs.
If several appear, get a structural inspection promptly.
