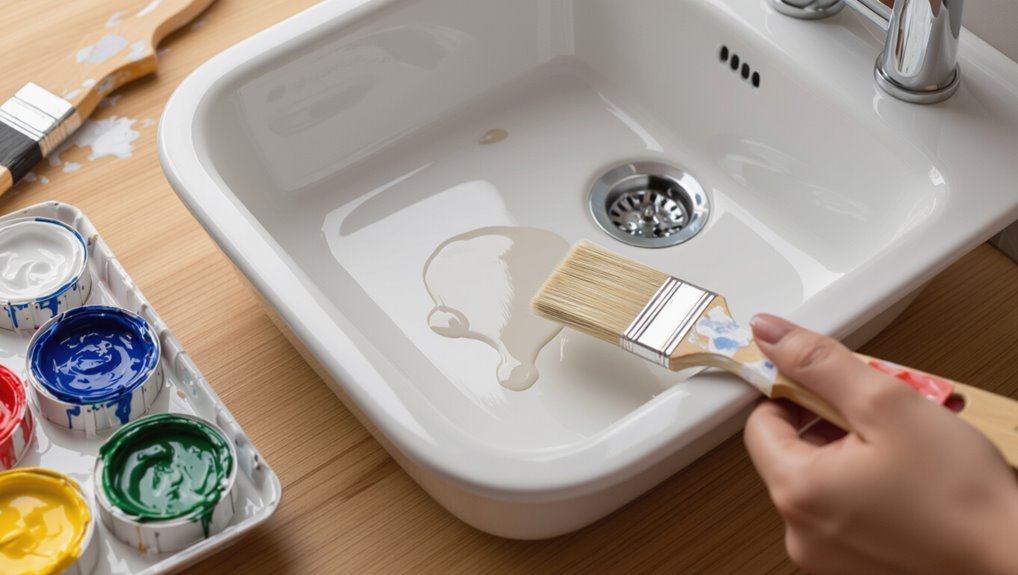
How to Remove Wall Paint From Hands Quickly
If you just got wall paint on your hands, rinse under warm running water and rub gently with soap or a soft cloth to remove fresh water‑based paint. For stubborn or oil‑based spots, try a little vegetable oil, then wipe with rubbing alcohol or acetone on a cotton ball—test a small patch first. Use a soft brush for creases, rinse, and moisturize. Follow safety tips for solvents and keep going for more detailed cleanup and care.
Quick Checklist: What to Do in the First 5 Minutes
Act fast: within the first five minutes rinse any wet paint off under warm running water while rubbing gently with your fingers or a soft cloth.
Act fast—within five minutes rinse wet paint under warm running water, gently rubbing with fingers or a soft cloth.
Check paint type, remove jewelry, and blot—don’t spread.
Use mild soap, avoid harsh solvents, and pat dry.
Prioritize skin protection: wear gloves next time and note effective paint removal techniques for future quick response and safety.
Best Immediate Method to Remove Paint From Hands
Act quickly and gently to blot or scrape off excess paint without rubbing it deeper into your skin.
Use household solvents like rubbing alcohol, hand sanitizer, or a small amount of mineral spirits on a cloth for stubborn spots, testing first on a small area.
Rinse well and moisturize afterward to restore skin oils and prevent dryness.
Act Quickly And Gently
Move fast but stay gentle—getting to the paint right after it lands on your skin makes removal much easier and reduces staining.
Use a quick reaction and a gentle technique: blot excess, rinse with warm water, lather mild soap, and pat dry.
- Blot immediately
- Rinse under warm water
- Lather soap and rub gently
- Pat dry and moisturize
Use Household Solvents
If soap and water don’t cut it, reach for common household solvents—like rubbing alcohol, acetone (nail polish remover), or mineral spirits—to break down paint quickly.
Apply them sparingly to a cotton ball or cloth, rub gently, then wash your hands with soap and warm water and moisturize.
Know household items and solvent types: test a small skin area, ventilate the room, avoid synthetic gloves, and don’t scrub hard.
Moisturize After Cleaning
Once you’ve removed the paint, moisturize your hands right away to restore oils and soften any residue that stubbornly clings to skin.
Pat dry, then apply a generous moisturizing lotion to aid skin repair and prevent cracking.
Follow these steps:
- Warm water rinse
- Gentle soap cleanse
- Pat dry, then lotion
- Repeat overnight if needed
How to Tell Water-Based vs Oil-Based Paint
To choose the right remover, you’ll first want to check whether the paint is water-based or oil-based.
Water-based paint usually feels milky when wet, dries quickly to a flexible film, and washes off with soap and water.
Oil-based paint is tackier, takes longer to dry, and needs a solvent like mineral spirits or paint thinner to break it down.
Water-Based Paint Signs
You’ll usually spot water-based paint by its quick drying time, milky or satin finish, and low odor compared with oil-based varieties.
You can identify water based paint properties and choose proper paint removal techniques — avoid solvents meant for oils.
Quick checks:
- Dries to touch fast
- Mild, non-oily smell
- Cleans with soap and water
- Flexible, non-cracking film
Oil-Based Paint Clues
Although oil-based paints take longer to dry, their telltale clues are clear: they’ve a stronger, solvent-like odor, leave a harder, glossy or enamel-like finish, resist water and soap cleanup, and may yellow slightly over time—so try a small solvent test (mineral spirits) on a hidden spot to confirm.
You should note oil based paint characteristics and follow oil based paint safety: ventilate, wear gloves, and use proper solvents.
Why Paint Type Changes Your Cleanup Steps
Since different paints cure and dissolve in different ways, how you clean them off your hands depends on the type you’re dealing with.
You’ll base cleanup on paint properties and choose cleanup strategies accordingly.
Consider these differences:
- Water-based: soap and water works.
- Oil-based: solvent needed.
- Latex: gentle scrubbing effective.
- Enamel: stronger solvents and patience.
Safety Checks Before Removing Paint From Hands
Before you start scrubbing, check your skin for cuts, rashes, or irritation so you know if you need gentler methods or medical advice.
Consider what type of paint you’re dealing with and whether solvents could aggravate your skin or cause allergic reactions.
Also make sure you’re in a well-ventilated area or have a fan running to avoid inhaling fumes.
Skin Sensitivity Check
How does your skin usually react to new products or solvents? You should test a small patch, watch for skin irritation, and stop at any allergy response signs.
Use gentle cleansers and avoid harsh scrubbing.
- Pick inner wrist or elbow
- Apply tiny amount
- Wait 24 hours
- Note redness, itching, swelling
Ventilation And Fume Awareness
Even in small spaces, fumes from solvent-based paints and removers can build up quickly, so make certain you’re working where air can move freely.
For fume safety, follow ventilation tips: open windows, use fans for air circulation, and position exhaust toward outdoors.
Prioritize protective equipment, odor control, and workspace preparation to minimize inhalation risks and chemical exposure and guarantee breathing safety via proper workspace ventilation.
When to Act Now and When to Wait for Paint to Dry
If the paint on your hands is still wet, act quickly to remove it with water and soap or a gentle solvent; if it’s already dried, you’ll need a different approach like scraping, exfoliating, or using an oil-based remover.
If paint is wet, wash promptly with soap and water; if dry, use scraping, exfoliation, or oil-based removal.
Consider time management and paint properties to decide.
- Wet: wash immediately
- Partly set: oil soak
- Fully dry: gentle scraping
- Test patch first
Tools and Household Items You’ll Need
Before you start, gather a few essential tools like disposable gloves, a soft brush or old toothbrush, and clean rags or paper towels.
You’ll also want common household cleaners—dish soap, rubbing alcohol, and baby oil—to tackle different paint types. Having these on hand makes removal faster and protects your skin.
Essential Tools To Gather
Gather a few basic items before you start: disposable gloves, paper towels or clean rags, a mild hand soap, an oil-based solvent (like baby oil, olive oil, or commercial remover for oil-based paints), rubbing alcohol or acetone for tougher spots, a soft-bristled brush or old toothbrush, and a nail brush for cuticle areas.
You’ll use these for paint removal techniques and skin care tips.
- Gloves
- Oils
- Solvents
- Brushes
Common Household Cleaners
Since most paint splatters are water- or oil-based, you’ll want a few common household cleaners on hand: dish soap, laundry detergent, white vinegar, baking soda, and rubbing alcohol (or acetone for stubborn oil-based spots).
Use dish soap or detergent for water-based paint types.
Vinegar or baking soda can be used for gentle removal, and alcohol or acetone is effective for tougher oil-based stains.
Test skin sensitivity first.
Washing Fresh Water-Based Paint With Soap and Warm Water
Start by rinsing your hands under warm running water to loosen the fresh water-based paint.
Then lather thoroughly with a mild liquid soap or dish detergent and rub for at least 20–30 seconds, paying attention to nails and skin creases.
Use appropriate water temperature and choose among soap types for best results.
- Warm water
- Mild liquid soap
- Thorough scrubbing
- Repeat if needed
Dish Soap and Olive Oil Trick for Sticky Paint
When soap and water won’t budge sticky water-based paint, try rubbing a little dish soap mixed with olive oil into your skin to break down the residue; the soap cuts grease while the oil softens dried paint and protects your skin.
Massage gently, let sit a minute, then wipe with a cloth and rinse. This practical cleaning techniques tip respects common paint properties.
Can Hand Sanitizer Remove Latex Paint?
You’ll want to know how hand sanitizer works before trying it on paint, since its alcohol content breaks down fresh latex but won’t dissolve cured film.
It can remove some wet or tacky latex spots, but it’s less effective on dried paint and may take scrubbing or repeat applications.
Use it sparingly, avoid open cuts, and rinse and moisturize afterward because frequent use can irritate skin.
How Hand Sanitizer Works
Grab a squirt of hand sanitizer and you might wonder if it’ll dissolve latex paint on your skin.
You’ll learn hand sanitizer effectiveness relates to alcohol concentration and solvent action breaking oils. It loosens grime, not cured paint. Use it for fresh smears; rinse and repeat.
- Evaporation speed
- Solvent power
- Skin safety
- Rinse requirement
Effectiveness On Latex
If hand sanitizer can loosen fresh smears, you might expect it to work on latex paint too, but its effectiveness is limited. You can try it on wet spots; results vary by paint types and drying time. Use gentle paint removers if needed, follow cleanup tips, protect skin care, and watch for skin irritation. Household solutions sometimes help.
| Method | Note |
|---|---|
| Hand sanitizer | Best on fresh |
| Soap & water | First step |
| Paint removers | For stubborn |
| Oil-based household solutions | Test small area |
Safe Use And Limits
Although hand sanitizer can break down fresh latex paint in some cases, it isn’t a reliable fix for dried or stubborn spots.
You should prioritize safe materials and skin protection, test a small area, and wash afterward. Use alternatives if needed and avoid over-scrubbing.
- Try sanitizer on fresh drips
- Prefer gentle solvents
- Wear gloves
- Rinse and moisturize
Lifting Dried Water-Based Paint With Baby or Mineral Oil
Gently rub baby or mineral oil into the dried water-based paint on your skin, letting the oil loosen the film for a few minutes before wiping it away with a cloth. The oil breaks the paint’s bond without harsh solvents, making it a safe, effective option for most people.
Use gentle massage, follow product safety labels, test on a small area, and practice skin protection and paint prevention as cleanup techniques and paint alternatives.
Remove Stubborn Spots With Rubbing Alcohol Safely
If oil didn’t lift every speck, you can use rubbing alcohol for stubborn spots, but test it on a small area first to make sure it won’t irritate your skin.
Apply the alcohol with a cotton ball and rub gently until the paint loosens.
After cleaning, wash well and moisturize to restore skin’s oils and prevent dryness.
Test On Small Area
Before you use rubbing alcohol on a larger patch of skin, test it on a small, inconspicuous area first to make sure your skin won’t react.
You’ll check sensitivity before applying common paint removal techniques and follow basic skin care tips.
Do this simple spot test:
- Clean area
- Apply small drop
- Wait 10 minutes
- Monitor for redness or stinging
Moisturize After Cleaning
Pat a small amount of fragrance-free moisturizer or aloe vera gel onto the cleaned area to restore moisture and soothe any irritation from rubbing alcohol; this helps prevent dryness and cracking while the skin heals.
Afterward, choose appropriate moisturizer types—cream for dry skin, lotion for normal, or ointment for very cracked areas—and massage gently to support skin repair and barrier recovery.
When to Use Acetone or Nail-Polish Remover on Skin
While acetone or nail-polish remover can quickly dissolve many types of paint, you should use them on skin only for small, stubborn spots and not on large areas or broken skin.
You’ll rinse immediately, test a small patch, and prefer acetone alternatives if you’ve sensitive skin or worry about skin irritation.
- Spot test
- Short contact
- Moisturize after
- Stop if burning
Using Paint Thinner or Mineral Spirits for Oil-Based Paint
If acetone didn’t budge oil-based paint or you have larger smears, reach for paint thinner or mineral spirits—they dissolve oil paints more effectively than nail-polish remover.
Work outdoors or in a ventilated area, wear gloves, and use a small amount on a cloth. Rinse and moisturize afterward.
Read labels for paint thinner safety, and consider mineral spirits alternatives if you need less harsh solvents.
Safer Citrus-Based Solvents: How to Apply Them
1 quick tip before you start: choose a citrus-based solvent labeled for skin or household use, not raw essential oil or pure d-limonene, and work in a well-ventilated area.
You’ll appreciate citrus advantages for milder solvent application. Rub a small amount, wait 30–60 seconds, then wipe. Repeat if needed and rinse with soap.
- Test patch
- Apply sparingly
- Wipe with cloth
- Rinse thoroughly
Using a Pumice or Gentle Scrub for Ingrained Paint
Because ingrained paint can resist solvents alone, reach for a pumice or gentle scrub to mechanically lift stubborn residue without overworking your skin.
Wet hands, apply mild soap and a small pumice stone or paste, and use gentle scrubbing in circular motions.
Rinse often, check progress, and stop if irritation appears.
Moisturize afterward to restore skin barrier.
Use a Soft Toothbrush for Creases and Nail Edges
When you need to reach creases and under nail edges, use a soft toothbrush and gentle bristle technique to loosen paint without irritating skin.
Work the brush along the cuticle lines and under nails, rinsing frequently to wash away loosened flakes.
Repeat the process as needed until the paint’s gone.
Gentle Bristle Technique
If paint’s lodged in creases or under your nails, reach for a soft-bristled toothbrush to loosen it gently. Its tapered head gets into folds without scraping skin, and the flexible bristles lift pigment from nail edges and cuticles where washcloths can’t.
You’ll use gentle scrubbing with a bristle brush and soap, rinse often, and be patient.
- Apply soap
- Scrub gently
- Rinse frequently
- Repeat as needed
Focus On Nail Edges
After loosening paint with the soft-bristled toothbrush, turn your attention to the nail edges and creases where pigment hides.
Gently scrub with short strokes, angling the brush under the free edge and along cuticles to lift pigment without damaging skin. This targeted cleaning helps nail care while reducing stains.
Use gentle pressure and wipe bristles often to aid paint prevention and maintain effectiveness.
Rinse And Repeat
Go ahead and rinse your hands under warm water.
Then repeat the gentle brushing on any stubborn spots with the soft-bristled toothbrush, focusing again on creases and nail edges.
Use targeted rinse techniques to loosen residue, then scrub gently for final paint removal.
- Rewet areas
- Brush creases
- Clean nail edges
- Rinse thoroughly
Quick Ways to Remove Paint From Under Fingernails
Getting paint out from under your fingernails can be quick and straightforward with the right tools and a little patience: use a soft brush, warm soapy water, and a wooden cuticle stick to gently lift paint.
Try natural remedies like olive oil or baking soda paste for stubborn bits.
Finish with proper nail care—trim, clean, and moisturize to prevent damage.
Removing Paint From Cuticles Without Irritation
When paint lands on your cuticles, act gently and promptly to avoid irritation or tearing the delicate skin; use mild solvents and soft tools so you remove the color without scratching or overdrying.
Follow simple cuticle care steps for irritation relief:
- Soak in warm, soapy water.
- Gently rub with a soft cloth.
- Use a mild solvent sparingly.
- Apply moisturizing cuticle oil.
Removing Paint With Only Baby Wipes
Baby wipes can work well for fresh, water-based paint or small smudges, but they might struggle with dried or oil-based paint.
Use firm, circular motions and change wipes as they get loaded to avoid spreading paint back onto your skin.
For stubborn spots, try gently loosening the paint first with warm water or a bit of oil before wiping again.
When Baby Wipes Work
If you’ve only smudged a bit of fresh, water-based paint, baby wipes can often remove it quickly without scrubbing hard.
You’ll find baby wipes effectiveness is highest on fresh, light smears; they’re a convenient paint removal techniques option.
Use them when paint is wet, on small areas, and on skin only—avoid heavy, dried, or oil-based stains.
- Fresh
- Small
- Wet
- Skin
How To Use
Grab a wipe and gently rub the fresh paint in small, circular motions, working from the outside of the smear toward the center; keep rotating the wipe so you’re always using a clean section and switch to a new wipe as soon as it gets saturated or stained.
Use firm but gentle pressure, repeat until paint lifts, then rinse and follow basic skin care tips as part of paint removal techniques.
Tips For Stubborn Paint
When fresh wipes don’t fully remove stubborn paint, you can still make surprising progress using only baby wipes and a few simple techniques.
You’ll gently rub, layer wipes, and repeat until paint loosens. These paint removal techniques focus on persistence and softness.
For stubborn stain solutions, try:
- Rub in small circles
- Fold for fresh surface
- Use warm water after
- Repeat patiently
Removing Stains Where Paint Hasn’t Bonded
Sometimes paint sits on your skin without fully bonding, leaving a flaky or powdery stain you can wipe away.
Check paint adhesion by rubbing gently with a damp cloth; different paint types react differently.
Use a soft brush or microfiber, mild soap, and warm water to lift residue.
For persistent bits, try an oil-based cleanser or rubbing alcohol, then rinse and moisturize.
What to Do After Multiple Failed Removal Attempts
If repeated scrubbing and soap haven’t worked, try an oil-based remover like mineral oil or baby oil to loosen stubborn paint.
Test a small area first and use gentle rubbing to avoid skin irritation.
If the paint still won’t come off or your skin reacts, get professional medical advice or see a dermatologist.
Try Oil-Based Removers
Reach for oil-based removers once soaps and scrubs haven’t budged the paint; they break down stubborn coatings without harsh abrasion.
Use oil-based options like mineral oil, baby oil, or commercial gel removers for effective paint removal. Apply, let sit, then rub gently. Rinse and moisturize to restore skin.
- Test on small area
- Use gloves if sensitive
- Avoid open wounds
- Dispose properly
Seek Professional Help
When DIY methods haven’t worked and the paint’s still clinging to your skin, it’s time to get professional help—medical or industrial—depending on the product and severity.
Contact medical staff for chemical burns or allergic reactions.
For stubborn, nonhazardous coatings, hire professional painters or cleanup specialists who’ll use safe solvents and tools.
Follow their aftercare, document any damage, and avoid further DIY attempts.
Rinsing and Neutralizing Solvent Residue Safely
Start by flushing your skin with lukewarm water to remove loosened paint and dilute any leftover solvent; avoid hot water, which can open pores and increase absorption.
Begin by rinsing with lukewarm water to flush loosened paint and dilute any remaining solvent.
Rinse for several minutes, use mild soap, and neutralize with a baking soda paste if needed. Follow solvent safety guidance and check for irritation.
- Rinse thoroughly
- Soap gently
- Neutralize residue
- Inspect skin
Moisturize and Repair Skin After Solvent Use
1. After rinsing, restore your skin barrier with hydration techniques: pat dry, apply soothing lotion, then protective creams to seal moisture.
Use gentle exfoliation only after skin recovery begins to remove residue and dead cells.
Follow a short repair regimen—repeat soothing lotion twice daily, use protective creams before work, and keep up post cleanup care until skin feels normal.
When to Stop and See a Doctor or Pro
If your skin isn’t improving after a few days of gentle care—or if you notice increasing redness, swelling, blistering, severe pain, numbness, or signs of infection such as oozing or fever—you should stop self-treatment and consult a healthcare professional or dermatologist.
Seek doctor signs and professional advice when:
- Pain worsens rapidly
- Spreading redness
- Pus or fever develops
- Loss of feeling persists
How to Remove Spray Paint From Hands Safely
If you’ve sprayed paint on your hands, start by moving to fresh air and removing any contaminated clothing to reduce inhalation and skin exposure.
You’ll want to try gentle removal first—wash with soap and warm water or use a citrus-based or acetone-free remover—then escalate to stronger solvents only if needed and on intact skin.
Follow up with moisturizer and monitor for irritation, and stop to seek medical care if you get a reaction or have large-area exposure.
Immediate Safety Steps
Because spray paint can contain solvents that irritate your skin and lungs, take quick safety steps before you start cleaning your hands.
Use safety precautions and know emergency measures: move to fresh air, avoid rubbing eyes, and get help if needed.
- Ventilate the area
- Wear gloves if available
- Rinse exposed skin with water
- Seek medical attention for severe reactions
Effective Removal Methods
Now that you’ve handled immediate safety—airflow, rinsing, and getting help if needed—you can focus on removing the spray paint itself.
Start with oil-based methods like vegetable oil or peanut butter to loosen paint, then scrub gently with a soft brush.
Try commercial paint removal techniques or acetone sparingly.
Rinse, moisturize, and choose skin-safe cleaning products to avoid irritation.
Best Approach for Enamel and High‑Gloss Paints
Start by evaluating the paint type and how long it’s been on your skin—enamel and high‑gloss paints are oil‑based and set harder than latex, so you’ll need stronger solvents and a bit more elbow grease.
Use careful solvent application, avoid harsh scrubbing, then moisturize.
- Apply mineral spirits sparingly.
- Use a nylon brush gently.
- Wipe with oil then soap.
- Rinse and hydrate skin.
Removing Paint From Sensitive or Damaged Skin
If your skin is red, cracked, or otherwise injured, check the area first and stop any scrubbing that hurts.
Use mild, non‑abrasive cleansers and lukewarm water to lift paint without irritating the skin.
After cleaning, protect the area with a gentle barrier (like a fragrance‑free ointment) and keep it moisturized while it heals.
Assess Skin Condition
Before you try any remover, check your hands closely for cuts, rashes, sunburn, eczema, or other sensitivity—these conditions change what products and methods are safe to use.
You should note pain, swelling, or signs of infection, and consider skin health and paint allergies before proceeding.
- Open wounds
- Irritated rashes
- Known paint allergies
- Compromised skin barriers
Use Gentle Cleaners
Given cuts, rashes, or other sensitivities, choose mild, nonirritating cleaners that won’t strip or aggravate your skin.
Use fragrance-free soap or a gentle oil-based cleanser, working with soft cloths and gentle exfoliation techniques to remove paint particles. Rinse thoroughly and pat dry.
Focus on skin barrier protection by avoiding harsh scrubs, solvents, or prolonged soaking that can worsen damage.
Protect And Moisturize
Once you’ve removed as much paint as possible with gentle cleansers, protect and moisturize the affected skin to support healing and prevent irritation.
Use mild, fragrance-free ointments to form protective barriers and restore skin hydration. Apply thin layers, avoid rubbing, and keep wounds covered until healed.
- Cleanse gently
- Apply ointment
- Maintain skin hydration
- Monitor for infection
How Long to Wait Before Scrubbing Dry Paint
If the paint’s labeled “dry to the touch” you can gently test a small spot after about 15–30 minutes, but wait at least an hour for thicker coats or oil-based paints before scrubbing so you don’t smear or push pigment deeper into the skin.
Consider paint drying time, then use gentle scrubbing techniques with warm water and mild soap; avoid aggressive rubbing that irritates.
Protecting Your Hands While Continuing the Job
While you keep working, protect your hands with the right barriers and quick-care habits to prevent fresh mess and skin irritation.
Use hand protection and safe practices to minimize exposure, tidy spots immediately, and soothe skin.
- Wipe spills promptly
- Keep a damp cloth nearby
- Apply barrier cream between sessions
- Rinse and moisturize breaks
Which Gloves Are Best for Painting Jobs
Because different paints and tasks demand different protection, pick gloves based on material, fit, and durability so you can work safely and comfortably.
Choose latex gloves or vinyl gloves for light water‑based work; consider nitrile alternatives for solvent resistance.
Weigh disposable options versus reusable gloves, add protective sleeves if needed, check grip texture, moisture resistance, chemical resistance, and prioritize correct size selection.
Quick Fixes to Avoid Cross-Contaminating Surfaces
Keep nearby surfaces covered while you clean paint off your hands so drips and smudges don’t spread.
Use disposable barriers like paper towels, plastic sheets, or disposable gloves to catch fresh paint and toss them when you’re done.
That way you won’t transfer paint to doorknobs, counters, or clothing.
Protect Nearby Surfaces
Before you start scrubbing your hands, protect nearby surfaces so paint doesn’t spread—place rags or paper towels under your work area, lay down a plastic sheet or painters’ drop cloth, and set a small container for used wipes to keep them from smearing paint onto counters, floors, or furniture.
- Surface protection: cover high-touch zones.
- Paint prevention: contain drips.
- Cleanup strategies: corral waste.
- Safe practices: avoid cross-contamination.
Use Disposable Barriers
One quick trick is to cover your wrists and forearms with disposable gloves, tape, or even painter’s masking film so paint doesn’t migrate from your hands to countertops or clothing.
You’ll keep surfaces clean while you focus on paint removal. Use disposable gloves as part of your protective gear, replace them when soiled, and dispose properly to guarantee a safe cleanup without spreading mess.
Avoiding Inhaling Fumes While Cleaning Your Hands
While you rinse and scrub paint from your hands, stay aware of fumes by working in a well-ventilated area—open a window or turn on a fan to keep fresh air moving.
You’ll follow fume safety and cleaning precautions, avoid solvents near your face, and limit time using strong cleaners.
- Ventilate space
- Face away from fumes
- Use mild cleaners
- Take breaks
Eco‑Friendly Paint Removers That Work on Skin
Good ventilation helps keep fumes down, but you can also choose gentle, planet-friendly options that won’t irritate your skin.
Try eco friendly options like plant based cleaners and biodegradable removers.
Opt for eco-friendly choices—plant-based cleaners and biodegradable removers that are gentle on skin and the planet
Use natural alternatives and homemade mixtures—olive oil plus sugar or baking soda paste.
Follow skin safe recipes and non toxic methods for quick, gentle solutions that rinse easily without harsh chemicals.
Cost‑Effective Pantry Staples for Paint Removal
Look in your pantry before you buy specialty products—common staples like vegetable oil, baking soda, vinegar, and sugar make effective, low-cost paint removers for skin.
You can mix simple pantry options into effective mixtures to loosen paint gently.
Try these combos:
- Oil + sugar scrub
- Baking soda paste
- Vinegar soak
- Oil + baking soda gentle rub
Top Commercial Hand-Safe Paint Removers
Some people prefer commercial removers because they’re formulated to work quickly and gently on skin. You’ll find products that target latex, acrylic, and oil-based paints without harsh solvents.
Look for fragrance-free gels, citrus-based formulas, and pumice-free creams. You’ll appreciate commercial options that rinse clean, moisturize, and act fast. They’re effective safe alternatives to harsh solvents, especially for frequent use.
How to Read Product Labels for Skin Safety
Before you buy, read the label carefully so you know what’s safe for skin and what to avoid.
Check product ingredients for harsh solvents, fragrances, and preservatives. Look for allergy warnings and “dermatologist tested” claims. Note contact time and rinse instructions.
If you have sensitivities, patch-test first.
- Scan ingredients list
- Note skin allergens
- Follow use directions
- Patch-test before use
Common Mistakes That Make Paint Stains Worse
When you try to scrub paint off quickly with harsh chemicals or rough abrasives, you can actually push the stain deeper or damage your skin, making removal harder and more painful.
Don’t panic and overdo it; common misconceptions lead you to worsen stains.
Follow paint removal tips, use prevention strategies, and choose effective techniques that protect skin and avoid aggressive, counterproductive actions.
How to Test a Solvent on a Small Skin Patch
If you’re going to try a solvent, test it on a small, hidden patch of skin first to check for irritation or a reaction.
You’ll follow solvent safety steps and watch the skin patch for 24 hours. If redness, burning, or swelling appears, don’t use it. Otherwise proceed cautiously.
Patch-test any solvent and observe for 24 hours; stop immediately if redness, burning, or swelling occurs.
- Clean area
- Apply tiny amount
- Wait 24 hours
- Rinse and inspect
Cleaning Up After Removing Paint From Your Hands
Rinse your hands thoroughly with warm water to remove loosened paint and any solvent residue.
Pat dry with a clean towel, then wash with mild soap to eliminate oils and particles.
Apply a gentle moisturizer to soothe skin.
Follow paint removal techniques cautiously and monitor for irritation.
Use skin care tips like avoiding harsh scrubs and protecting hands with gloves during future projects.
Removing Paint From Jewelry and Watches Safely
After you’ve washed and moisturized your hands, check any rings, bracelets, or watches for paint splatters before you move on to more aggressive cleaning methods.
For jewelry care and watch maintenance, act gently: soak leather straps separately and avoid harsh solvents on metals.
- Use mild soap
- Try rubbing alcohol sparingly
- Use a soft toothbrush
- Dry and polish promptly
Preventing Recurring Paint Stains on Clothing
Because paint stains are easier to stop than to remove, set up simple habits that keep your clothes safe before you start a job.
Wear an apron or old coveralls, secure sleeves, and use disposable shoe covers. Keep a clean rag and scraper nearby.
Follow paint prevention techniques and clothing protection tips: change out of work clothes immediately, launder separately, and treat splatters right away.
Quick Mid‑Project Hand‑Cleanup Checklist
If you notice paint building up on your hands mid‑job, pause briefly and follow a quick cleanup checklist to keep the mess from spreading and your skin healthy.
Use practical hand cleanup techniques and follow project paint precautions:
Use practical hand-cleanup steps and project precautions to stop paint spread and keep your skin healthy.
- Wipe excess with a disposable cloth.
- Apply mild soap and warm water.
- Use a gentle scrub brush.
- Rinse, dry, and moisturize.
Teaching Helpers and Kids Safe Cleanup Habits
When you’re working with helpers or kids, set clear, simple rules about hand cleanup before anyone starts painting so everyone knows what to do when paint shows up on skin.
Use kid friendly teaching methods during paint preparation and art activities, model safe cleanup and supervision techniques, turn chores into cleanup games and fun projects, deliver engaging lessons, and enforce responsible practices so habits stick.
Troubleshooting Stubborn Pigment or Dye Stains
Stubborn pigment and dye stains can resist regular soap and scrubbing, so you’ll need targeted approaches that match the paint type and how long it’s been on your skin.
Try these focused pigment removal steps to fix stubborn stains quickly:
- Use oil or grease to lift dried pigment.
- Apply rubbing alcohol for dye-like stains.
- Gently exfoliate with a paste.
- Rinse and moisturize.
Maintaining Healthy Skin Across Multiple Projects
As you tackle multiple painting projects, protect your skin by establishing simple habits—wear gloves when possible, rotate tasks to give irritated areas a break, and wash hands promptly with a mild cleanser to remove solvents before they dry in. You’ll benefit from consistent skin care and thoughtful project preparation.
| Habit | Frequency | Benefit |
|---|---|---|
| Gloves | Every session | Barrier |
| Cleanse | After contact | Remove solvents |
| Moisturize | Daily | Restore skin |
| Rest | Between tasks | Reduce irritation |
When to Replace DIY Cleanup With Professional Services
If your hands show deep-set stains, chemical burns, persistent irritation, or you’ve used industrial-strength solvents, call a professional instead of trying more DIY fixes.
If stains are deep, skin is burned or irritated, or industrial solvents were used, seek a professional immediately.
They’ll assess skin damage, provide medical-grade cleaning or treatment, and help prevent lasting harm.
- Project Complexity vs Skill Level
- Health Risks outweigh DIY Cleanup
- Cost Considerations and Time Efficiency
- Professional Services for Long term Solutions
Frequently Asked Questions
Can Paint Transfer to Others Through Casual Contact After Cleanup?
Yes — paint transfer can happen through casual contact if your hands or clothing still have wet or tacky paint; you’ll need to clean surfaces and yourself promptly to prevent smudges and passing paint onto others or belongings.
Will Paint Under Nails Affect Nail Polish Removal Later?
Yes — if paint sits under nails it can damage nail health and shorten polish longevity. You should clean under nails promptly, avoid aggressive scraping, and moisturize cuticles so your polish removal and nails stay healthier.
Can Repeated Solvent Use Cause Allergic Skin Sensitization?
Yes — repeated solvent use can sensitize you; you’ll develop allergic reactions over time. Practice solvent safety, use gloves, wash thoroughly, and stop exposure if you notice persistent skin irritation or rash and see a dermatologist.
How to Remove Paint Fumes Lingering on Clothing or Hair?
You can neutralize paint fumes on clothing and hair fast: don’t panic — you’ll avoid lingering odor by airing items, using fume absorption methods like baking soda or activated charcoal nearby, and applying a gentle clothing treatment and shampooing hair thoroughly.
Are There Natural Oils That Permanently Stain Skin Pigments?
No, essential oil effects rarely cause permanent skin pigment reactions; you’ll usually see temporary discoloration or irritation, especially with citrus oils causing photosensitivity, but true permanent staining is uncommon—seek dermatological advice if changes persist.
Conclusion
You’ve got the tools and a plan, so don’t panic—act fast and be gentle. Treat paint removal like peeling back a bandage: quick, steady, and careful to avoid injury. Use water and soap for water-based paints, solvents for oils, and protective measures every time. Teach helpers safe habits, check ingredients, and moisturize after. If stains or skin reactions persist, seek professional help instead of forcing more home remedies.