How to Get Paint Off a Brick Wall: Effective Removal Methods
You can remove paint from brick by first identifying the paint type and inspecting the brick and mortar, then choosing a method that matches the surface: chemical strippers for stubborn oil-based layers, citrus or soy gels for gentler removal, heat guns for thick flakes, low-pressure power washing (500–1,200 PSI) for well-adhered latex, or soda/walnut-shell blasting for tougher jobs. Wear PPE, protect plants, neutralize residues, and test a small patch; keep going and you’ll find detailed steps, costs, and troubleshooting tips.
Identify Paint Type on Brick (Latex vs Oil vs Lead)
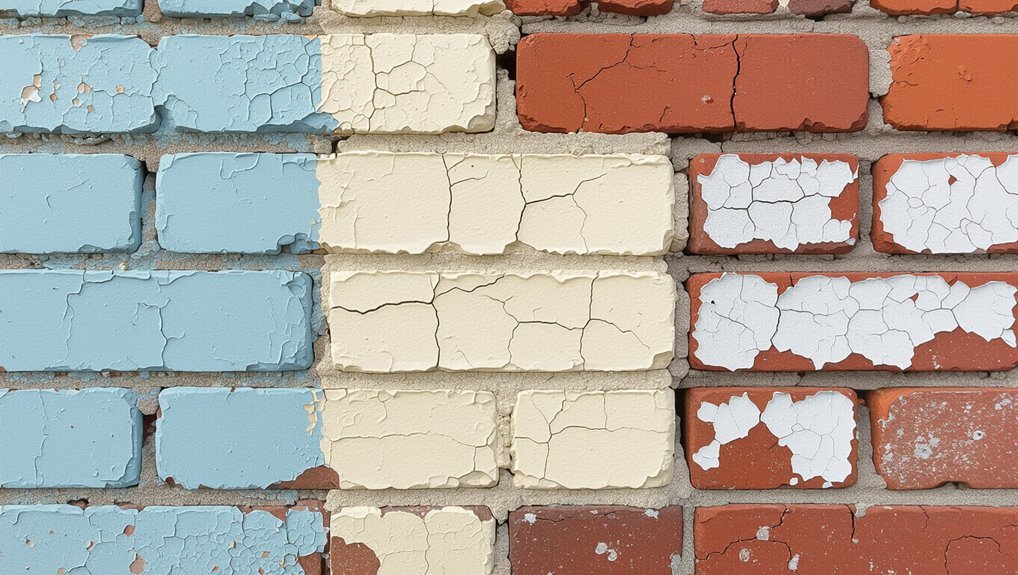
Before you start stripping paint, figure out what type you’re dealing with—latex, oil-based, or lead-based—because each needs a different approach.
Identify the paint first—latex, oil, or possible lead—so you can choose the right, safe removal method.
You’ll use paint identification methods like solvent tests, scraping samples, or lab kits to confirm type.
Note paint toxicity concerns with older layers: if lead’s possible, don’t DIY.
Plan removal, containment, and disposal accordingly to protect yourself and the environment.
Inspect Brick and Mortar Before You Start
Once you know what type of paint you’re dealing with, take a close look at the brick and mortar to see how they’ll respond to removal methods.
Perform a thorough brick inspection for cracks, spalling, or loose units.
Test mortar integrity by probing joints gently and checking for crumbling.
Note fragile areas and plan gentler techniques to avoid damaging substrate during paint removal.
Keep or Remove Paint? How to Decide?
Check the paint’s condition first — flaking, bubbling, or heavy staining usually means removal’s necessary.
You’ll also want to weigh any historical or architectural value, since original painted brick can be worth preserving.
Balance appearance and preservation before you choose a method.
Assess Paint Condition
Condition matters: you’ll want to determine whether the paint is sound, peeling, or hiding damage before deciding to keep or remove it.
Inspect mortar joints, brick faces and edges for flaking, efflorescence, or trapped moisture. Use a wire brush and a moisture meter during your surface assessment to gauge adhesion and underlying issues.
Good paint condition favors keeping; deterioration signals removal.
Consider Historical Value
If your building has historical significance, you should weigh preservation rules and original appearance before stripping paint. You’ll consult local guidelines, experts in historical preservation, and choose restoration techniques that protect masonry. Decide whether paint removal aids authenticity or harms patina. Balance cost, legal constraints, and long-term conservation; document choices and use reversible methods where possible.
| Option | Benefit | Risk |
|---|---|---|
| Remove | Reveal original brick | Damage mortar |
| Preserve | Maintain patina | Mask original look |
| Partial | Compromise | Inconsistency |
Quick Decision Guide: Best Method by Paint, Brick, Budget
First, identify the paint type because latex, oil, and masonry paints each need different removers or techniques.
Then inspect the brick for mortar condition and fragility so you don’t damage it with harsh methods.
Finally, balance your budget against the results you want — low-cost options may leave residue while professional or chemical treatments cost more but clean better.
Paint Type Matters
Because different paints bond and weather differently, the method you choose should start with identifying the paint type—latex, oil-based, or masonry-specific—then match removal technique to the paint, the brick’s porosity, and your budget.
You’ll pick softer chemical strippers for latex, stronger solvents or sanding for oil-based, and specialized cleaners for masonry paints, balancing paint compatibility with removal efficiency and cost.
Brick Condition Check
When you inspect the wall, look for paint adhesion, brick porosity, mortar condition, and any previous repairs so you can pick the right removal method quickly.
Check for spalling, efflorescence, loose mortar, and soft spots.
Use simple surface evaluation techniques: tap, scrape, and wet tests.
These brick maintenance tips help you choose gentler methods for fragile brick and aggressive methods for sound masonry.
Budget Vs. Results
If you want the best balance between cost and outcome, match the removal method to the paint type, brick condition, and your budget: weigh a quick cost analysis—materials, equipment rental, labor—against an outcome evaluation—surface integrity, cleanup, time.
For small jobs, use chemical strippers; for large or delicate brick, hire pros.
Prioritize long-term brick health over cheapest upfront choice.
Safety Gear and Site Prep for Brick Paint Removal
Before you touch a brush or power washer, outfit yourself and the work area so everyone stays safe and the cleanup goes smoothly.
Wear goggles, respirator, gloves, long sleeves and sturdy footwear.
Set up barriers, warning signs and a clear workspace organization plan.
Check electrical safety, test equipment, and have a fire extinguisher and first-aid kit nearby before beginning.
Protect Nearby Surfaces and Landscaping
While you prep to strip paint, shield surrounding areas so overspray, runoff, and debris don’t damage siding, windows, or plants.
Use plastic sheeting, tarps, and drop cloths for surface protection, securing edges with tape or weights.
Lay down plastic sheeting, tarps, and drop cloths; secure edges with tape or weights to protect surfaces.
Cover shrubs and soil with breathable fabric, divert water away, and remove fragile pots.
Check barriers periodically and clean up residue promptly to preserve landscaping care.
Test a Small Area Before Full Removal
Before you commit to a full-scale removal, pick an inconspicuous spot to test your method.
Try the same scraper, chemical, or pressure setting you’ll use on the rest of the wall and watch how the brick and mortar respond.
If you see chipping, etching, or mortar damage, adjust your approach before continuing.
Choose An Inconspicuous Spot
Although it’s tempting to plunge in, pick a small, out-of-the-way section of the brick—behind a downspout, near the corner, or under an eave—and try your chosen removal method there first so you can see how the brick and mortar react.
You’ll confirm which paint removal techniques suit the masonry and avoid damage, protecting long-term brick surface care while saving time and effort.
Use Appropriate Test Methods
When you’re ready to remove paint, start by testing a small patch with the exact method and tools you’ll use so you can judge effectiveness and any harm to the brick or mortar.
Try different test methods—chemical, heat, or mechanical—on similar areas. Note paint compatibility with removers, dwell time, and ease of cleanup so you can pick the safest, most effective approach.
Inspect For Surface Damage
Start by closely inspecting a small, inconspicuous area after your test removal so you can spot any surface damage—cracked mortar, spalling, or color loss—before proceeding to the whole wall.
Do a focused surface assessment and damage evaluation, then decide on tools and techniques based on the findings.
- Note mortar cracks
- Check brick face stability
- Record color or texture changes
Chemical Strippers for Brick: Types and Selection
If you’re tackling paint removal on brick, choosing the right chemical stripper matters because different formulations work better on various paint types and brick porosities. Consider chemical options (caustic, solvent, biodegradable) and prioritize stripper safety when selecting. Match product to paint age, test a small area, and follow manufacturer guidelines.
| Type | Best For | Notes |
|---|---|---|
| Caustic | Oil-based | Aggressive |
| Solvent | Latex | Fast |
| Biodegradable | Sensitive brick | Gentler |
| Gel | Vertical surfaces | Clings |
Apply and Remove Chemical Strippers Safely
Once you’ve chosen and tested a stripper, prepare for application by protecting yourself, the work area, and nearby plants or masonry features.
After testing a stripper, protect yourself, the work area, and nearby plants or masonry before starting.
Wear gloves, goggles, and a respirator; apply in small sections for controlled stripper application and safe removal. Scrape softened paint gently, collect debris, and dispose per instructions.
- Work in well-ventilated zones
- Use plastic sheeting
- Keep a spill kit nearby
Neutralize and Rinse Chemical Residues
After using a chemical stripper you’ll want to put on gloves, eye protection, and a respirator before handling residues.
Neutralize remaining chemicals according to the product instructions—often by applying a diluted baking soda or vinegar solution—and let it sit briefly.
Then thoroughly rinse the brick with plenty of water, using a hose or pressure washer on a low setting until runoff is clear.
Wear Protective Gear
Put on protective gear before you neutralize and rinse chemical residues so you don’t expose your skin, eyes, or lungs to harsh cleaners.
You’ll need proper safety equipment and protective clothing to work confidently and prevent injury.
- Gloves and chemical-resistant apron
- Goggles or face shield
- Respirator rated for solvents
Check seals, replace damaged items, and dispose of contaminated clothing safely.
Dilute Chemical Residue
Before rinsing, neutralize paint remover and solvent residues so they won’t keep damaging the brick or harm you; choose the right neutralizer (water for water-based cleaners, a mild vinegar solution for alkaline strippers, or a manufacturer‑recommended neutralizer for strong solvents) and mix it to the recommended dilution, wearing your gloves, goggles, and respirator while you work.
Then test a small area to observe chemical interactions and monitor residue effects, adjusting neutralizer strength as needed.
Thoroughly Rinse Surface
Once you’ve neutralized residues and confirmed the solution’s effect on a test patch, it’s time to flush the wall thoroughly so leftover chemicals won’t keep reacting with the brick or mortar.
Rinse with clean water, using pressure or a garden hose. Focus on mortar lines and porous spots for proper brick maintenance and surface cleaning.
- Start top, work downward
- Use gentle pressure
- Repeat until runoff is clear
Eco-Friendly Paint Removers for Brick Walls
If you want to remove paint from brick without harsh chemicals, eco-friendly options let you protect the masonry, your health, and the environment.
You can try eco-friendly alternatives like citrus or soy-based gels and other natural solvents that soften paint.
Apply, let dwell per instructions, then scrub gently with a nylon brush. Rinse thoroughly and repeat only as needed.
Use a Heat Gun to Remove Paint From Brick : When & How
You’ll want to reach for a heat gun when paint’s thick, peeling, or won’t budge with chemical strippers.
Use steady, sweeping motions at moderate heat, keep the nozzle moving to avoid scorching the brick, and work in small sections.
Always wear gloves, eye protection, and a respirator, and have a fire extinguisher nearby.
When To Use A Heat Gun
Although heat guns work quickly, you should only use one on brick when the paint is thick, multiple layers are present, or chemical strippers and sanding haven’t done the job.
You’ll balance heat gun safety with heat gun efficiency and choose this method when:
- Paint is stubborn and layered
- Strippers and sanding fail
- You need faster removal than manual methods
Safe Heat Gun Techniques
When paint resists strippers and sanding, a heat gun will speed removal—but you must handle it with care to avoid burns, brick damage, or fire. You’ll follow heat gun safety: wear gloves, eye protection, and a respirator; keep a fire extinguisher nearby. Use a low setting, keep nozzle moving, and scrape gently—proper heat gun technique preserves brick and removes paint effectively.
| Tool | Purpose |
|---|---|
| Gloves | Protect hands |
| Nozzle | Focus heat |
| Scraper | Lift paint |
| Extinguisher | Fire control |
Why to Avoid Open Flames on Masonry
Because brick and mortar can hide cracks and voids, using open flames on masonry risks more than scorched paint—you can damage the structure, release trapped moisture, and create dangerous fumes.
You should avoid open flames due to clear fire hazards and masonry damage. Consider safer methods:
- risk of hidden combustion
- vaporized contaminants
- weakened mortar and bricks
Hand Tools: Scrapers, Wire Brushes, and Technique
Pick a scraper with a firm, angled blade and a comfortable handle so you can work steadily without gouging the brick.
Use a stiff wire brush and short, controlled strokes to lift softened paint from mortar lines and textured surfaces.
Keep your wrist steady and check progress often to avoid overworking the same spot.
Proper Scraper Selection
Start by matching your hand tools to the paint type and brick condition: use a stiff putty knife or paint scraper for flaky latex, a razor-edged masonry scraper for stubborn oil-based layers, and a medium-stiff wire brush to clear loose grit and mortar before and after scraping.
Choose scraper types and scraper materials based on blade hardness and handle grip.
- Hardened steel blades
- Carbide or razor edges
- Sturdy wood or rubber grips
Effective Brushing Technique
Once you’ve removed loose paint with the scraper, follow up with focused brushing to loosen remaining flakes and clean mortar joints.
Use a medium-stiff wire brush held at a 30–45° angle and sweep along the grain of the brick, not against it.
Choose brush types for texture: brass for softer brick, stainless for stubborn spots.
Use consistent brushing techniques and clear debris as you work.
Power Washing Brick: Pressure Limits and Tips
When pressure washing brick, keep the PSI between 500 and 1,200 and hold the nozzle at least 12–18 inches away to avoid etching mortar or blasting away paint remnants.
Lower pressures work for softer bricks and painted surfaces while higher pressures suit unpainted, hard-fired masonry. Use power washing with proper pressure settings, nozzle selection, water temperature, surface preparation, effective techniques, and maintenance tips.
- Test a small area first
- Sweep debris before cleaning
- Rinse from bottom up
Masonry Grinders and Cup Wheels : Pros & Cons
Masonry grinders with cup wheels offer a fast, aggressive way to remove paint, mortar, and surface irregularities from brick, but they demand care: you’ll get rapid material removal and a smoother finish on hard-fired masonry, yet risk over-grinding softer bricks, gouging mortar joints, and creating a lot of dust and vibration if you don’t match wheel grit, speed, and technique to the job.
Use masonry grinders with proper cup wheels, follow safety precautions, inspect for surface damage, and perform regular tool maintenance to guarantee effective paint removal without harming brick.
Soda and Media Blasting for Exterior Brick
Soda and media blasting give you a low-impact way to strip paint from exterior brick, with soda being gentle and other media ranging from soft to aggressive.
You’ll compare media types to match cleaning power with the brick’s condition and mortar strength.
Before you start, you’ll follow specific surface preparation steps—cover plants, protect nearby surfaces, and test a small area.
Soda Blasting Basics
Although it sounds gentle, soda blasting uses a high-pressure stream of sodium bicarbonate media to strip paint from exterior brick without seriously abrading the substrate. You’ll find it effective for delicate mortar and historic surfaces.
- You control soda applications for targeted removal.
- You reduce surface damage versus harsher abrasives.
- Consider media comparisons later to choose the best option.
Media Types Compared
Which blasting media will give you the cleanest results with the least damage? You’ll compare media types like baking soda, crushed glass, and walnut shells, weighing abrasiveness, porosity impact, and cleanup.
For exterior brick, choose gentler removal techniques to protect mortar and texture; tougher media speed removal but risk etching.
Match media to brick condition and paint stubbornness for best results.
Surface Preparation Steps
Before you blast, walk the perimeter and assess the brick and mortar for cracks, loose sections, efflorescence, and previous repairs so you can target fragile areas and avoid causing more damage.
You’ll prep for soda or media blasting, protecting nearby surfaces, vegetation, and drainlines, and plan for cleanup to support ongoing surface cleaning and brick maintenance.
- Protect nearby surfaces
- Secure loose mortar
- Plan containment and disposal
Removing Latex Paint From Brick : Step-By-Step
Start by evaluating the painted area and gathering supplies—gloves, safety goggles, a stiff nylon brush, a garden hose or pressure washer (on low), and a paint stripper suited for latex paint on masonry.
Test stripper on a small patch, scrub with the brush, rinse thoroughly, and repeat as needed.
Note technique comparison for effectiveness and how paint adhesion affects dwell time and removal success.
Removing Oil-Based and Enamel Paint From Brick
Oil-based and enamel paints bond to brick more tenaciously than latex, so you’ll need stronger chemicals and more elbow grease to remove them.
Use safe, tested paint removal techniques and follow brick surface care afterward to prevent damage.
- Test a solvent on a small area first.
- Scrape gently with a stiff brush.
- Rinse thoroughly and neutralize residues.
Stripping Multiple Paint Layers From Old Brickwork
Before you start stripping layers off old brick, assess the paint type and the condition of the mortar so you know how aggressive you can be.
Pick a stripper formulated for multiple coats and compatible with brick, and test it on a small area first.
Protect the brick and surrounding surfaces with plastic, masking, and neutralizing measures to prevent damage.
Assess Paint And Mortar
When you’re stripping multiple paint layers from old brickwork, first take a close look at both the paint and the mortar to gauge adhesion, thickness, and damage.
You should assess paint adhesion and mortar integrity before any removal to prevent further harm.
- Note blistering, flaking, and number of layers.
- Check mortar integrity for crumbling or gaps.
- Photograph areas for reference.
Choose Appropriate Stripper
Pick a stripper that matches the paint type, the brick’s condition, and your safety limits — some are made for multiple thick layers and others for delicate, crumbling mortar.
You’ll evaluate solvent vs. paste, consider eco friendly options for less odor and runoff, and plan stripper application technique and dwell time.
Test a small area, then proceed systematically.
Protect Brick And Surroundings
You’ll want to shield the brick and nearby surfaces thoroughly before stripping multiple paint layers. Loose mortar, porous brick faces, plants, windows, and ground areas can all be damaged by chemicals, abrasion, or runoff.
Use surface protection and plan landscaping considerations carefully.
- Cover plants and soil with plastic sheeting.
- Mask windows and trim securely.
- Protect mortar joints and delicate brick with tape.
Removing Paint From Mortar Without Damage
Although mortar’s rough texture grabs paint, you can remove it without harming the joints by choosing gentle methods and working patiently.
With patience and gentle techniques, paint can be lifted from mortar without damaging the joints.
Test cleaners on inconspicuous areas to account for mortar types and paint compatibility.
Use soft nylon brushes, plastic scrapers, low-pressure washing, or mild chemical strippers designed for masonry.
Rinse thoroughly and repeat gently until residue lifts, avoiding harsh scrubbing that erodes joints.
Cleaning Stains and Residue After Stripping Paint
After stripping paint from brick and mortar, you’ll often see tannin stains, ghosting, or sticky residue left behind; tackle these promptly with the right cleaners and gentle agitation to prevent permanent discoloration.
Use appropriate cleaning techniques and focused residue removal:
- Test a mild detergent solution and scrub with a soft brush.
- Rinse thoroughly with low-pressure water.
- For stubborn stains, try a poultice or oxygen bleach, then rinse.
Repairing and Repointing Mortar After Removal
When mortar comes away during paint removal, assess each joint for depth and soundness before you start; you’ll only repoint joints that are clean, dry, and free of loose debris.
Remove damaged mortar, brush dust, and dampen joints.
Mix compatible mortar and practice mortar color matching to blend repairs.
Use proper mortar repair techniques: compact in layers, tool joints to match profile, and cure gently.
Best Cleaning Agents to Prep Brick for Repainting
Choosing the right cleaning agent makes a big difference in how well paint adheres and how long your brick lasts, so pick products that remove dirt, efflorescence, and old paint residue without damaging the masonry.
You’ll combine cleaning techniques and eco friendly options depending on stain type:
- Mild detergent and soft brush for general dirt
- Dilute muriatic alternatives for mineral stains
- Biodegradable paint removers for sensitive areas
To Seal or Not: When to Reseal Cleaned Brick
If your cleaned brick sits exposed to weather or moisture-prone areas, you should seriously consider resealing to protect against water damage and staining.
You’ll evaluate sealant options—breathable masonry sealers or repellents—based on porosity and appearance. Resealing reduces efflorescence, freeze-thaw damage, and dirt penetration.
Consider application frequency and manufacturer guidance so you capture long term benefits without trapping moisture.
Preventing Future Paint Adhesion on Brick
After sealing—or deciding not to—you’ll want to stop paint from sticking to the brick again.
Use simple paint prevention tips and brick maintenance strategies to keep surfaces clear.
Do:
- Apply a breathable, water-repellent coating to shed paint and moisture.
- Keep bricks clean; remove dirt and mildew promptly to reduce adhesion.
- Use clear sacrificial coatings that you can strip before repainting.
Renting Tools vs Hiring Pros : How to Choose
When deciding whether to rent tools or hire pros for removing paint from brick, weigh the scope of the job, your budget, and your comfort with the equipment.
If you’re confident and the job’s small, renting tools saves money and gives control.
If it’s large, delicate, or you lack time, hiring professionals guarantees proper technique, safety, and warranty for the result.
Cost and Time Estimates by Method
Expect costs and timelines to vary a lot depending on your chosen method: DIY chemical strippers and hand-scraping can cost under $100 in supplies and take a weekend for a small wall.
Costs and timelines vary: DIY stripping can be under $100 in supplies and take a weekend for a small wall.
Rented power tools raise expenses to $50–$150/day but cut labor to a day or two.
Hiring pros typically runs $300–$1,500+ and finishes in a day for most residential jobs (larger or damaged walls cost more and take longer).
- DIY: low cost, high labor — cost analysis helps decide.
- Rented tools: moderate cost, faster — plan time management.
- Pros: highest cost, minimal time — budget for quality.
Troubleshooting Common Problems and Fixes
Cost and time estimates help you pick a method, but practical problems often shape the outcome more than the budget.
If paint removal challenges arise—stubborn spots, mortar damage, or uneven stripping—you’ll want targeted fixes: soften with repeat applications, use a brass brush on rough areas, lower pressure to protect mortar, and test patches.
Learn from common mistakes to adjust technique quickly.
Disposing Paint Waste and Stripper Residues Safely
Disposing paint chips, slurry, and spent stripper properly prevents environmental harm and keeps you out of legal trouble, so handle residues with care.
You should follow local paint disposal rules, contain waste, and avoid runoff. Practice chemical safety by wearing PPE and using labeled containers.
- Seal and label waste
- Use hazardous waste drop-offs
- Never pour chemicals down drains
Frequently Asked Questions
Can Paint Removal Damage Hidden Utilities Within Brick Walls?
Yes—you can damage hidden utilities if you’re careless. Use utility detection before work, protect cables and pipes, and avoid aggressive methods that compromise wall integrity; otherwise you risk electrical, plumbing, or structural harm.
How Long Should Cleaned Brick Cure Before Repainting?
You should wait about 48–72 hours before repainting cleaned brick, depending on cleaning techniques used and local humidity; make sure mortar’s fully dry, and if needed allow up to a week for thorough drying time.
Will Removing Paint Affect Historic or Landmark Building Status?
Yes — you could stir controversy like rippling paint: removing paint can alter historic preservation status or violate landmark regulations, so you’ll need approvals, documentation, and often conservation-grade methods to protect designation and character.
Are There Insurance or Permit Requirements for Exterior Paint Removal?
Yes—you’ll likely need to check insurance policies and local permit regulations before exterior paint removal; you’ll want liability coverage, contractor proof, and any historic-area permits, since requirements vary by municipality and project scope.
How Do Temperature and Humidity Affect Paint-Stripping Effectiveness?
Ironically, you’ll love how weather effects mess with your schedule: high humidity and cold increase paint adhesion and slow stripper action, while warm, dry conditions speed removal but can make chemicals evaporate too quickly, reducing effectiveness.
Conclusion
Like a gardener deciding whether to prune or replace a stubborn hedge, you’ll weigh paint type, brick health, budget and safety before choosing a method. Tend gently with a scraper, stripper, or pressure washer when the brick’s fragile; dig deeper with pros for oil or lead paint. Whatever path you pick, prepare, protect and dispose responsibly—your wall will thank you, revealing its true, weathered character beneath the old, stubborn coat.