How to Paint Exterior PVC Trim: Simple Method That Lasts Longer
You can paint exterior PVC trim so it lasts by cleaning, scuffing, priming, and using exterior acrylic paint made for plastics. Start with a solvent-free cleaner, sand lightly with 220–320 grit to dull the sheen, then wipe with a tack cloth. Apply a high-adhesion PVC primer, then thin, even coats of UV-resistant acrylic latex, allowing full dry time between coats. Use quality brushes for edges and inspect caulked joints for seamless results; follow the steps below to learn more.
Quick Answer: Can You Paint Exterior PVC Trim?
Yes — you can paint exterior PVC trim, and when you do it right the results last.
You’ll improve curb appeal without compromising PVC durability by choosing proper prep, adhesion promotion, and compatible paint.
Follow surface cleaning, light abrasion, and primer steps so coatings bond. That care guarantees paint longevity, resists peeling, and keeps trim looking good for years with minimal maintenance.
Tools & Materials to Paint Exterior PVC Trim
Before you start, gather the right tools and materials so the job goes smoothly and the finish lasts.
You’ll need essential painting tools (brushes, rollers, caulk gun), the recommended paint types for PVC, and surface-prep supplies like cleaner, sandpaper, and primer.
I’ll walk you through what each item does and why it matters.
Essential Painting Tools
To paint exterior PVC trim well, you’ll need a compact kit of reliable tools and materials that make the job faster and produce a durable finish: quality sandpaper and a tack cloth for surface prep, a solvent-free cleaner, high-adhesion primer and paint formulated for PVC, brushes and a roller suited to acrylic finishes, painter’s tape, drop cloths, and safety gear like gloves and eye protection.
- Sanding/paper
- Cleaner/tack cloth
- Brushes/roller
- Tape/drop cloth
Use these essential painting techniques to prep and apply evenly, ensuring long lasting finishes without extra fuss.
Recommended Paint Types
When you’re picking paint for exterior PVC trim, choose products formulated for plastics and outdoor use—specifically high-adhesion acrylic or elastomeric latex paints and primers labeled safe for PVC or vinyl; they’ll bond properly, flex with temperature changes, and resist UV fading.
For color selection, pick lighter tones to minimize heat absorption.
Consider finish types—satin or semi-gloss—for durability and easier cleaning.
Surface Preparation Supplies
Get a compact kit of the right tools so you can prep PVC trim quickly and correctly:
- Mild detergent, sponge — for surface cleaning techniques that remove grime.
- 220–320 grit sandpaper — scuff for adhesion.
- Tack cloth and solvent wipe — remove dust and oils.
- Quality primer — choose from recommended primer options for PVC adhesion before painting.
When Painting PVC Trim Makes Sense (Pros & Cons)
Although PVC trim is low-maintenance and naturally resistant to rot and insects, painting it can still make sense in several situations you’ll commonly encounter.
Though PVC trim resists rot and pests, painting can boost appearance and add UV protection.
You’ll choose paint for Aesthetic Choices—matching trim to siding or modernizing color—and for Longevity Benefits, adding UV protection.
Pros: improved curb appeal and extra shielding.
Cons: maintenance, potential peeling if prep’s poor, and heat-related warping risks.
How to Test PVC and the Existing Finish
Want to be sure your PVC will accept paint and that the current finish won’t sabotage your work? Use simple PVC testing methods and existing finish evaluation to confirm adhesion.
Do these quick checks:
- Clean a small area.
- Scotch-tape pull test.
- Light sanding to see if primer bonds.
- Solvent swab to detect topcoat type and residue.
Step 1: Clean and Decontaminate PVC
Start by removing surface grime, mildew, and any oily residues so primer and paint can bond properly.
Use gentle cleaning methods—mild detergent, trisodium phosphate alternative, or a 50/50 vinegar solution—and soft brushes or cloths. Rinse thoroughly and let dry.
For stubborn contaminants, apply targeted decontamination techniques like diluted bleach for mildew, then neutralize and rinse to prevent residue.
Step 2: Scuff‑Sand and Prep Seams and Edges
Next, lightly scuff‑sand the PVC with fine‑grit sandpaper (220–320 grit) to dull the glossy surface so primer and paint will adhere; work the entire piece evenly, then wipe away dust with a tack cloth.
Use scuff sanding techniques and focus on edge preparation and seams:
- Sand seams gently.
- Smooth edges.
- Remove dust.
- Inspect for gaps.
Step 3: Pick the Right Primer for PVC
Now that your PVC is prepped, pick a primer formulated for plastics so it’s compatible with the surface.
Choose an adhesion‑promoting primer specifically labeled for PVC or vinyl to help paint stick and resist peeling.
Apply it per the manufacturer’s directions and let it cure before painting.
Surface Compatibility
Because PVC can have different surface textures and additives, you’ll need a primer that bonds specifically to the type of PVC trim you’ve got.
Check compatibility for UV resistance and color selection before buying.
Consider:
- Smooth extruded PVC
- Foam PVC (cellular)
- Textured or embossed surfaces
- Factory-coated or colored trim
Match primer specs to the surface for lasting results.
Adhesion Promoting Primer
When you’re choosing a primer for PVC trim, pick one labeled specifically as an adhesion-promoting or PVC/vinyl primer so it chemically bonds to the plastic rather than just sitting on the surface. You’ll compare primer types and check surface compatibility; solvent-based adhesion primers often outperform acrylics on PVC. Use a primer-table below for quick reference.
| Type | Best For | Notes |
|---|---|---|
| Solvent | PVC | Strong bond |
| Acrylic | Painted PVC | Easier cleanup |
| Universal | Mixed | Moderate adhesion |
| Epoxy | High-wear | Durable |
Step 4: Choose the Best Exterior Paint for PVC Trim
Paint choice makes the biggest difference in how long your PVC trim will look great and resist weathering.
Pick exterior acrylic latex designed for plastics, consider UV-resistant formulas, and think about color selection and finish types for durability and appearance.
Follow this quick checklist:
- Plastic-compatible label
- UV inhibitors
- Appropriate finish (satin/eggshell)
- Manufacturer warranty and color match
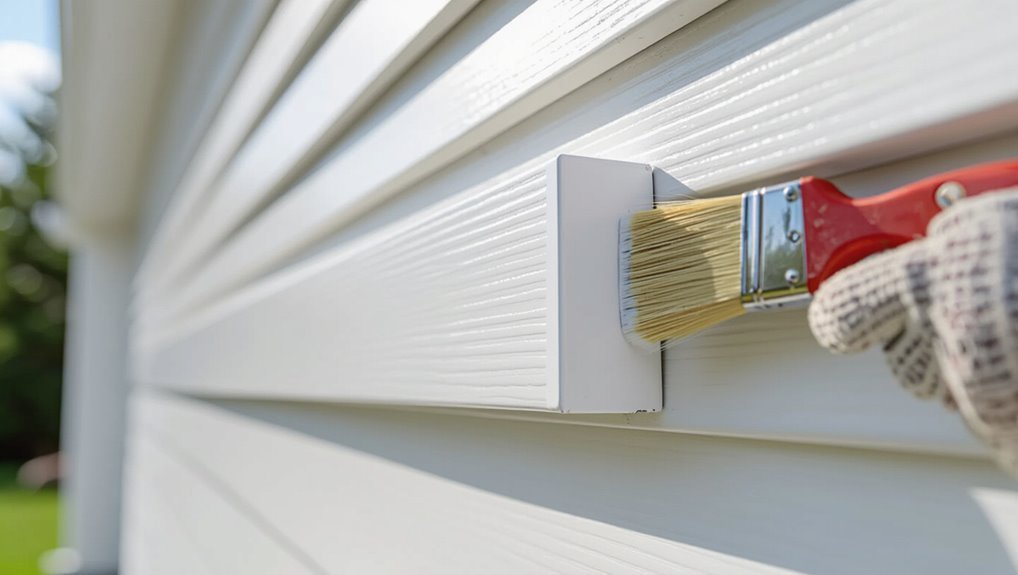
Step 5: Painting Techniques for Smooth, Durable Coverage
Start by using the right brush and a foam or short-nap roller to get an even finish without brush marks.
You’ll apply thin, even coats rather than one heavy layer to prevent drips and promote adhesion.
Let each coat dry fully before lightly sanding and applying the next for a smooth, durable result.
Brush And Roller Techniques
Grab a high-quality angled brush and a short-nap roller to get smooth, even coverage on PVC trim—use the brush for corners and profiles, and the roller for flats.
You’ll focus on brush selection and roller technique to avoid streaks.
- Load brush sparingly.
- Tip out brush strokes.
- Roll in one direction.
- Blend wet edges quickly.
Thin, Multiple Coats
Once you’ve smoothed corners and flats with your brush and roller, work in thin, multiple coats to build durable, even coverage without runs.
Apply thin layers, letting each dry per manufacturer instructions. Lightly sand between coats if needed for adhesion and smoothness.
Aim for multiple applications rather than one heavy pass; that prevents sagging, guarantees uniform color, and extends the finish’s lifespan on exterior PVC trim.
Fixing Caulked Joints, Miters, and Tight Details
Tackle caulked joints and tight miters by first inspecting every seam for gaps, uneven beads, or hardened caulk that could prevent paint from adhering smoothly.
Use caulk removal techniques, clean surfaces, and evaluate joint sealing options before painting.
Remove old caulk, clean surfaces thoroughly, and assess sealing options before painting for a smooth, lasting finish
Do this:
- Scrape and cut damaged caulk.
- Clean with solvent.
- Recaulk with paintable sealant.
- Tool seams smooth, then prime.
Common Problems: Adhesion, Peeling, and Discoloration Fixes
1 common set of problems you’ll face with painted PVC trim is poor adhesion, peeling, and discoloration — and each has clear, fixable causes.
You’ll address adhesion challenges by cleaning, abrading, and using a compatible primer.
For peeling solutions, remove loose paint, feather edges, and recoat correctly.
Discoloration remedies include selecting UV-resistant paint and correcting contaminated surfaces.
Follow proper maintenance strategies to prevent recurrence.
Maintenance Tips to Keep Painted PVC Trim Looking New
Although painted PVC trim is low-maintenance, you’ll keep it looking new by establishing a simple routine: clean gently, inspect for damage or adhesion issues, and touch up promptly.
Although painted PVC trim is low-maintenance, a simple routine—gentle cleaning, quick inspections, and prompt touch-ups—keeps it looking new.
Use effective cleaning techniques and UV protection to extend life.
- Wash with mild soap and soft brush.
- Rinse and dry completely.
- Repair chips immediately.
- Reapply UV-resistant finish as needed.
Frequently Asked Questions
Will Painting PVC Trim Void the Manufacturer’s Warranty?
If your manufacturer restricts coatings, painting PVC trim can void the warranty; for example, a homeowner lost coverage after using oil-based paint. You should check warranty implications and confirm proper paint adhesion before proceeding.
Can I Use a Paint Sprayer for Large PVC Trim Projects?
Yes — you can use a sprayer for large PVC trim projects. Use low to medium sprayer settings, thin coats, and guarantee project preparation: clean, sand lightly, and mask surroundings. You’ll get fast, even coverage without runs.
How Long Should Painted PVC Trim Cure Before Caulking or Handling?
You should wait at least 24–48 hours curing time before caulking or handling painted PVC trim; longer in cool or humid conditions. Confirm surface preparation was thorough so paint bonds properly, avoiding premature adhesion or damage.
Are There Color Restrictions for Painted PVC Near High-Heat Areas?
Like a solar umbrella, you shouldn’t use very dark shades near heat sources; you’ll want heat resistant colors to reduce warping and color fading. Pick lighter, reflective tones and specially rated paints for safety and longevity.
Can I Paint PVC Trim That’s Previously Been Stained or Gel-Coated?
Yes — you can paint previously stained or gel-coated PVC, but you’ll need effective stain removal techniques, sanding and proper primer to guarantee gel coat compatibility, then use a high-quality exterior PVC paint for lasting adhesion.
Conclusion
You can paint exterior PVC trim—when prepped right, it lasts. Studies show properly primed PVC keeps paint adhesion up to 10+ years, cutting repainting frequency in half. Clean, decontaminate, sand lightly, use a compatible primer, and choose a quality exterior acrylic or polyurethane topcoat. Pay attention to caulked joints and flashing to prevent water issues. With routine inspections and touch-ups, your painted PVC trim will stay attractive and durable for many seasons.