How to Thicken Latex Paint for Better Coverage
You can thicken latex paint to improve hiding and reduce coats by adding small amounts of commercial latex conditioner, acrylic extender, or a bit of calcium carbonate paste while stirring slowly to avoid lumps. Test on a scrap panel for leveling, sagging, and drying; use thicker-nap rollers or brushes for application and sand between coats if needed. Don’t overdo it—follow manufacturer limits and consider fresh paint or a pro if problems persist; more tips follow below.
Quick Answer: When and Why to Thicken Latex Paint
You’ll want to thicken latex paint when it’s running, sagging, or soaking into porous surfaces too quickly, because a thicker body helps it level, hide, and build an even film.
You’ll use simple thickening methods to control paint application, improving coverage and reducing drip.
Follow manufacturer guidance, test small batches, and adjust viscosity until brushes and rollers lay down a smooth, even coat.
When You Should Not Thicken Latex Paint
While thickening can fix many application problems, don’t do it when the paint’s formulation or the job calls for its original flow — altering viscosity can ruin finish, adhesion, or drying.
Thicken only when necessary — changing a paint’s viscosity can compromise finish, adhesion, and drying.
You should avoid adding thickening agents if:
- manufacturer’s specs warn against changes
- you’re using specialty latex paint (e.g., trim or high-gloss)
- delicate substrates need specific application techniques
- you lack a test panel for consistency issues
How Paint Consistency Affects Coverage and Hiding Power
Consistency matters: thicker paint tends to sit on the surface and hide the old color better, while thinner paint flows into pores and may need more coats to achieve the same hiding power.
You’ll control finish and durability by adjusting viscosity for your substrate, choosing proper coverage techniques, and modifying brush or roller speed during paint application to optimize evenness and reduce streaks.
How to Tell If Your Latex Paint Is Too Thin (3 Easy Tests)

If your paint runs or sags when you roll or tip a brush, it’s a clear sign it’s too thin and won’t hold a tidy edge.
Do a quick coverage test by brushing a swatch over a primed patch—if the old color shows through easily, the paint needs thickening.
These simple checks let you decide whether to add a thickener or use another coat.
Paint Runs Or Sags
Paint that sags or runs is often too thin, and you can check this with three quick tests to confirm.
You’ll spot runs after paint application if surface preparation or product quality is poor. Adjust roller technique, brush selection, and drying time; guarantee paint adhesion, correct finish types, and color matching for project planning to prevent sagging.
- Inspect vertical coverage
- Test on scrap panel
- Measure viscosity
- Note environmental humidity
Poor Coverage Test
When you’re unsure whether your latex paint is too thin, run three quick tests that’ll tell you in minutes: a visual coverage check on a vertical surface, a tap test on a scrap panel, and a simple viscosity smear to judge body. These reveal if you need coverage improvement or altered application techniques.
| Test | What to look for |
|---|---|
| Visual | Sheerness, streaks |
| Tap | Runs, sagging |
| Smear | Thin, watery feel |
Ideal Viscosity for Walls, Trim, and Furniture

For walls you’ll want a flowy, medium viscosity so the paint levels out without runs.
While trim needs a slightly thicker body to hold crisp edges.
When working on furniture, aim for an even heavier consistency to build a durable, smooth finish.
I’ll explain target thicknesses and simple tests to get each surface right.
Optimal Wall Viscosity
Although thicker isn’t always better, getting the right viscosity makes your latex paint behave predictably on walls, trim, and furniture.
You’ll aim for an ideal thickness that levels well, resists drips, and accepts your preferred application techniques.
Test small areas, adjust with conditioner, and note drying times to match surface porosity.
- Test with a 2″ brush
- Adjust with paint conditioner
- Record drying time
- Match surface porosity
Trim Paint Consistency
Dial in your trim paint’s viscosity so it lays down smoothly without brush marks, runs, or an overly slow dry that traps dust.
Aim for slightly thicker paint than walls to resist sagging but still self-level. Adjust paint thickness modestly with recommended reducers or conditioners.
Use appropriate application techniques—angled brushes, light pressure, and thin, overlapping strokes—to get crisp edges and even coverage.
Furniture Finish Thickness
Up next, focus on how viscosity shifts when you move from walls and trim to furniture pieces, because each surface demands a different flow to get the look and durability you want.
You’ll aim thicker for furniture to boost furniture durability and prevent sagging; adjust thinness for smooth trim. Consider finish types and brush/roller choice.
- Sand between coats
- Test on spare wood
- Use high-build additives
- Match sheen to use
Tools to Check Paint Viscosity (No Fancy Gear)
You don’t need a lab to check paint viscosity — a few simple tools you probably have on hand will tell you whether your latex is too thin or just right.
For quick viscosity measurement, use a clean cup and stick: time how long paint drips off a stir stick or pours through a funnel. A notchless eye and kitchen timer are reliable simple tools.
Why Manufacturers Thin Latex Paint
You’ll notice manufacturers thin latex paint to make it easier to apply evenly with brushes and rollers.
They also adjust viscosity to improve shelf stability so the paint won’t separate or spoil over time.
Finally, thinner paint flows better on production lines and fills containers more consistently, which keeps manufacturing efficient.
Easier Application Consistency
Because even high-quality latex can be too thick straight from the can for smooth brushing or spraying, manufacturers thin it slightly to guarantee consistent flow and leveling during application.
You’ll notice easier application techniques and more predictable paint layering when viscosity’s tuned.
- Smoother brush strokes
- Even spray patterns
- Reduced roller drag
- Controlled drying for uniform finish
Improved Shelf Stability
Longevity matters, so manufacturers thin latex paint to help it stay usable on the shelf longer.
You’ll find thinner formulations slow settling and reduce clumping, improving overall paint stability and extending shelf life.
By maintaining uniform viscosity, you’ll avoid spoiled batches, wasted product, and unpredictable performance.
Thinning helps preservatives and dispersants work efficiently, keeping your paint reliable until you’re ready to use it.
Optimized Manufacturing Efficiency
When manufacturers thin latex paint, they streamline production by making the material easier to pump, mix, and filter, so you get consistent batches faster and with less downtime.
You’ll see smoother manufacturing processes and tighter quality control, letting plants scale output without sacrificing performance.
- Faster pumping and transfer
- Easier pigment dispersion
- Reduced filter clogging
- Simplified QC sampling
When to Thin Paint Back : and When to Leave It
Wondering whether to thin your latex paint or leave it as-is? You’ll check paint viscosity first: if it’s too thick for your sprayer or uneven with brush marks, use gentle thinning techniques—small water additions and thorough mixing.
Don’t thin if coverage is solid and the finish feels resilient; thinning can lower hide and durability.
Test a small sample before changing batch viscosity.
How Temperature and Humidity Change Paint Body
Temperature changes how thick your latex paint feels—warm temps thin it and cold temps make it viscous.
High humidity slows drying and can leave a gummy film, while low humidity speeds drying and can affect leveling.
If paint thickens in cold weather, you’ll face poor flow, brush marks, and adhesion issues unless you warm and remix it.
Temperature Effects On Viscosity
Because heat speeds molecular motion, warmer air and surfaces thin latex paint and colder conditions make it thicken.
So you’ll see viscosity change as temperature shifts. You’ll notice temperature impact and heat influence reduce body, while cold effects increase thickness; plan for climate considerations and seasonal variations when adjusting formula.
- Monitor temperature before mixing
- Warm paint before thinning
- Avoid painting in cold snaps
- Adjust additives accordingly
Humidity’s Impact On Drying
After considering how temperature shifts paint body, you also need to account for humidity because moisture in the air directly affects drying time and film formation.
You’ll notice humidity effects slow water evaporation, extend drying times, and can leave a tacky finish or weak film if too high.
Work when humidity is moderate, improve ventilation, and avoid adding thinners that worsen sagging.
Cold Thickening And Problems
When paint gets cold, it thickens and becomes harder to stir, pour, and atomize. You’ll notice slower flow, poor leveling, and clogged spray tips.
Cold weather creates thickening challenges and viscosity issues that cause application problems, longer drying times, and reduced paint stability. You can mitigate this by warming cans slightly and working in controlled environments.
- Warm cans gently
- Use slow-speed mixing
- Avoid spraying below recommended temps
- Store at stable temperature
How Old Paint Behaves and When to Replace It
If your stored latex paint is several years old, you’ll notice changes in texture, odor, and performance that tell you whether it’s still usable.
Check paint lifespan on the can and watch for separation you can’t remix, foul smell, mold, thick clumps, or poor coverage—clear Replacement signs.
If problems persist after stirring and straining, discard and buy fresh paint for reliable results.
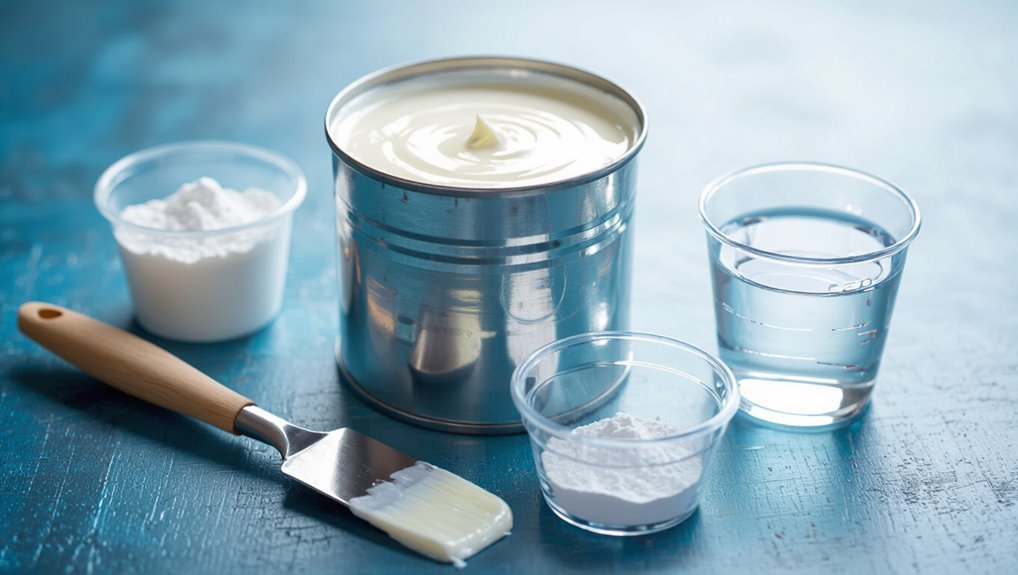
Commercial Latex Paint Thickeners: What to Buy
Choose a commercial thickener designed for water-based paints to restore body and brushability without harming color, sheen, or adhesion.
You’ll want a concise buying guide with product recommendations, ingredient comparisons, brand evaluations, and user reviews.
Look for reliable thickening agents and clear application techniques.
- Manufacturer-tested compatibility
- Dosage and mixing tips
- Performance vs. cost
- Customer feedback trends
How to Use Fumed Silica Safely and Effectively
Fumed silica is a powerful, low-dose thickener that you’ll want to handle carefully: add tiny amounts while stirring, keep dust airborne exposure to a minimum, and follow manufacturer safety data for respiratory and skin protection.
For safe handling, pre-wet or slurry fumed silica into a liquid before blending, use PPE, mix slowly to prevent clumps, and test small batches for desired viscosity.
Using Calcium Carbonate and Powders to Increase Body
When you want more body in latex paint, start by choosing the right filler—calcium carbonate comes in different grades and particle sizes that affect texture and tint.
Mix slowly into a separate portion of paint, wetting the powder completely to avoid lumps, then strain if needed before blending back into the batch.
Apply test coats to confirm spread, adhesion, and finish, adjusting filler amount for the balance between thickness and workability.
Choosing The Right Filler
Texture matters: if your latex paint needs more body without changing color or gloss, calcium carbonate and similar powder fillers are a reliable option.
You’ll pick filler types based on particle size, opacity, and compatibility, and consider basic mixing techniques for even dispersion.
Choose inert, non-reactive powders and test small batches to confirm performance.
- Particle size effects
- Opacity and tinting
- Compatibility with binder
- Lab or small-batch tests
Mixing And Application Tips
Now that you’ve picked a suitable powder and checked compatibility, let’s cover how to mix and apply it so the added body works as planned.
Use slow, steady mixing techniques to avoid clumps, add powder gradually, and wet it into paste before blending.
For application strategies, use thicker nap rollers or brushes, apply even coats, and sand lightly between layers for smooth, consistent coverage.
Specialty Acrylic Additives and Binders: When to Use Them
Although standard thickeners handle most latex paint jobs, specialty acrylic additives and binders step in when you need enhanced performance—better film strength, adhesion to difficult substrates, or long-term flexibility.
When standard thickeners fall short, specialty acrylic additives and binders deliver stronger films, tougher adhesion, and lasting flexibility.
You’ll choose specialty additives based on binder benefits, application techniques, and formulation differences to match substrate and exposure.
- Improved adhesion for slick surfaces
- Enhanced flexibility for exterior trim
- Increased sag resistance
- Controlled open time for rollers
Household Thickeners That Work : and When to Avoid Them
Specialty additives are great for tough jobs, but for many DIY or small repairs you can get reliable results with common household thickeners.
You can use household ingredients and natural alternatives as DIY solutions, but test first.
Learn simple thickening techniques and mixing methods, avoid overdoing paint additives, and monitor viscosity adjustments to prevent cracking, poor adhesion, or clogged sprayers.
Paint Conditioner vs Thickener: Which to Choose?
Wondering whether you need a paint conditioner or a thickener? You’ll pick based on goals: conditioner improves flow for smoother application; thickener raises paint viscosity for fuller coverage.
Consider surface, drying time, and finish. Choose smartly to match application techniques and desired texture.
- Conditioner for levelling and fewer brush marks
- Thickener for better hide
- Test small area
- Follow manufacturer instructions
Step-by-Step: Thicken Latex Paint for Interior Walls
Start by preparing your workspace and the paint: clear the area, lay down drop cloths, and stir the latex thoroughly to guarantee an even base before you add anything.
Add a measured latex thickener gradually, mix until smooth, test on a scrap wall, and adjust.
Follow surface preparation tips, sand glossy spots, clean dust, and use paint layering techniques for even opacity and fewer coats.
Step-by-Step: Thicken Paint for Trim and Doors
Before you start, prep the trim and doors by cleaning, sanding, and removing loose paint so the thicker finish will stick.
Pick a thickening method—like adding a paint conditioner, using less solvent, or mixing in a store-bought thickener—that suits your paint and equipment.
Adjust viscosity slowly, testing on a scrap piece until the flow and coverage are right.
Prep Surface Properly
Because trim and doors show every brush stroke, you’ll need a clean, dry surface before you thicken and apply latex paint.
Inspect and address surface texture, surface repair, and paint adhesion; consider paint primer where needed.
Use proper lighting and note environmental conditions.
Choose tool selection for prep.
- Surface cleaning
- Sanding for texture
- Fill and prime
- Check humidity and light
Choose Thickening Method
Now that your surface is prepped, pick a thickening method that matches the paint and finish you want for trim and doors. Consider compatibility with paint properties and desired sheen, and choose from common thickening techniques.
| Method | Best for |
|---|---|
| Acrylic additive | Smooth trim |
| Powder thickener | High-build doors |
| Flourish gel | Minor adjustments |
Adjust Viscosity Gradually
When you start thickening paint, work in small increments so you can tune the viscosity without overshooting; add your chosen thickener a little at a time, stir thoroughly, and test on a disposable trim scrap or hidden edge to check flow and leveling.
You’ll focus on adjusting viscosity and testing consistency to get smooth coverage on trim and doors.
- Add tiny amounts
- Stir thoroughly
- Test between additions
- Note dry results
Step-by-Step: Thicken Paint for Furniture and Cabinets
Start by cleaning and sanding the piece to guarantee the thicker paint will adhere evenly; remove dust, grease, and loose finish, then sand lightly to create tooth. Choose a compatible thickener, stir thoroughly, test on scrap, and apply thin coats, sanding between. Preserve furniture finishes and cabinet coatings by using appropriate primers and light topcoats.
| Prep | Mix | Apply |
|---|---|---|
| Clean | Test | Thin |
| Sand | Stir | Layer |
How to Mix Thickeners Evenly to Avoid Clumps
Start by sifting powdered thickeners so you break up lumps before they touch the paint.
Slowly add small amounts of paint or water while you keep the mixture wet, then mix consistently at low speed to integrate everything without aerating.
Keep stirring gently until the texture is smooth and lump-free.
Proper Powder Preparation
1 simple trick will keep powdered thickeners from clumping: pre-wet and sift them before adding to your paint.
You’ll choose powder types carefully and use proper mixing techniques so slurries stay smooth. Make a loose paste, break up lumps, then blend steadily into paint.
- Measure powder precisely
- Use a fine sieve
- Wet before sifting
- Stir with steady speed
Gradual Liquid Integration
With your powdered thickener pre-wet and sifted, you’ll add the liquid component slowly so it disperses evenly and won’t form clumps. Watch liquid properties and temperature; pour small streams while stirring to control viscosity adjustments. Stop, test, and repeat until smooth.
| Step | Action | Result |
|---|---|---|
| 1 | Slow pour | Even dispersion |
| 2 | Stir | No clumps |
| 3 | Test | Desired viscosity |
| 4 | Adjust | Fine tune |
Continuous Low-Speed Mixing
Keep the mixer running at a low, steady speed while you add the pre-wet thickener so particles stay suspended and won’t clump.
You’ll use continuous mixing techniques and viscosity maintenance strategies to keep consistency even. Stir gently for several minutes, monitor flow, and don’t rush.
- Add pre-wet thickener slowly
- Use paddle at low RPM
- Pause to check viscosity
- Avoid high-speed bursts
Thickener Ratios: Simple Rules of Thumb
A few simple ratios will get you close to the consistency you want without guesswork: start with 1%–2% thickener types by volume for light bodying, 3%–5% for medium, and 6%–8% for heavy.
Adjust in small increments, test between additions, and match to your application techniques.
Keep notes so you can repeat successful mixes and avoid over-thickening.
How to Test Thickened Paint Before You Roll or Spray
Before you commit to a whole wall, test the thicker batch on a scrap piece or hidden corner with a brush and roller to check coverage and leveling.
Then thin a small amount into your sprayer and watch the spray pattern for clogging or uneven atomization.
If either test shows drips, poor leveling, or spattering, adjust your thinning incrementally and retest.
Brush And Roll Test
Do a simple brush-and-roll test on a scrap board or hidden wall area to confirm your thickened latex moves and levels the way you want.
You’ll try brush techniques and roller methods to check coverage, drag, and leveling before committing. Note drying time and edge blending so you can adjust viscosity if needed.
- Use a good-quality brush
- Try a 3/8″ nap roller
- Check for streaks
- Note sagging
Spray Pattern Check
If your brush-and-roll test looked good, next check how the thickened latex sprays so you won’t discover problems mid-job. Test on scrap with proper spray technique, watch pattern, and tweak nozzle adjustment until even. Note feel and coverage; adjust thickness if splatter or clogging occurs.
| Feeling | Result |
|---|---|
| Relief | Smooth |
| Frustration | Clogged |
How Thickeners Affect Drying Time and Curing
When you add a thickener to latex paint, you change how fast solvents evaporate and how polymer particles come together, which directly affects both drying time and the longer-term curing process.
You’ll notice shifts in drying factors and the curing process; adjust environment and thinning as needed.
- Slower surface dry
- Extended tack window
- Humidity sensitivity
- Film coalescence time
Will Thickener Change Sheen or Color?
Curious whether a thickener will alter your paint’s sheen or color? You’ll usually see minimal sheen changes if you add recommended amounts of commercial thickeners; they’re formulated to preserve finish.
Test a small batch to confirm color consistency, since pigments can look slightly different when applied thicker. Stir thoroughly and apply test swatches to guarantee the final appearance meets expectations.
Thickening and Sprayability: When to Switch Application
As you thicken latex paint for brush or roller use, keep in mind that increased viscosity can clog or atomize poorly in sprayers.
So you’ll need to reassess your application method before loading a spray gun. You should evaluate paint consistency and choose application techniques that match.
Consider:
- Test spray on scrap material
- Check manufacturer sprayer specs
- Use larger tip sizes
- Avoid over-thickening for fine atomization
How to Thin Paint Again If You Over-Thicken It
If you over-thicken your latex paint, add small amounts of water and stir thoroughly between additions to avoid going too thin.
Test the consistency frequently by brushing or rolling a bit onto a scrap surface until it flows and levels the way you want.
Stop when the paint matches the original working viscosity so coverage and finish stay consistent.
Add Water Gradually
When you’ve over-thickened latex paint, you can usually restore its workability by adding water a little at a time; this prevents overshooting the consistency and ruining your batch.
Use room-temperature water and a steady mixing technique so you don’t create lumps. Add small amounts, stir thoroughly, then wait a minute before more.
- Use room-temperature water
- Stir with a consistent mixing technique
- Add teaspoons, not cups
- Observe flow and sheen
Test Consistency Frequently
After you’ve added small amounts of water and mixed, test the paint’s consistency frequently so you don’t end up over-thinning it.
Dip a clean brush or stir stick, apply a small swipe, and inspect coverage and drips.
Keep notes during paint testing, and make small consistency adjustments—add tiny water increments to thin or a bit of acrylic thickener to recover body until you reach desired performance.
Common Mistakes When Thickening Latex Paint
Although it seems simple, thickening latex paint is easy to mess up if you don’t follow a few key rules. You’ll avoid common thickening mistakes by watching for improper mixing techniques and wrong additives selection.
Don’t let over thickened paint or inconsistent application methods ruin results. Also stop ignoring manufacturer guidelines, neglecting surface preparation, or rushing the process.
- Improper mixing techniques
- Wrong additives selection
- Over thickened paint
- Inconsistent application methods
Safety and Ventilation When Handling Additives
Because many paint thickeners and additives contain volatile chemicals, you should always work in a well-ventilated area and wear appropriate PPE—gloves, eye protection, and a mask rated for organic vapors when needed—to protect your lungs and skin.
Prioritize additive safety: set up workspace setup for air circulation, limit chemical exposure, follow handling precautions for fumed silica or calcium carbonate, and maintain a clean mixing environment.
Compare DIY Thickeners vs Commercial Products
With safety and ventilation covered, you’ll want to weigh the pros and cons of DIY thickeners against commercial products before changing paint.
You’ll judge DIY thickeners’ effectiveness by consistency control, variability, and contamination risk, while commercial products comparison favors formula reliability and warranty. Choose based on needed predictability and finish.
- DIY: readily available ingredients
- Commercial: consistent results
- Test samples first
- Follow manufacturer directions
Cost and Time Trade-Offs: DIY vs Buy Fresh Paint
If you’re on a tight budget or racing to finish a job, mixing a DIY thickener can save money and time up front, but buying fresh paint often pays off when you factor in labor, touch-ups, and finish consistency. You’ll weigh cost analysis, time savings, paint quality, and project duration to decide what’s best.
| Option | Upfront Cost | Risk |
|---|---|---|
| DIY thickener | Low | Variable finish |
| Buy fresh paint | Higher | Consistent quality |
| Hybrid | Moderate | Balanced trade-offs |
How to Salvage Separated or Watery Latex Paint
When you open a can and find thin, separated latex paint, don’t toss it—many cans can be rescued with a little patience and the right steps.
Identify paint separation causes, stir thoroughly, strain lumps, and test. Use restore paint techniques like slow mechanical agitation or latex conditioner to regain body.
- Stir 10–15 minutes
- Strain through nylon
- Add binder or conditioner
- Test on scrap surface
Storing Thickened Paint Between Coats or Jobs
1 simple step will help keep your thickened latex paint ready between coats or jobs: seal it tightly and limit air exposure. You’ll use proper paint storage, container sealing, and environment control to preserve viscosity maintenance and paint stability. This supports long term preservation, extends paint lifespan, and guarantees job readiness.
| Tip | Benefit |
|---|---|
| Seal lid | Limits air |
| Cool spot | Slows spoil |
| Label date | Track age |
| Stir gently | Restore texture |
| Inspect often | Prevent failure |
When to Consult a Pro or Buy Fresh Paint Instead
You’ve done the basics to keep thickened latex usable, but sometimes a job calls for expert help or fresh paint.
Know when to seek pro consultation or replace cans: ruined gloss, persistent clumps, strong odor, or poor paint quality can cost time and look.
If gloss is ruined, clumps persist, or odors linger, consult a pro or replace the cans.
Consider professional advice for large jobs or matching finish; buy fresh paint if performance’s compromised.
- Visible clumps or separation
- Off smell after sealing
- Inconsistent sheen across samples
- Large-area or color-matching needs
Quick Checklist: Best Practices for Walls, Trim, and Furniture
Use this quick checklist to get consistent results on walls, trim, and furniture:
Prep surfaces by cleaning and sanding.
Stir and strain your thickened latex to remove clumps.
Thin slightly only if needed for smooth application.
Choose the right brush or roller nap for the surface.
Maintain a wet edge on walls.
Cut in trim before rolling adjacent wall areas.
Apply thinner, even coats to furniture and sand between coats.
Always test a small patch to confirm sheen and adhesion.
For walls preparation, trim techniques, furniture care, paint additives, consistency checks, and application tips, follow sequencing, use proper tools, and let coats dry fully before sanding or recoat.
Frequently Asked Questions
Can Thickeners Affect Paint Adhesion to Glossy Surfaces?
Yes — thickeners can alter adhesion to glossy surfaces; you’ll need adhesion techniques like sanding, deglossing, or primers because thickeners may reduce wetting and bonding, so you shouldn’t skip surface prep for reliable results.
Will Thickening Paint Increase Its VOC Emissions?
Yes — if you add solvent-based thickeners you’ll likely raise VOCs; studies show indoor air VOCs can increase 30%. You’ll need to follow VOC regulations and weigh the environmental impact before altering paint formulations.
How Long Can I Store Paint After Adding Organic Thickeners?
You can usually store paint for 6–12 months after adding organic thickeners, but it varies; you’ll monitor paint storage conditions and check thickener shelf life, stirring and sealing cans tightly to prevent spoilage and separation.
Can Thickened Paint Cause Visible Brush or Roller Marks?
Yes — thickened paint can leave visible brush or roller marks; like syrupy ribbons, it highlights strokes if you don’t adjust application techniques, and its longer drying time can lock in texture, so feather and smooth promptly.
Are There Compatibility Issues With Two-Part Epoxy Primers?
Yes — you’ll face epoxy compatibility issues if the two-part epoxy primer’s chemistry clashes with topcoats; test adhesion and solvent resistance first. Doing so protects primer performance and prevents peeling, fish-eyes, or poor cure.
Conclusion
Think of paint as a river: when it’s too thin it slips past the rocks, failing to shape the shore. Thickening latex paint lets it cling, sculpting color and hiding flaws. Don’t force every stream—some flows need fresh paint or a pro’s dam. Store mixed batches airtight, stir like tending a garden, and test on a scrap. With the right consistency, your walls, trim, and furniture will finally hold their ground.