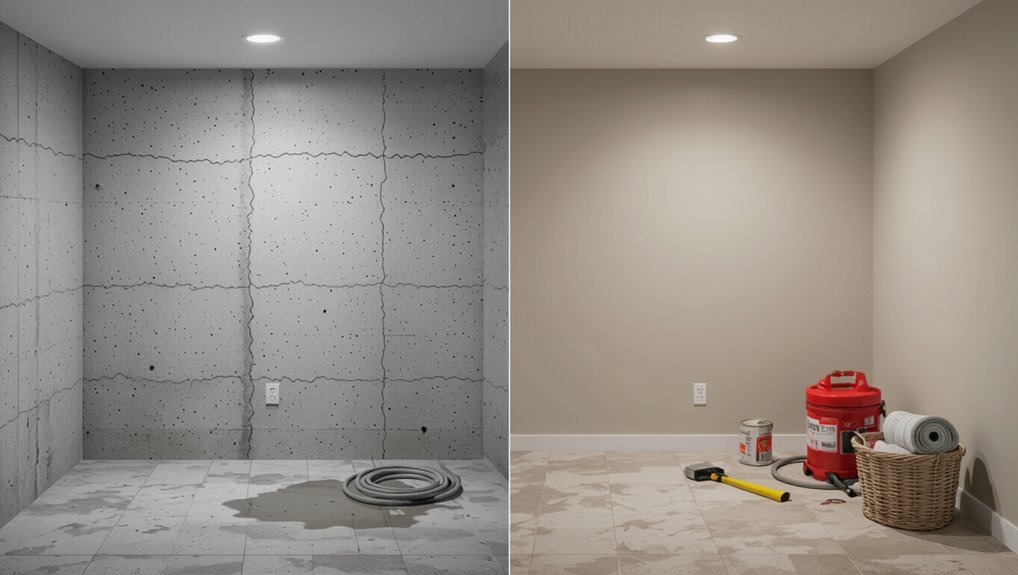
Is It Ok to Paint Basement Walls? What You Should Know
You can usually paint basement walls to brighten and freshen the space, but only if the walls are dry, sound, and free of active mold or efflorescence. Inspect for cracks, peeling, powdery masonry, damp spots, and musty odors; fix leaks, clean or treat mold, and repair masonry first. Use a masonry primer and breathable or mold-resistant paint, and allow full drying time. Keep ventilation and moisture control in mind, and keep going for tips on prep, products, and prevention.
Should You Paint Your Basement Walls? Quick Decision Guide
Wondering whether you should paint your basement walls? You’ll weigh basement aesthetics, moisture risk, and purpose: storage, living space, or workshop.
Painting can brighten, use color psychology to make low ceilings feel higher or cozier. If walls are dry and sound, a sealed, mold-resistant paint improves appearance and maintenance.
Skip paint if persistent dampness or structural issues remain.
Inspect Walls: What to Look For Before Painting
Before you pick colors or buy paint, take a close look at the walls themselves — their condition will determine whether painting is appropriate and what prep work you’ll need.
During your basement inspection, note cracks, flaking or powdery masonry, mold spots, and efflorescence.
During your basement inspection, watch for cracks, flaking or powdery masonry, mold, and efflorescence.
Measure for unevenness, gaps around seams, and loose or damaged finishes.
Document issues so you can plan repairs and proper prep.
How Moisture and Leaks Affect Paint Adhesion
Check walls for efflorescence, peeling paint, musty odors, or damp spots—those are clear signs of water intrusion.
If moisture’s present, paint won’t bond properly and will blister, flake, or mold over time.
Before painting, you’ll need to stop leaks and apply proper moisture treatments like sealers or waterproofing to guarantee a lasting finish.
Signs Of Water Intrusion
If you see peeling paint, bubbling, white powdery efflorescence, or a damp, musty smell, your basement walls are telling you moisture’s getting in—and paint won’t stick where water’s present. Check for discoloration, damp spots, or rusted fasteners. Consider waterproofing techniques and drainage solutions to stop intrusion before painting.
| Symptom | Location | Likely cause |
|---|---|---|
| Peeling | Lower wall | Seepage |
| Efflorescence | Concrete | Hydrostatic pressure |
| Musty odor | Corners | Trapped moisture |
Effects On Paint Bonding
Those warning signs point to a bigger problem for paint: moisture undermines adhesion at the surface and within the wall.
If water soaks masonry or drywall, paint adhesion fails, causing blistering, flaking, or peeling.
You’ll need thorough surface preparation to remove salts, efflorescence, and loose material; otherwise coatings won’t bond.
Address leaks first, then repaint for lasting results.
Preventive Moisture Treatments
Because moisture is the main enemy of paint adhesion in basements, you should tackle prevention before you ever pick up a brush.
Inspect for leaks, fix cracks, and install moisture barriers where needed. Use proper sealant application on masonry joints and seams, let it cure fully, and guarantee drainage and ventilation.
Those steps help paint stick and prevent blistering or peeling.
Spot Efflorescence and Assess the Risk
When you spot a white, powdery crust on your basement walls, that’s efflorescence — mineral salts left behind as water evaporates — and it tells you moisture’s been moving through the masonry. You should note efflorescence causes, test dryness, and weigh treatment options before painting.
| Feeling | Action |
|---|---|
| Concerned | Monitor moisture |
| Determined | Fix leaks |
Spot Mold and Mildew: Signs That Block Painting
If you see fuzzy patches, dark spots, or a musty smell on basement walls, don’t paint over them — mold and mildew indicate ongoing moisture and can ruin paint and your health.
You should identify extent, dry the area, and use proper mildew treatments.
Address leaks, improve ventilation, and follow mold prevention steps before repainting so coatings adhere and problems don’t return.
Wall Types: Concrete, Cinder Block, and Drywall Differences
After you’ve dealt with any mold or mildew, the next step is to contemplate what your basement walls are made of — concrete, cinder block, and drywall each behave differently and need different prep and paint products.
You’ll note concrete finishes are dense and may need masonry paint; cinder block textures trap moisture and need sealing; drywall accepts typical primers and latex paints for smooth, clean results.
Prep Concrete and Cinder Block for Painting
Start by clearing the surface: sweep and vacuum loose dirt, dust, and spider webs.
Then scrub the concrete or cinder block with a stiff brush and a trisodium phosphate (TSP) solution or a concrete cleaner to remove grease, efflorescence, and old paint residue.
Rinse, let dry, then inspect surface texture.
Choose primer and paint for proper paint compatibility with porous masonry to guarantee adhesion and durability.
Repair Cracks, Spalling, and Loose Mortar Before Painting
Before you paint, walk the walls and mark any cracks, spalling, or loose mortar so you know what needs attention.
Pick repair materials that match the substrate—masonry patch, hydraulic cement, or fresh mortar—and follow product instructions.
Make sure repairs are firmly bonded and the surface is stable before priming and painting.
Inspect And Mark Damage
Inspect the walls closely and mark any cracks, spalling, or loose mortar so you know what needs fixing before you paint.
Walk the space with a flashlight, note size, location, and pattern for a clear damage assessment.
Photograph each spot, label marks, and prioritize repairs.
That prep guides your repair techniques and prevents missed issues that could ruin the paint job.
Choose Proper Repair Materials
When you’ve mapped the damage, pick repair materials suited to your wall type and the specific problems—use hydraulic cement or masonry patch for active leaks and wider cracks,
polymer-modified cement or tuckpointing mortar for spalled areas and loose mortar, and a flexible epoxy or polyurethane for hairline or moving cracks.
- Match repair materials to masonry and expected movement.
- Confirm paint compatibility with primers and coatings.
- Follow manufacturer cure times before painting.
Ensure Surface Is Stable
Because paint only hides problems, you’ll need to repair cracks, spalling, and loose mortar so the surface is stable and coatings will adhere.
Inspect walls, chip out deteriorated material, and use appropriate patching compounds or mortar to restore wall stability.
Follow surface preparation steps: clean, dry, and prime repaired areas.
Don’t skip this—proper prep prevents peeling and moisture intrusion.
Treat Efflorescence, Salts, and Mineral Deposits
Salt and mineral deposits—called efflorescence—can show up as white, powdery streaks on basement walls and indicate moisture is moving through the concrete; you’ll want to remove and treat these deposits before painting to guarantee a lasting finish.
Use proper efflorescence treatment and salt removal steps:
- Brush and vacuum loose salts
- Apply masonry cleaner or diluted acid per instructions
- Repair leaks, then prime with a masonry sealer
Clean and Remediate Mold: DIY vs Professional Help
If you spot mold on basement walls, act quickly to clean small patches yourself but call a pro for large or recurring infestations. You should follow safe DIY remediation steps—protective gear, detergent, and drying—to limit spread and support mold prevention. Know limits and document damage.
| Task | Tools | Outcome |
|---|---|---|
| Small cleanup | Gloves, cleaner | Remove surface mold |
| Drying | Fans, dehumidifier | Prevent return |
| Monitor | Checklist | Ongoing prevention |
When to Call a Pro for Water or Mold Issues
If you see visible mold or can’t get rid of musty odors, call a professional so the source and health risk are properly assessed.
You should also hire a pro for recurring water intrusion—patching paint won’t fix a persistent leak or seepage.
Getting expert help early can prevent bigger damage and wasted repainting effort.
Visible Mold Or Persistent Odors
When you spot visible mold or can’t get rid of a persistent musty odor, it’s a clear sign to call a professional—these issues usually mean ongoing moisture problems that simple paint or DIY cleaners won’t fix.
You’ll want expert assessment for mold prevention and odor control.
Pros can:
- Identify hidden sources
- Recommend remediation steps
- Verify air quality post-repair
Recurring Water Intrusion Issues
Because recurring leaks usually signal a structural or drainage problem, you should call a pro once water returns after repairs or during heavy rain, not just the first time you see dampness. Assess waterproofing techniques and drainage solutions quickly to prevent mold.
| Issue | Action | Timeline |
|---|---|---|
| Leak returns | Hire pro | Immediate |
| Musty smell | Test mold | 24–48 hrs |
| Visible mold | Remediate | Immediate |
| Sump failure | Repair/replace | 48 hrs |
Best Paint Types for Concrete and Masonry Walls
Choosing the right paint for concrete and masonry walls matters because these surfaces demand coatings that handle moisture, adhesion, and porosity.
Choosing the right paint for concrete and masonry is essential—pick coatings that manage moisture, stick well, and breathe.
You’ll want durable, breathable, and mildew-resistant options. Consider surface prep and the best primer options before painting, and pick paint color choices that brighten the space.
- Masonry acrylic latex
- Elastomeric coatings
- Epoxy or concrete-specific paints
Waterproof Paint vs Breathable Masonry Paint: When to Use Each
Wondering whether to seal your basement with a waterproof paint or to let the walls breathe? You’ll pick waterproof options for active leaks and high moisture, prioritizing paint durability. Choose breathable masonry paint when humidity is moderate and you need vapor permeability to prevent trapped moisture.
| Situation | Recommendation |
|---|---|
| Active leaks | Waterproof |
| High humidity | Waterproof |
| Mild dampness | Breathable |
| Historic masonry | Breathable |
| Longevity concern | Waterproof |
Priming Basement Walls for Long‑Lasting Results
Before you paint, you’ll clean, repair cracks, and remove efflorescence so the primer bonds properly.
Pick a primer formulated for masonry or for sealing porous concrete—this makes paint adhere and resist moisture.
With the right prep and primer, your finish will last longer and perform better.
Surface Preparation Steps
If you want your basement paint to last and resist moisture, priming is the step you can’t skip—proper primer seals porous masonry, evens out suction, and creates a stable surface for topcoat adhesion.
Before priming, focus on surface cleaning and selecting compatible paint types.
Then:
- Remove dust, efflorescence, and loose mortar.
- Repair cracks and fill voids.
- Allow full drying before priming and painting.
Choosing The Right Primer
When you want paint to stick and moisture to stay out, picking the right primer is the key step—use a masonry or masonry‑bonding primer designed for concrete, cinderblock, or brick so it seals porous surfaces, blocks efflorescence, and promotes adhesion for your topcoat.
Choose primer types based on substrate and moisture levels, and follow proper application techniques—brush, roller, or sprayer—ensuring full coverage and drying time.
Choose Paint Sheen and Color for Darker Basements
How bright do you want your darker basement to feel?
Pick sheen and color to boost mood and light reflection; color psychology matters—cool tones recede, warm tones cozy up.
Consider:
- Satin or eggshell for subtle sheen and easy cleaning
- Light, warm neutrals to amplify perceived space
- Accent wall in a deeper, warm hue for depth without gloom
Tools, Ventilation, and PPE for Safe Basement Painting
You’ll need a short list of reliable tools, good ventilation, and basic personal protective equipment before you start painting a basement—these three things cut health risks and make the job go faster.
Gather painting tools (rollers, brushes, drop cloths), check ventilation systems or add fans, and follow PPE guidelines: respirator, gloves, goggles.
Stick to clear safety measures and inspect equipment before work.
Step‑by‑Step Painting Process for Basement Walls
Start by preparing the surface and workspace so each painting step goes smoothly: clear the area, lay drop cloths, remove loose paint or efflorescence with a wire brush, patch cracks with masonry filler, and sand rough spots for a firm, clean surface before priming.
Start by clearing the area, laying drop cloths, and preparing the masonry—wire-brush, fill cracks, sand smooth before priming.
Then:
- Prime masonry, let cure fully.
- Roll two thin coats, checking texture options and even coverage.
- Finish with trim touch-ups and pick color selection for desired light and mood.
Prevent Future Moisture Problems After Painting
Once the paint’s dry and trim’s touched up, take steps to keep moisture from returning and undoing your work.
Inspect grading, gutters, and downspouts to divert water. Add dehumidifiers or ventilation to control humidity.
Seal cracks and consider exterior fixes before interior patching. Use proper moisture barriers where needed to protect the substrate and preserve paint longevity for a durable, trouble‑free finish.
Cost, Time, and Expected Lifespan of a Paint Job
Budget and schedule matter: a typical basement paint job will cost you anywhere from a few hundred dollars for DIY supplies to $1,500–$3,500 for professional labor and materials.
Do a clear cost analysis and time estimation, weigh budget considerations and material choices, and expect realistic lifespan expectations.
- DIY: lower cost, longer time
- Pro: higher cost, faster completion
- Materials affect longevity and maintenance
When Not to Paint: Alternatives to Painting Basement Walls
Don’t paint until you’ve ruled out structural problems like cracks or bowing walls, because paint won’t fix those and could hide serious issues.
If you have any signs of moisture—efflorescence, damp spots, or musty smells—stop and address waterproofing or drainage first.
When painting isn’t appropriate, consider breathable wall coverings such as cement board, insulated panels, or proper finishing systems that manage moisture.
Structural Problems First
If your basement shows cracks, bowing walls, or persistent moisture from structural issues, painting won’t fix the underlying problem and could make things worse; address foundation and drainage problems first.
You should prioritize foundation stability and a professional moisture assessment, then consider repairs or sealing options:
- Hire a structural engineer for evaluation
- Fix exterior drainage and footing issues
- Use appropriate waterproofing systems after repairs
Address Moisture Issues
When your basement shows signs of recurring dampness, painting is only a cosmetic bandage and won’t stop moisture from causing mold or structural damage; you should tackle the source before applying any finish. Fix leaks, add moisture barriers, and improve humidity control with dehumidifiers and proper drainage. Consult a pro for waterproofing plans.
| Step | Action |
|---|---|
| 1 | Identify leaks |
| 2 | Install barrier |
| 3 | Add dehumidifier |
| 4 | Improve drainage |
| 5 | Professional assessment |
Consider Wall Coverings
Addressing moisture first will tell you whether painting’s appropriate, but sometimes walls need more than paint — especially if they’re uneven, insulated, or you want a finished look.
Consider coverings that solve texture and finish concerns and guide color selection.
- Install drywall for smooth wall texture and easy paint
- Use paneling for warmth and quick install
- Try beadboard for character and moisture resistance
Frequently Asked Questions
Can I Paint Basement Ceilings and Beams the Same Way as Walls?
You can, but you shouldn’t always paint basement ceilings and beams exactly like walls: choose a ceiling color to brighten, and treat beam texture differently—clean, prime, maybe use satin or semi-gloss for durability and highlight architectural detail.
Will Painting Affect My Home’s Resale Value or Inspection Results?
Yes — painting can boost resale value and spruce listings, but don’t expect miracles: if you hide moisture or mold you’ll face inspection implications, so fix issues first, use proper prep, and disclose problems honestly.
How Soon Can I Store Items Against Freshly Painted Walls?
You can usually store items against freshly painted walls after 24–48 hours, but wait 72 hours if humidity’s high; follow drying time recommendations and monitor moisture concerns to avoid sticking, odor, or trapped damp causing mildew.
Are There Eco‑Friendly or Low‑Voc Paint Options Suitable for Basements?
Yes — you can choose eco friendly paints and low VOC options that breathe easier; they’re like a clean-upwind in a stuffy room. You’ll get mildew-resistant, durable coverage while reducing fumes and environmental impact.
Can I Paint Over Old Wallpaper or Paneling in the Basement?
You can paint over old wallpaper or paneling, but you shouldn’t skip wall preparation tips; start with wallpaper removal techniques or secure seams, clean, sand glossy surfaces, apply primer/sealer, and use paint suitable for basements.
Conclusion
Before you paint, be sure you’re fixing moisture first — otherwise paint’s just lipstick on a leaky cup. I once painted my own basement only to peel it all off six months later after a hidden crack dumped water in; lesson learned. Waterproofing first cut my call-backs to zero. If walls are dry, clean, and sound, painting’s fine; if not, repair or consider alternatives so your work actually lasts.